| On this page |
This node aims to accelerate and simplify the animation process of hairs through the automatic generation of an APEX rig. The idea is to custom-select few master hair curves and let the APEX Add Groom SOP create joints that you can animate. The rest of the hair curves will then follow the master selection.
The following example illustrates how to use the APEX Add Groom SOP in conjunction with a basic groom.
Scene setup 
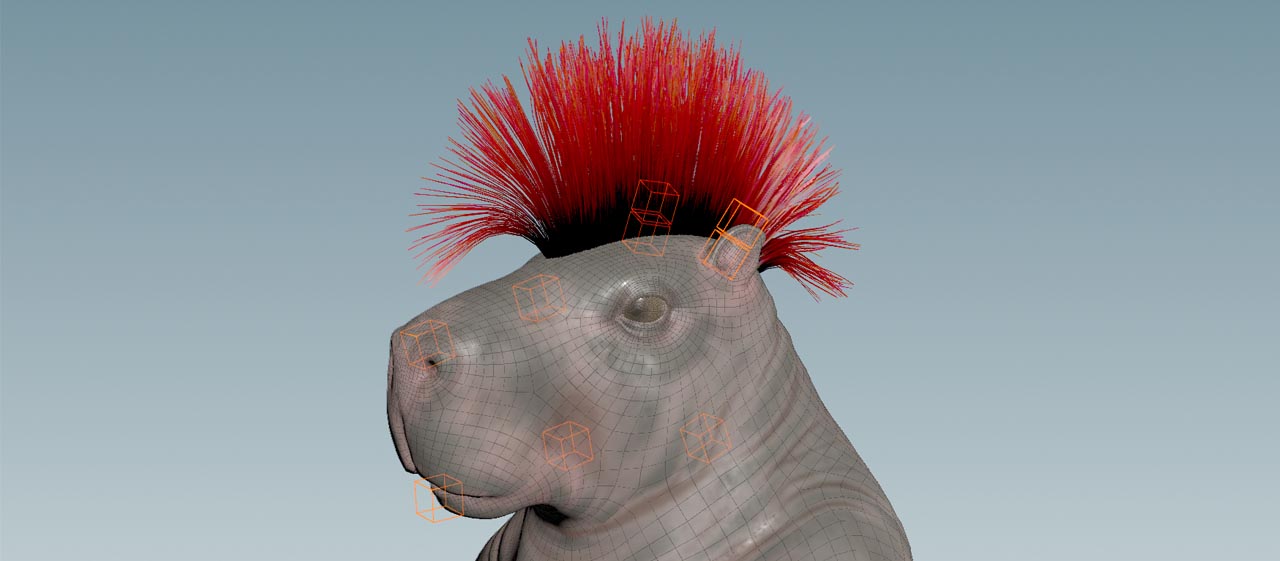
What you need to make the node work is a rigged character and a groom. Below you can see the head of Houdini’s Test Geometry: Capybara SOP with parts of its controls and the Mohawk you’ll be animating through the APEX Add Groom SOP. The rig already uses APEX Autorig Component SOPs to set up the rig and deform the bones.

For both the parts there are Null SOPs, named
RIG and GROOM. The nulls contain the necessary information for the add groom. Of course, the two parts can also live inside separate Geometry OBJs and we recommend this workflow for more complex setups.
For the add groom network you have to bring in RIG and GROOM through Object Merge SOPs. Alternatively, you can also bring in rig and groom through
File Cache SOPs that point to appropriate BGEO files.
APEX Add Groom 
Now you have everything you need to feed the APEX Add Groom SOP.
-
Add an APEX Add Groom SOP.
-
Connect its first input with the output of the
RIGobject merge. -
Connect its second input with the output of the
GROOMobject merge.
The third input is more relevant for feathers. There you often display feathers as polygon surfaces rather than high-res geometry with hundreds of individual barbs. Once you've connect the two streams, you can start to configure it.
By default, the add groom node constraints the hair to the skin of the animated character. For example, when you move the character’s head, the hair will follow this motion.
Groom settings 
On the Groom tab you can find a Short Curve Mode. When you set it to Cull, you can define a Length Threshold. All curves with a length smaller than the given value won’t be affected by the add groom node, e.g. in areas with very short. This can significantly improve performance.
We also recommend to turn off Output Surfaces. This option is only required for feathers.
Joints 
This section lets you create so-called control groups. A control group is basically a selection of hair curves. Based on this selection, the node creates joints and adds them to the APEX rig. You can define multiple groups through the same node, but in most cases you’ll end up with one add groom per group. This has normally practical reasons like better control over the various groups or masks.
-
The Name Prefix indicates the node’s origin, because it’s set to
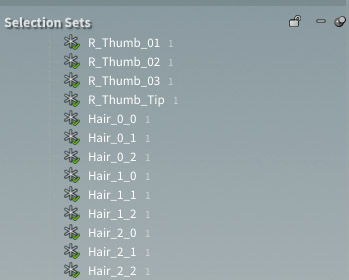
feathers_by default. You can change this tohair_or anything else. The new joints will appear in the Selection Sets list in the viewport.
-
By default, Skin Vector Attribute takes the normals
Nfrom the character’s skin to orient the joints. -
The Control Groups lets you specify multiple groups and treat them individually. Enter the number of groups directly, or press the + button to add new groups. When you create a new group, a Joint Properties parameter set appears.
Joint Properties 
The first step is to select the curves you want to use for the animation. If you have already defined a group, e.g. through an Attribute Wrangle SOP or by manual selection in a different part of the groom network, you can enter the name to the Joints ▸ Group parameter’s input field. Alternatively, you can select curves directly from the viewport, as explained below.
-
Click the
Select geometry… button.
-
On the viewport,
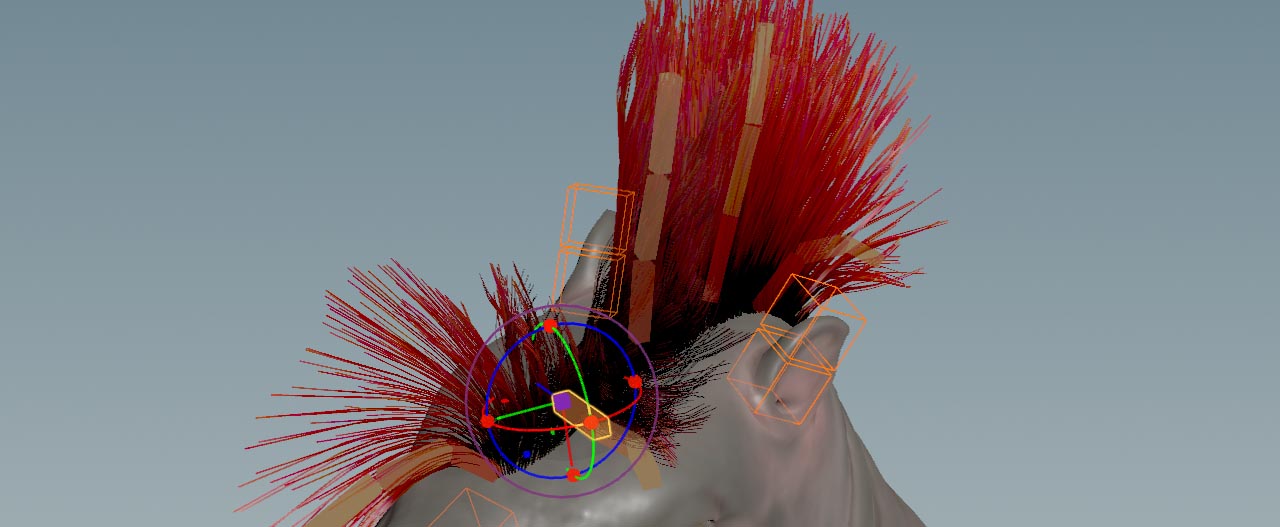
-⇧ Shift-click the curves you want to use to create the joints. Selected curves have a brownish-yellowish color (see image below).
-
When you're ready, hit Enter to confirm your selection. To abort the process, press ⎋ Esc.
The numbers of the selected curves appear in the Group parameter’s input field and you can edit them manually. You will also see the newly created joints, wearing the colors from Root Color and Tip Color. Another convenient parameter is Width to determine the size of the joints' viewport representation.
If you want to change the number of joints, increase or decrease Joint Count. For long curves you can use higher values, especially for hero shots. Short curves won’t profit from high joint counts.
Moving joints 
Now you can start to move the joints. To do that, select the add groom node.
-
Hover the mouse over the viewport.
-
Press Enter to see the rig. You’ll also notice a HUD in the viewport’s upper left corner.
-
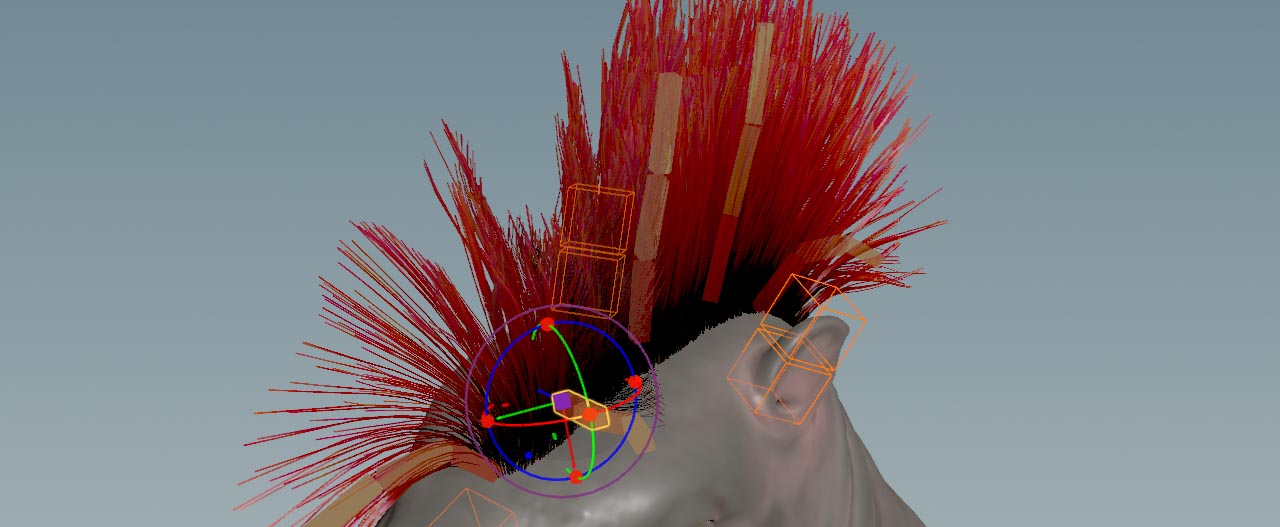
Select a joint and rotate it. To leave the animation mode, press ⎋ Esc.
The node calculates weights to define how strongly the neighbor curves will follow a joint. What you get is a smooth transition between the curves that fades out slowly. The clip below shows the motion of the curves.
Orientation 
The add groom’s Control Group section contains an Orient to Skin Vector Attribute toggle. When you turn on the toggle, the node will exclusively use the attribute you've specified on the Skin Vector Attribute. By default that’s the skin’s normal N.
When the toggle is turned off, orient is being used. In cases without any orientation attributes, the node will create a skin vector attribute.
Joint Influence 
If you still think that the influence of the joints is too strong, you might consider limiting their scope.
The Mask Attribute controls, on which curves the joints will have influence on. The mask attribute has to exist before and normally it’s already on the groom when it comes into APEX Add Groom SOP.
Instead of an attribute, you can also use Limit Influence Distance to avoid that curves are moved in areas that should remain static. Core Distance and Maximum Distance create a falloff. Below you can see a comparison. Without the limiting effect, even those feathers that are under the influence of another joint will be moved.


Mask Attribute and Limit Influence Distance can coexist and the values are multiplied: curves will only be moved in those area where both properties apply.
APEX setup 
Since you're already working with an APEX node, it’s necessary to proceed with this technology and prepare the setup accordingly.
Note
The entire APEX technology in Houdini is still under development. Functionality and features are subject to change.
-
Add an
APEX Scene Animate SOP and connect its input with the output of the add character node. This node is essential, because it’s where you interact with the animation setup you've created so far.
-
Lay down an
APEX Scene Invoke SOP and connect its first input with the output of the scene animate node. This node shows the actual motion of the animated feathers.
-
Turn on Bind Multiple Outputs and click the Output All Character Shapes buttom. In this example, the button creates two entries in the Multiple Outputs section. The path-key pairs define, which part of the animation you’ll be using. Clicking the button selects all eligible entries from the list of available outputs. You can see all entries for a specific node in the Geometry Spreadsheet pane. In this case, the only relevant entries are
Base.shpandGroom.shp. Other entries likeGroom.skelorBase.rigare not required for the hair.