| On this page |
This covers how to setup procedural collision to work with a procedural asset. The Houdini setup uses the
For Each LOP node to create a sequential suffix allowing you to create collision for multiple geometries while still keeping the power of procedural collision.
Copy over the HDA file 
Before you begin, copy the Houdini HDA file that you will be working with throughout this workflow:
-
Open a file browser window and then navigate to your Houdini Engine install directory.
-
In the install directory, navigate to the
\Plugins\HoudiniEngine\Content\Examples\hdafolder. -
In the
\hdafolder, copy theHEUE_Geometry_Fence.hdafile. -
Navigate to your user directory and then create a new folder named
\ProceduralCollision. -
In the
\ProceduralCollisionworking folder, paste the HDA file. -
Run Houdini.
-
Open the
HEUE_Geometry_Fence.hdaworkflow file and become familiar with its contents.
Inspect Houdini setup (optional) 
The following sections inspects how the content example was created and a few important setups before going into Unreal. You can skip to the Import to Unreal section to see the Unreal setup.
Collision setup for fence planks 
-
Double-click
the
geo1to enter into Geometry view. Then double-clickhece_geometry_fence1to enter the Surface Operator network view. -
Double-click
the
Collisionsubnetwork. You can now see the setup to generate a material. -
Locate the
Blast SOP node named
blast1 not"planks. This is the start of the sequence to extract the planks and create a procedural collision piece.
-
The
Box SOP,
Match Size SOP, and
Transform SOP nodes creates a box and then shapes it with some padding to form around the fence planks.
-
In the
Peak SOP node, locate the
distanceparameter. This is promoted into Unreal to allow you to adjust the collision’s padding. See Promote parameters for export for more information.
Collision attributes setup for multiple geomtries 

This setup requires an extra step because the fence posts are multiple geometries. For multiple geometries, the name group must have a sequential suffix after the collision attributes. For example the first collision is collision_geo_simple_1, and second is collision_geo_simple_2. See Collision from multiple geometries for more information.
-
Locate the
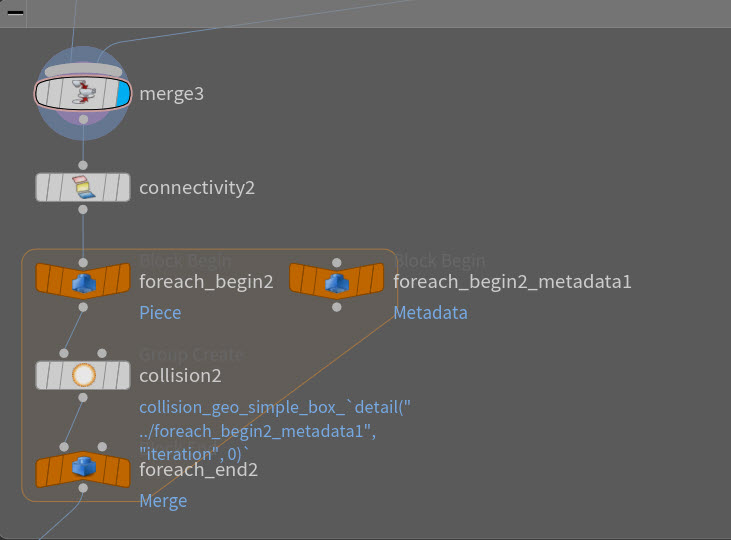
Merge SOP node named
merge3. This merges the two collisions from the planks and posts into one to allow for a single export. -
Followed is a
For Each Connected Piece LOP sequence with a
Group SOP to add the collision attributes. See Looping in geometry networks for more information on how For Each LOPs works.
-
Select the
Group SOP node named
group2.-
In the
Group Nameparameter with the primitive:
collision_geo_simple_box_`detail("../foreach_begin2_metadata1", "iteration", 0)-
The
collision_geo_simple_boxrepresents the Unreal attribute needed to generate this type of collision. -
The
detail("../foreach_begin2_metadata1", "iteration", 0)represents the detail attribute to create an iteration of a numbered sequence for the collision. This ensures each piece is named in the sequential suffix needed for multiple geometries.
-
Promote parameters for export 

-
the
hece_geometry_fence1and select Type Properties. Locate the Parameters tab. -
On the Existing Parameters section, you can see all the promoted parameters that will carry forward into Unreal.
-
In the Collision folder, you can see the following:
-
The
Enable Collisionparameter allows you to set if a collision is generated -
The two
Collision Paddingallows you to create additional collision padding to the fence panel or fence post if you require it.
-
-
Import into Unreal 
Make sure you have a Houdini Engine for Unreal session running. See Session for more information.
-
In Unreal, import the
hece_geometry_fenceHDA. -
the HDA and select Instantiate at the origin.
-
You should now see the fence in the viewport.
-
Change Houdini parameters 
During the Houdini setup, certain parameters were promoted to use them in Unreal.
-
In Houdini Parameters detail panel, locate the Mesh tab.
-
Select the checkbox for
Export Fence Full. -
In the Design tab, change some of the parameters for your fence.
-
In the Collision tab, select the checkbox for
Enable Collision.
Bake into actor 
-
In the Houdini Engine panel, select Bake.
-
In the Viewport, locate the Show tab and select the checkbox for collision.
-
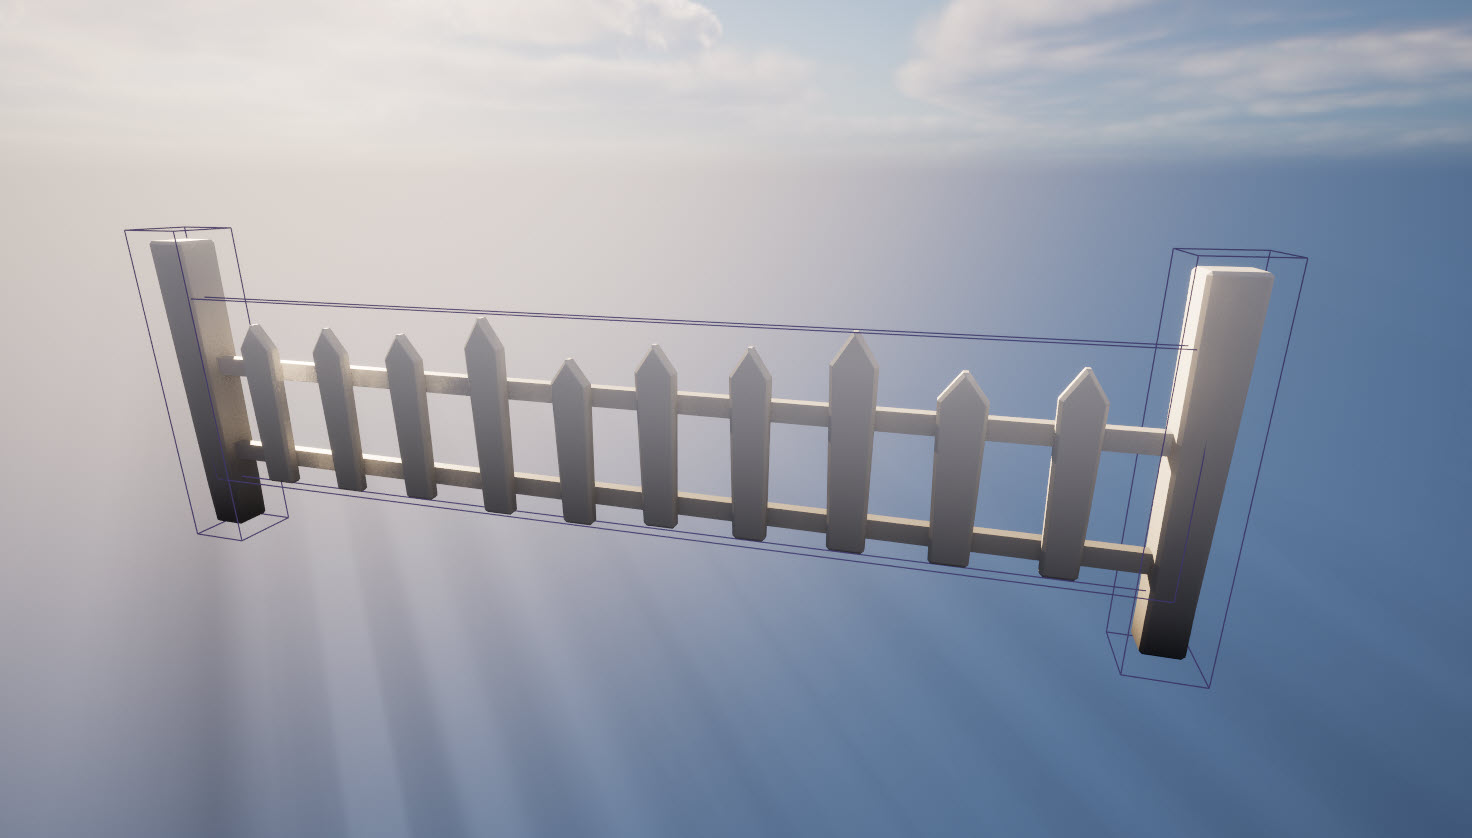
You should now see your altered fence model with its matching collision.

-
-
Select the
hece_geometry_fenceHDA again. -
In the Collision tab, change the
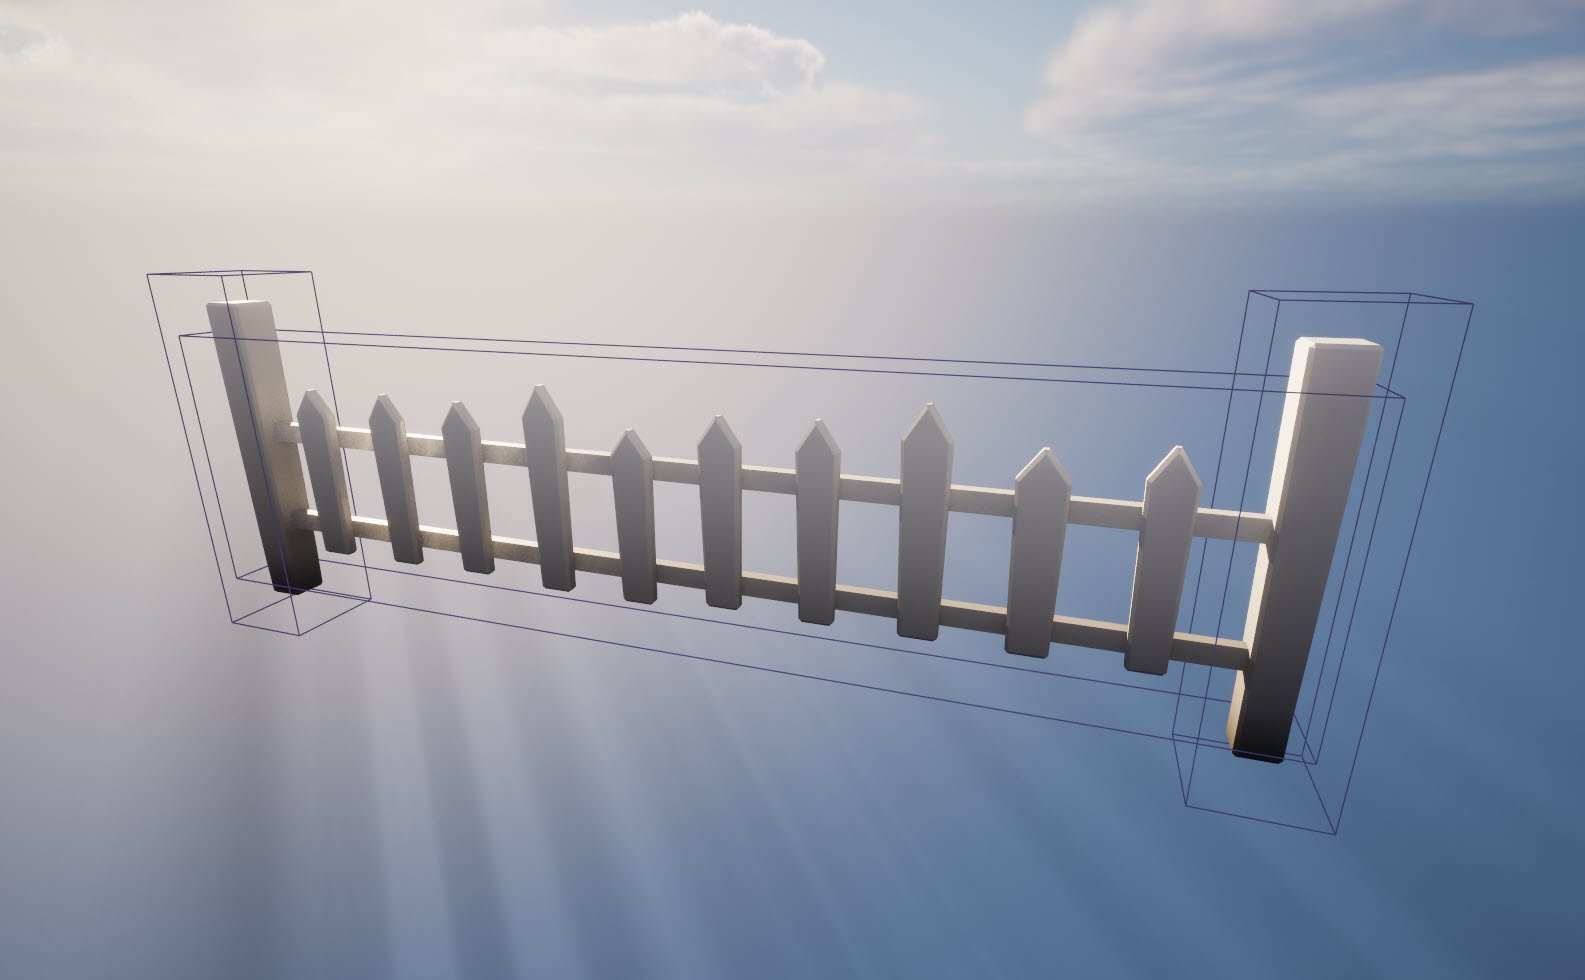
Collision Padding PanelandCollision Padding Poststo0.2. -
Select Bake.
-
Your fence’s panels now have additional padding in its collision.

-
| See also |