Easiest ACES-CG to SRGB Jpeg?
18673 31 11-

- TangheStudent
- Member
- 88 posts
- Joined: 2月 2021
- Offline
-
- CV
- Member
- 46 posts
- Joined: 1月 2016
- Offline
-

- TangheStudent
- Member
- 88 posts
- Joined: 2月 2021
- Offline
Hello CV,
The reason images are automatically saved in aces-CG is that everyone does composite in aces-cg.
IT is not that much effort to transform it to srgb.
If you want a free good compositing software you can download davinci resolve fusion for free.
https://www.blackmagicdesign.com/products/davinciresolve/fusion [www.blackmagicdesign.com]
You will have to point the node to your aces config.
-
- sda502
- Member
- 37 posts
- Joined: 4月 2022
- Offline
-
- CV
- Member
- 46 posts
- Joined: 1月 2016
- Offline
TangheStudent
Hello CV,
The reason images are automatically saved in aces-CG is that everyone does composite in aces-cg.
IT is not that much effort to transform it to srgb.
If you want a free good compositing software you can download davinci resolve fusion for free.
https://www.blackmagicdesign.com/products/davinciresolve/fusion [www.blackmagicdesign.com]
You will have to point the node to your aces config.
Thanks Tanghe, I use Nuke with Aces, it works fine :-)
But for sending clients or other people a simple status I would rather directly burn in Aces into a jpg without extra stuff added.
I have a feeling Karmas Display Filter might be a possible way.
Best
C
-

- jsmack
- Member
- 8042 posts
- Joined: 9月 2011
- Offline
-

- ajz3d
- Member
- 579 posts
- Joined: 8月 2014
- Offline
sda502
Say you have an .exr file sequence rendered out of Houdini, and you want to send it to Davinci Resolve for editing/color grading in HDR mode with an HDR screen.
How to set the project up in Davinci Resolve?
I'm using these settings which I picked up from somewhere. Naturally, "ACES Output Device Transform" depends on your target color space. Also, pick "CSC - ACEScg" as "ACES Input Transform" for your imported rendered images, although with global IDT set to the same value this might be unnecessary.
However, I'm not sure if it's THE proper way, so take my advice with a pinch of salt.
-

- Yader
- Member
- 36 posts
- Joined: 2月 2016
- Offline
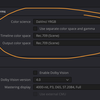
Here's an easy way to burn in the Aces Look - save it as a default and you can render/save out jpg's/png's without going through COPs or a compositing app. First make sure you have the baked lut from ACES, it should be somewhere like aces_1.x/baked/houdini/ and it's called sRGB for ACEScg Houdini.lut. Load that into the flipbook LUT slot and turn Gamma either off or set it to 1 (doesn't seem to make a difference). Save as Default and hit Start. Oh, and your viewport should be set to Karma of course 
Maybe some guru can chime in and help out with an expression for a timestamp in the filename.
So now, every time you create a flipbook you'll get the look from the viewport burned in.

Maybe some guru can chime in and help out with an expression for a timestamp in the filename.
So now, every time you create a flipbook you'll get the look from the viewport burned in.
Edited by Yader - 2022年10月29日 17:26:54
-

- BabaJ
- Member
- 2129 posts
- Joined: 9月 2015
- Offline
ajz3d
However, I'm not sure if it's THE proper way, so take my advice with a pinch of salt.
Either way thanks for posting....it just so happened that I had to do a video render in Davincini today from a Houdini exr sequence I ran off.
It's been two years since I've rendered off some video from Houdini exr's.
Before I always had to do some adjustments like gamma, offset and gain in the color section.
I just set my project the same as your color space & transforms settings.
It worked perfect with no adjustments needed. Got the video quality I wanted.(As what I previewed in Mplay)
Thanks for your post. It certainly helped me.
Edited by BabaJ - 2022年10月29日 20:09:19
-

- Robot_and_Robot
- Member
- 30 posts
- Joined: 4月 2015
- Offline
-

- smbell
- Member
- 76 posts
- Joined: 2月 2017
- Offline
Yader
Here's an easy way to burn in the Aces Look - save it as a default and you can render/save out jpg's/png's without going through COPs or a compositing app. First make sure you have the baked lut from ACES, it should be somewhere like aces_1.x/baked/houdini/ and it's called sRGB for ACEScg Houdini.lut. Load that into the flipbook LUT slot and turn Gamma either off or set it to 1 (doesn't seem to make a difference). Save as Default and hit Start. Oh, and your viewport should be set to Karma of course
Maybe some guru can chime in and help out with an expression for a timestamp in the filename.
So now, every time you create a flipbook you'll get the look from the viewport burned in.
This works from the Export > ffmpeg mp4 that's built into mplay as well, but you need to set the inverse sRGB gamma of 0.454 so the .jpgs it creates as temporary files don't throw off the LUT with a double sRGB conversion.
It appears that the dialog for this is missing the option to disable the "conversion to the image's native colorspace" that is available in the Save frame as dialog.
I really wish Houdini would save defaults for everything btw, if I had a dollar for every time I had to constantly set various UI things I'd be a rich man

Not sure how accurate it is with that value in the ACES world, but it's close enough for a preview.
Edited by smbell - 2023年3月11日 16:00:38
-
- Lifarino
- Member
- 4 posts
- Joined: 3月 2017
- Offline
Hope people don't mind if I revive this thread as I have been trying to resolve an issue related to this without any luck on my own.
I have successfully achieved the Aces look on my images thanks to Yades example (thanks a lot!). One issue still remains on my side which I cannot understand why it happens. I am trying to grab some specific layers of the images I rendered and put them all together by using a Channel Copy.
I attached an screenshot of the result so you can see what I am trying to achieve and the issue I am getting. The image on the left is the actual Smoke I want to export in the red channel of the texture. The image on the right is what I currently see on the red channel of the texture I am exporting. I renamed the image to C rather than the original name (environment light), but the results are always the same.
I am not sure of what the issue is. The emisssion channel (C.g) looks completely fine and exactly the same as the original input. If I disable OpenColorIO, the smoke texture looks alright but then the rest of the channels look wrong. Does anyone have any ideas that could help?
Edited by Lifarino - 2024年3月12日 16:34:54
-
- Quick Links


