Building Generator
基本的な「ブロックアウト」形状と名前の付いた建物コンポーネントのセットを指定すると、詳細な建物を作成できるツール。
はじめに
Building Generator は Gamedev toolの一つです。このページは、ツールで何ができるかの説明するためのハイレベルな要約です。
モジュール
- モジュールは建物の部品を表します。例えば、窓、ドア、棚など。
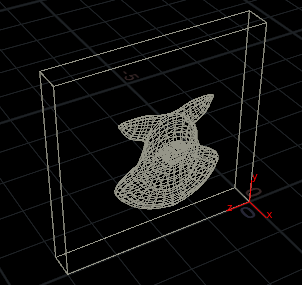
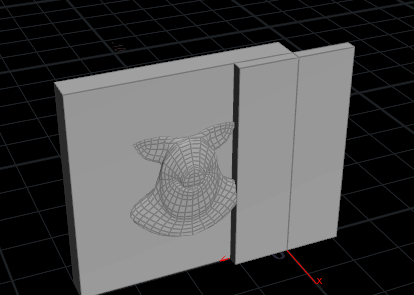
- モジュールは YZ 平面に正体し、前面の右下の角が原点にあるようになっています。
- 大まかな指針として壁モジュールを4x4 ユニットで作り始めました (つまり pighead 4つ)。
- モジュールのプリミティブには @ name アトリビュートが認識のために必要です。例えば 'wall' など。
- GameDev building utility はモジュールの大きさと @name を設定するための単一ノードです。
平らな壁がYZ 面にあり右下の角が原点に来ている
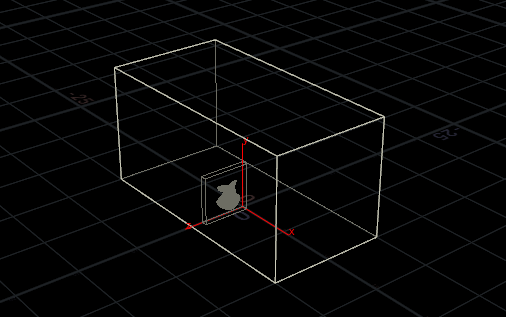
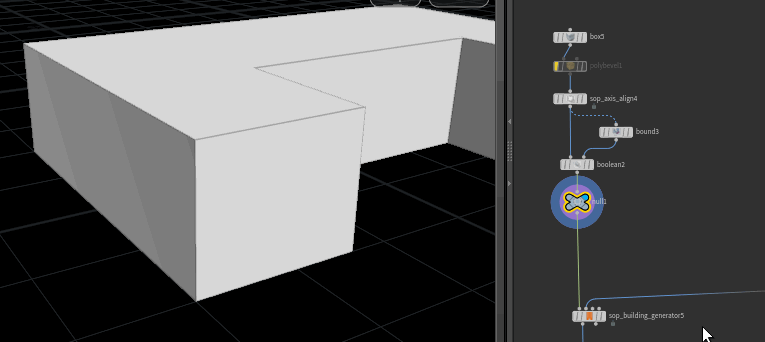
ブロックアウト形状
- 地面 (XZ面) に配置されていること
- 直角で構成されていることが望ましい (しかし必須ではない)
- ねじれが無くあまり複雑な形状でないほうが良い (がそうであっても試せば面白い形状が出来る)
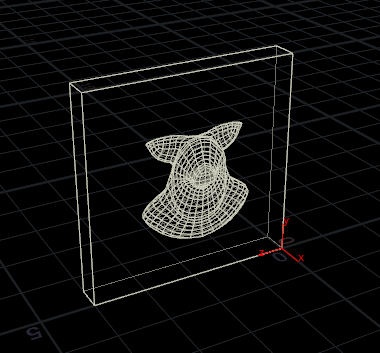
建物の例、パネルを大きさの比較のため
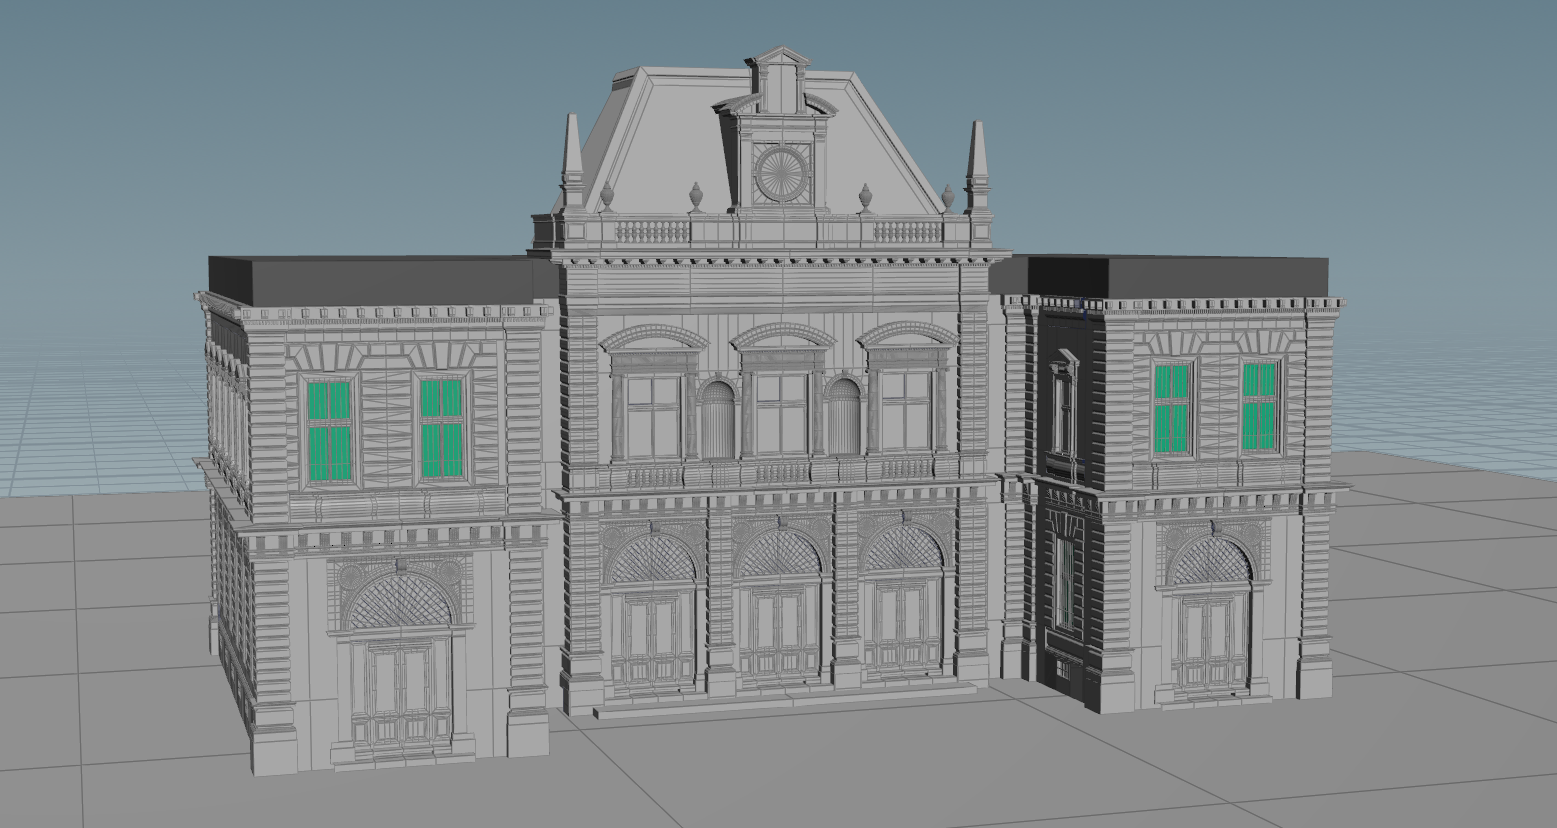
単純なビル
最高峰の建築家を嫉妬、泣かせるような建物を見てください。(基本の説明後に、より良いものを作るのでご心配なく ):
これはこちらのブロックアウト形状から作られています
どうやって? 読み続けましょう!
サンプルファイル
「はじめに」セクションを通過した後は、Pre-Made 構成モジュールを使用している Building Generator のサンプルファイルを見ていくことをお勧めします。 ここでは、生成された建物へのアートディレクションを最大限に活用する方法の説明のために、Facade Pattern Syntax (ファサードパターン構文)、手付けによるオーバーライド、そしてボリュームによるオーバーライドの方法を紹介しています。 モジュールは maito78 のご好意により "Poste Model"から抽出されています。
はじめに
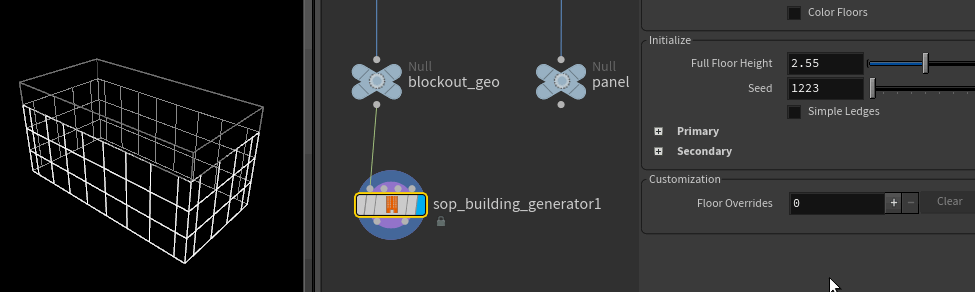
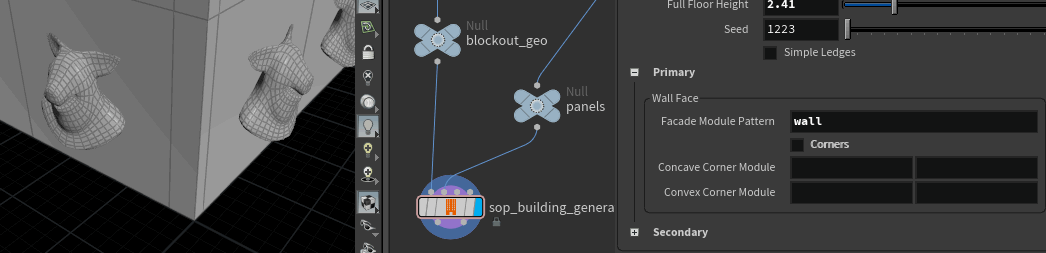
まず、30x10x30 の box を作り、sop_building_generator1 に接続、オプションをすべて無効にしました。 壁がパネルに分割されています。Full Floor Height を変更すると、パネルのサイズが変わります。
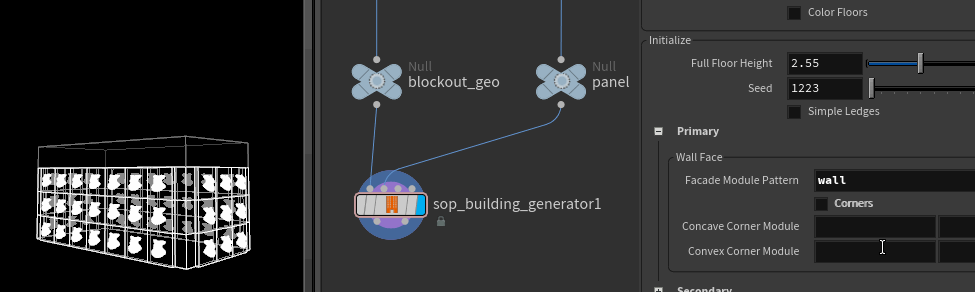
panel ノードを2番目の入力に接続、name アトリビュートを (この場合 "wall") を設定すると、仮のパネルが panel ノードで置き換えられます。
ここのロジックは理論的には単純ですが、実装は面倒です。パネルがそれぞれの壁に詰め込まれる際に左右の隙間が均等で、なおかつその隙間をできるだけ小さくしようとしています。GameDev チームがこのロジックを考え出しました。感謝しましょう ;)
Secondary セクション以下で Ledge (棚)を有効にすると、予想通り小さな仮の平板が作られ、後ほど name で指定されるモジュールで入れ替えられます。
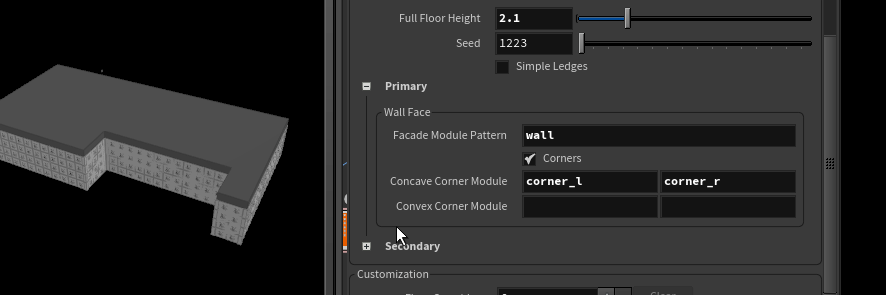
カド
ボーナスとしてカドの ‘caps’ を追加することも可能です。
カドの設定は、基本的な壁パネルと似ています。カドの左右に来るパネルを定義する必要があります。 カドの左側は基本パネルのように定義され、実際、ベースパネルに対して併せると関係が明確になります。 ここではカドが壁の上になるようにしていて、カドの右後ろが原点に来るようになっています。このパーツは corner_L という name が設定されていて、これをbuilding_generator SOP で使用するには、これと元の壁パネルを Merge SOP でつなげ、それを building_generator SOP の2番目の入力に接続します。
カドの右側は、カドの左後ろでアラインされ、X軸でミラーされたように配置されます。

原点が整列点となることがわかれば、 XY 軸上にくる面を傾斜させ、きれいに面取りができることを意味します。
Concave Corner (凸型) とConvex Corner (凹型) のカドを処理するため、XY面が反対を向いたパーツが2つ必要です (それらは corner_l_cvex と corner_r_cvex という名前です)。

Concave Corver (凹型) パラメータにそれらを追加すると、すべての場合できれいな処理が得られます。
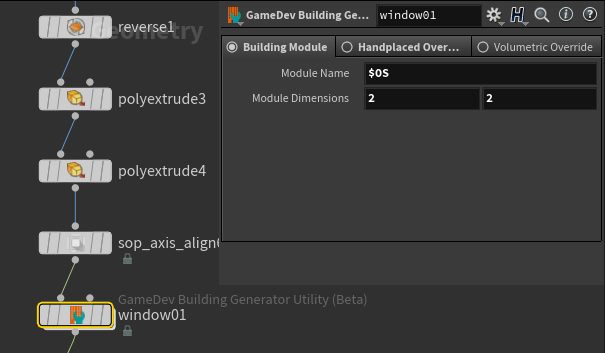
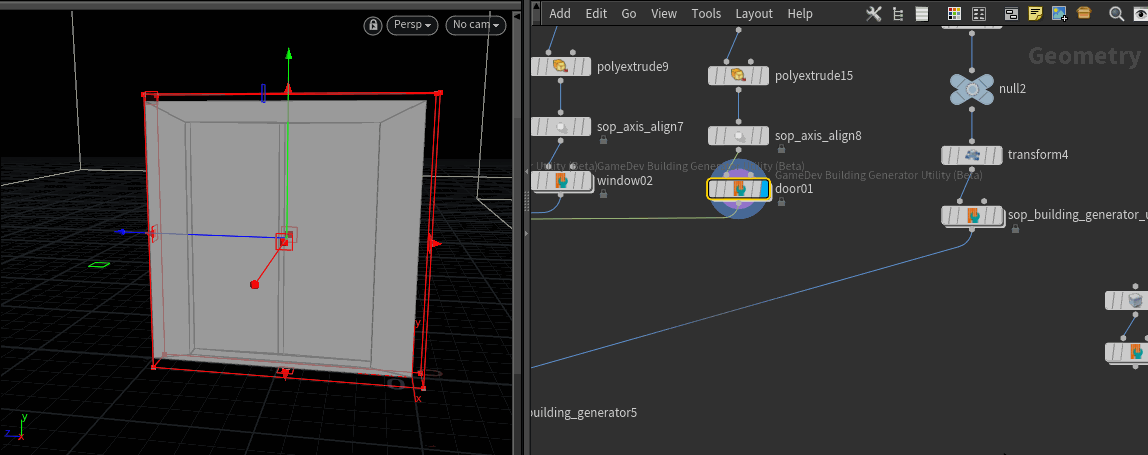
Building Generator Utility ノード
ここまで、pig panel は建物に収まるサイズに調整されましたが、明示的な寸法に合わせなければならない場合はどうするのでしょうか? また、すべてのパネルに @name を追加しなければなりません。 誰かがこういうことのための HDA を作るべきだと感じます。
そういうことで Building Generator Utilityノードが、これら両方のニーズ (そしてそれ以外いくつか) をカバーします。 Name SOP をこのユーティリティノードで置き換え、そこで名前を指定し ($OS を使用して楽できます)、パネルの幅と高さ(2 x 2) を指定することで、予期しないリサイズを回避できます。 します。
Floor overrides
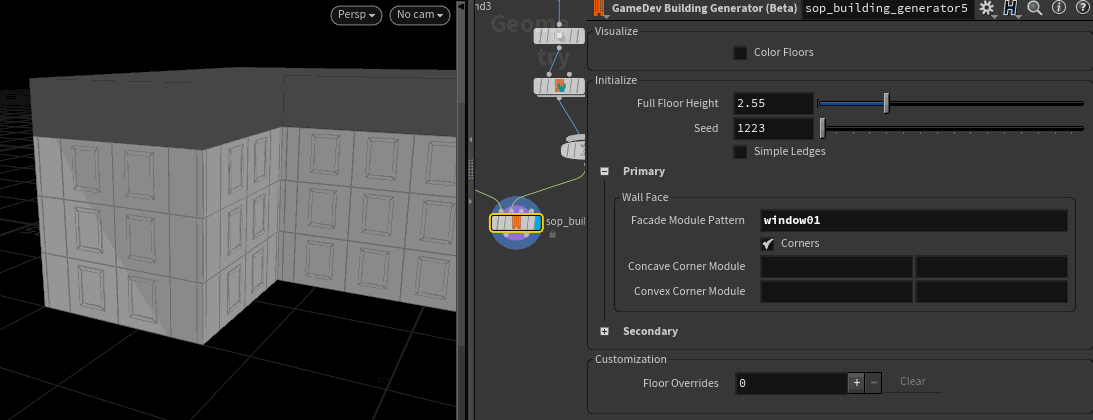
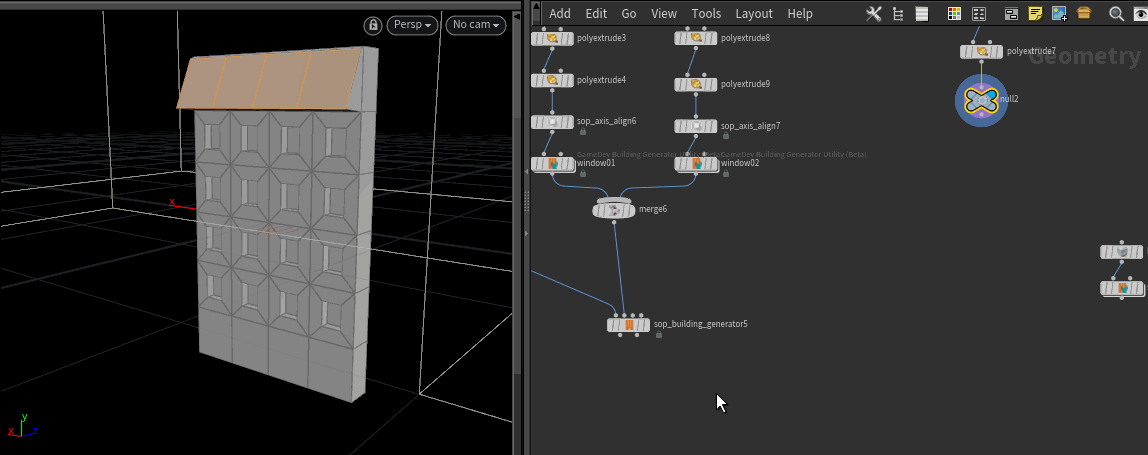
ここの例では、window01 と window02 の2つのパネルをモデルしています。 デフォルト設定ではパネルすべてに window01 が使われ、カドと棚を現時点ではオフにしています。
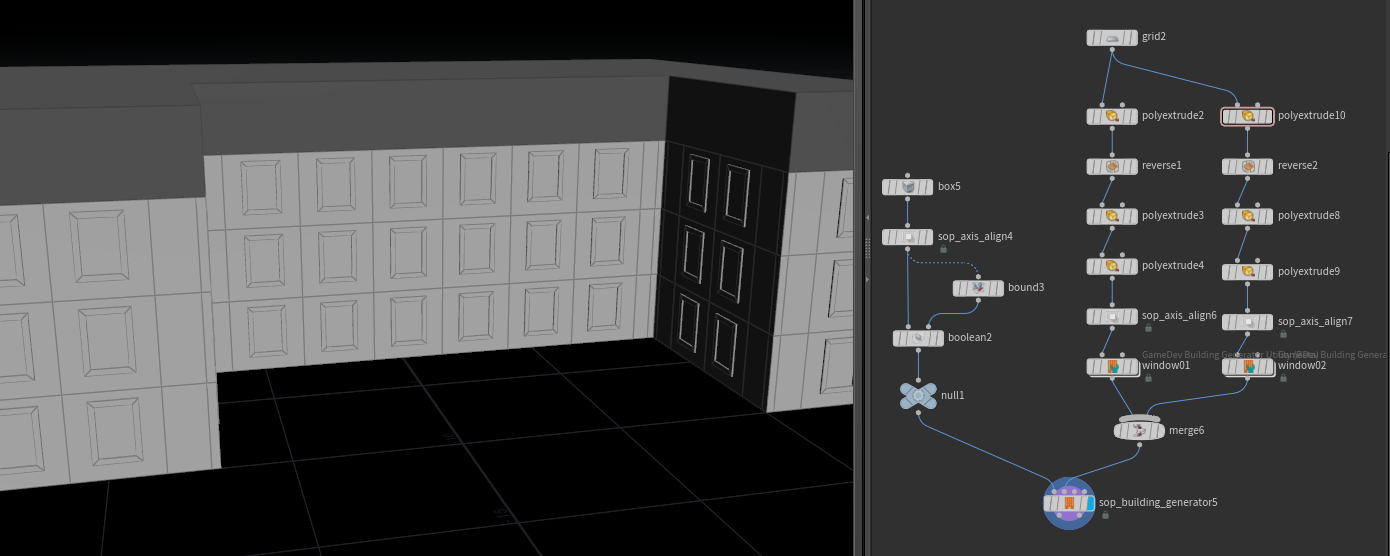
次に、1階と2階には window02を 使いたいとします。Customization 以下の Floor Overrides がこれを可能にします。 Floor Overrides 以下に新しいエントリを作成すると、Primary と Secondary のパラメータの設定がコピーされ、変更できるようになります。 ここで window01 をwindow02 に交換して、1階が更新されたのが確認できます。
このプロセスをフロアごとに繰り返しカスタマイズ可能です。
Handplaced overrides (マニュアル配置オーバーライド)
建物に対し特別な正面モデルや側面モデルがある場合、それらを必要な場所にワールド空間で配置可能です。building generator ノードはこれらを認識し、その部分にモジュールを配置しません。
これは Building Generator Utility ノードの Handplaced Overrides タブで行います。 ここでは、この絶妙にモデルされたセクションをどこに配置するか決め、次に Building Generator Utility ノードを使って Center と Size を更新しました。 これらの値は、Building Generator に「ここにモジュールを配置しない」と伝えるバウンディングボックスになります。Building Generator の3番目の入力に接続があるときは、パネルセクションを切り取り、代わりに Handplaced Override の設定を使います。
Volume overrides (ボリュームオーバーライド)
Handplaced Override と同様、バウンディングボックスを定義し、Generator ノードに「この領域ではこれらの設定を使用する」と指示することもできます。 ここで door01 というセクションを定義、入り口となる部分に Box を配置、ドアが来るようにしています。Box はBuilding Utility ノードの4番目の入力に接続され、パネルが置き換えられます。
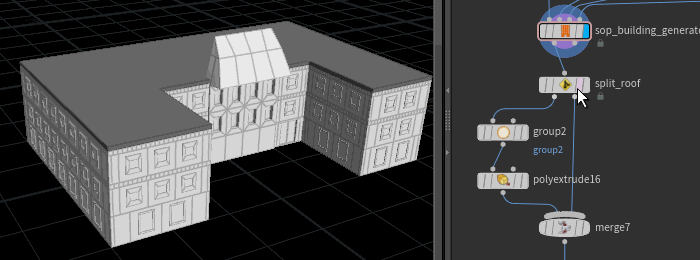
仕上げ
屋根の作成のために
- 上部のセクションをスプリットします (ビルのすべてのプリミティブに floorindex など便利なグループが割り振られています)
- 上に向いた面を グループ化します。
- ベベルと Inset を追加します。
- 残りのビル部分とマージします。
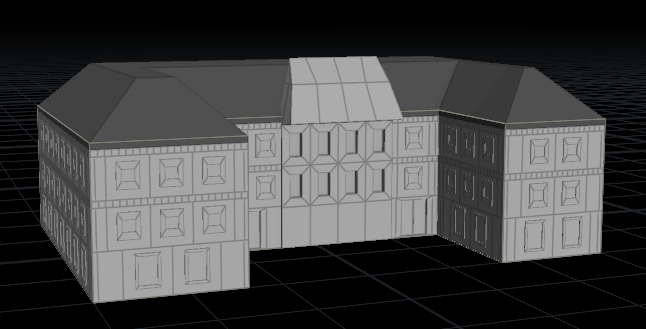
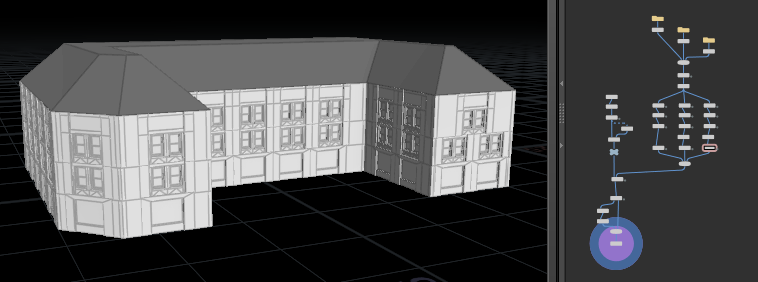
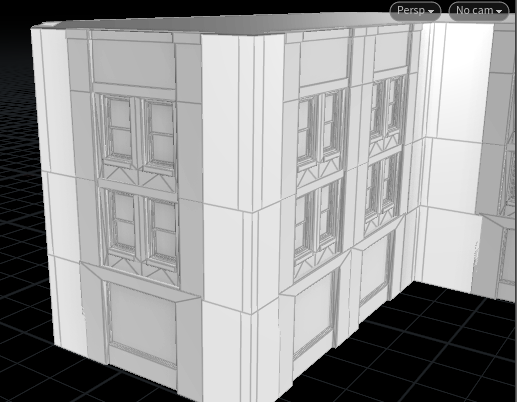
Building 2 - 既存モデルからキットバッシング
こちらはより見た目の良い結果で、すでにモデルしたビルのパーツを使用しています。
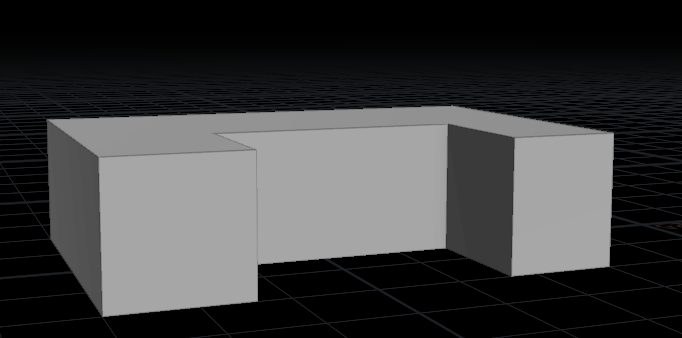
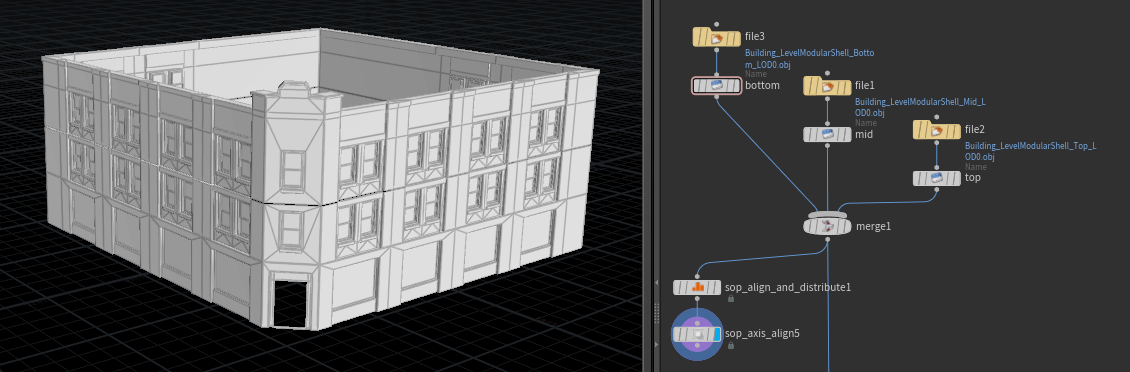
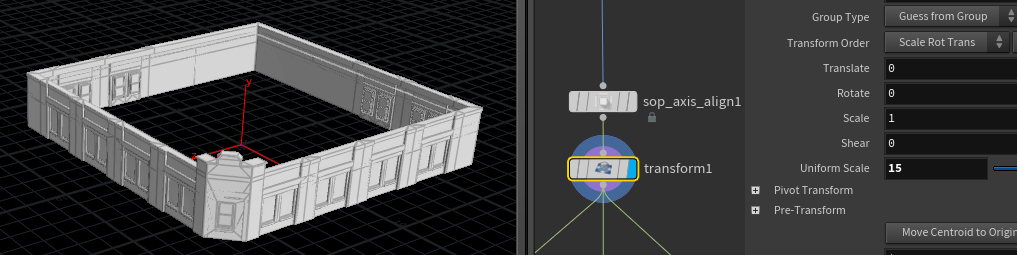
作業の殆どはモデルを探すことで、モジュール化することはかなり簡単でした。 こちらが、整列させ、積み重ねたオブジェクト3つです。
このオブジェクトは巨大だったので、GameDev Align ツールを最初に使い、単位サイズにして原点に配置し、それから幅が約15単位になるようにスケールしました。
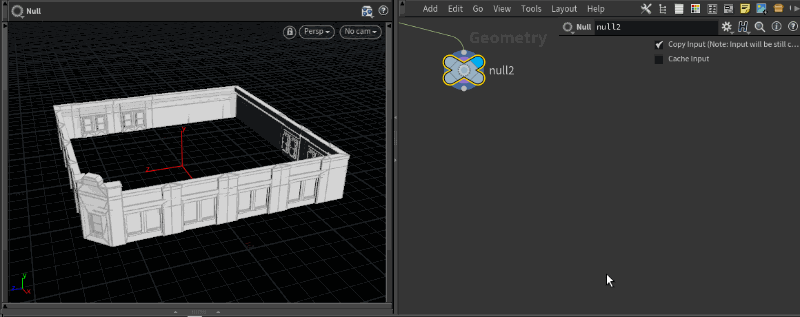
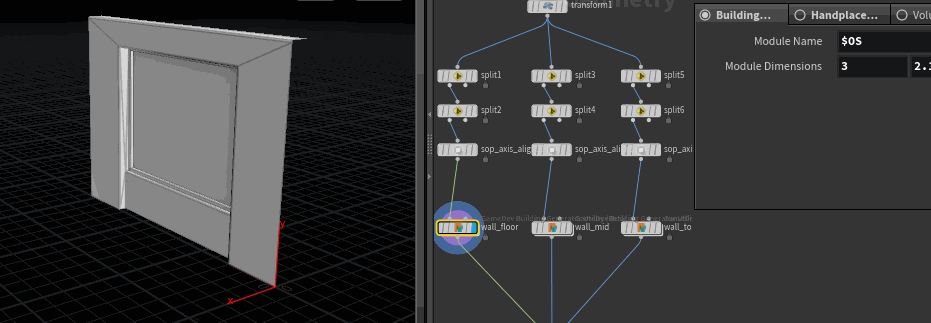
From here its a pretty easy task to isolate to each module I want. Here I show isolating one of the ground floor modules. ここから必要な各モジュールに分離するのはとても簡単な作業でした。 ここでは、1階のモジュールのうちの1つを分離しています。 ワークフローは以下の通りです:
- '9' ホットキーで グループリストを表示、groundfloor を選択しスプリットします
- 窓のパネルを一つ選択しスプリットします
- Axis Align ツールで原点に移動し、YZ面に沿わせます。
- Building Utility で name 設定と大きさの設定を行います (Geometry Spreadsheet から値を見つけます)。
このように作業することで、wall_floor、wall_mid、wall_top の3つのモジュールを手早く定義することができました。
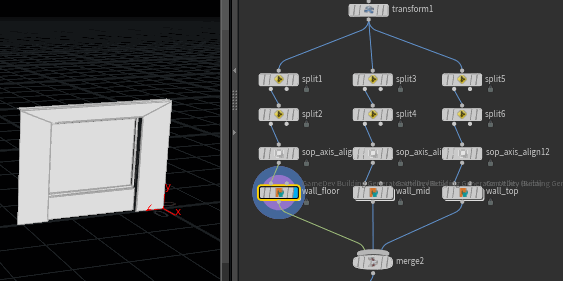
これらすべてを Building Generator SOP に渡し、今回は床の高さが Geometry Spreadsheet から取得した値と一致するように注意しました。
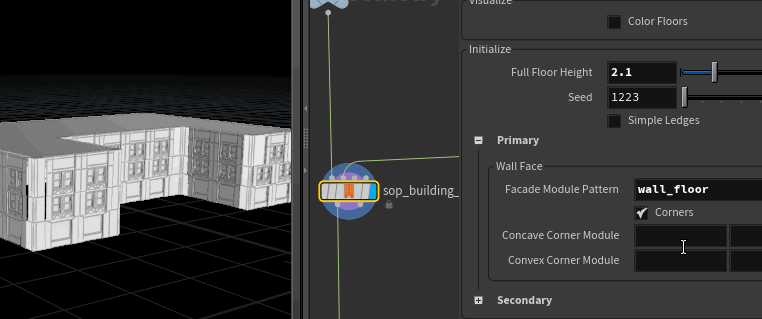
この段階で、元の blockout geo のカド一つにずうずうしくもベベルを実行してみましたが、それでもは期待通りの結果になりました。
しかしよく見てみると、隙間が出来ています。なぜでしょう? 何故かというと、モジュールの配置が少し杜撰だったからで、モジュール3つすべてでカドが原点になければなりませんでした。Axis Align SOPを使って Max-X の値を原点に持ってきましたが、これら3つのモジュールにはそれぞれ異なる ledge の設定があり、異なる厚みになってしまいます。各モジュールに Transform SOP を追加して修正します (Utility SOP の上流で必ず適用してください)。
これで隙間が消えました!
コメント
Goldwaters 5 年, 11 ヶ月 前 |
Simply awesome. Definitely going to be putting this to work!
AeroAstroArts 5 年, 11 ヶ月 前 |
Thank you for re-uploading this one, the first time it was posted it had a video along with it. Would you be so kind as to re-upload the video too? Thanks in advance, this is probably the most useful tutorial thus so far. :)
commedieu 5 年, 11 ヶ月 前 |
Awesome thank you!
Is there any way to use GameDev shelf tools w/o internet connection? @ our office we only have a intranet.
Thank you!
For instance,
could I download it and install it manually?
commedieu 5 年, 11 ヶ月 前 |
nevermind.. of course you guys provided thorough documentation on how to do it through github...
ty ty.
3dkeshaw 5 年, 10 ヶ月 前 |
epic
alex_martin2 5 年, 8 ヶ月 前 |
Amazing tool!
shad0h 5 年, 7 ヶ月 前 |
How would i create the interior?
Sulabi 5 年, 7 ヶ月 前 |
Awesome tool ty! Is there any way to make modules following a spawn pattern?
MasterHipoly 5 年, 6 ヶ月 前 |
Hi, I have massive amount of modular building meshes, How I can setup this building generator in HDA for using with existing static meshes in UE4/Unity (Priority to UE4)
Andrei_K 5 年, 6 ヶ月 前 |
I am actually trying to do similar stuff as well. It's a bit tricky to get ledges to work right and to match the required style exactly.
MuhammadMadiHero 5 年, 4 ヶ月 前 |
thanks dude
but how can we create the interior ?
3amsick 5 年, 4 ヶ月 前 |
Amazing tool!
roof !!
Can't I have a roof in a procedural way?
Jisung 5 年, 4 ヶ月 前 |
nice tut but i have some issue when i install my houdini asset built with this building generator it`s fine but, if i bring some geometry like(fbx,bgeo.sc) and plug in to some module pattern it`s give me warning in unreal engine (Unable to read file) and i can`t solve this problem give me some help
Mouzzer 5 年, 2 ヶ月 前 |
Hello! And how to make several houses at the same time?
segomez 5 年, 1 ヶ月 前 |
this is Awesome, i am working on a vr project, were all the town homes are basically the same architecture, and was looking into building my own house generator, this is going to help me a lot.
Sirgabriel 4 年, 11 ヶ月 前 |
thankyou
JIn_ 4 年, 9 ヶ月 前 |
so... if the basic shape is not located at the ground the building generator won't work???
Filanm 4 年, 6 ヶ月 前 |
There are some goodies in there.
Yuri Serizawa 4 年, 6 ヶ月 前 |
Looks like the link to the example file is expired.
izcho 3 年, 11 ヶ月 前 |
Great stuff Matt, you singled out the roof by index, but what if we have multiple buildings and variying amount of levels, could I procedurally figure out the height of each and pick the top, and where would I do this? Thanks
fr_3D 3 年, 1 ヶ月 前 |
Roof: Use a Split node to separate the SLOP group. For the SLOP branch you can add a transform node, scale Y for your individual fascia height, set Pivot Translate Y to -> $YMIN. Then add a Sort node, Primitive Sort -> By Y and Reverse. Add another Split node with 0 as Group, this separates the topmost primitive. Then you can add a Poly Extrude with Distance and Inset of your choice. Merge the non-zero primitives from the second Split node and then merge the non SLOP geometry from the first Split node.
DenialSmith701 2 年, 10 ヶ月 前 |
I think that good specialists could now sell their services on sites such as https://engre.co/services/modeling/architecture-building/ and do 3D modeling helping to create architectural projects. I saw there are many firms and companies that are looking for global projects
Please log in to leave a comment.