このプロジェクトは、タイムスケールとコントロールに重点を置いた、ゴルフボールがバイオリンを突き破る RBD シミュレーションです。以下のチュートリアルで、スローモーションの破壊をコントロールしながら、RBD シミュレーションで使用する小さめのユニークオブジェクトの準備とセットアップについて解説していきます。HIP ファイルを見ながら学習すると、より理解が深まるでしょう。
ステップ1 - アセットの準備
どの RBD シミュレーションも、最初に破壊のためにモデルの下準備をする必要があります。つまり、穴があればふさぎ、破砕で問題を起こしそうなジオメトリがあれば修正します。今回の場合は、使用モデルの大部分が 3D ピースのため「分離」するパーツができてしまわないよう、ジオメトリが欠けているネックの裏側部分を作り直していきます。
このモデルには修正が必要な問題が幾つか含まれています。まず隙間をクリーンアップします。ネック下側のケースとの接合部の隙間を埋めて穴をなくします。側面パネルが 2D なので厚みをつけるほか、円柱状オブジェクトの穴をふさぐ、内部の浮いているピースを削除するなど、細かい修正もいくつか加えていきます。
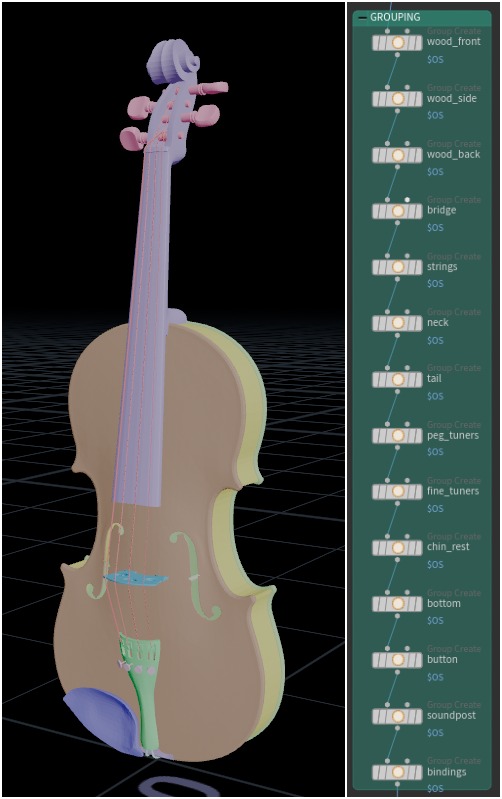
次に、破砕とレンダリングの際に、選択と命名をしやすくするため、一部のパーツをグループ化し、その後「pname」という一時的な name アトリビュートをひとつ作成します。ここにピースの元の名前を格納しておくと、後ほど Solaris で名称設定する際に役立ちます。他にも後から修正を加えましたが、いずれも、グループ分けやジオメトリに加える一部の編集に伴って後から必要になる小さな修正です。その他のアセットとして、台として使用するベベル付ボックス、背景用の簡単な曲面、ゴルフボールを作れば準備は完了です。モデリングを終え、台の上に配置したら、ジオメトリの破砕に進みましょう。
ステップ2 - バイオリンの破砕
モデルのクリーンアップができたら、バイオリンを破砕して RBD シミュレーションの準備をしていきます。破砕や拘束は、静止状態にしたオブジェクトで設定し、後から変形やアニメーションをコピーして戻すのが良いでしょう。今回の比較的シンプルなシーンであっても、バイオリンを静止状態に戻してから破砕に着手するのが良いでしょう。
たとえば岩などに比べ、バイオリンのようなオブジェクトは木製品のため、木目を考慮する必要があり、破砕がやや複雑になります。今回の場合は、リファレンスをもう一度見て、これから作るケースの全体的な形を確認しましょう。先ほどのグループと名前を使って、RBD シミュレーションで必要となるメインのバイオリンケースを破砕し、さらに、壊れないピース(ネック、テール、細かい下部パーツ)も RBD Sim 用に適切に準備していきます。
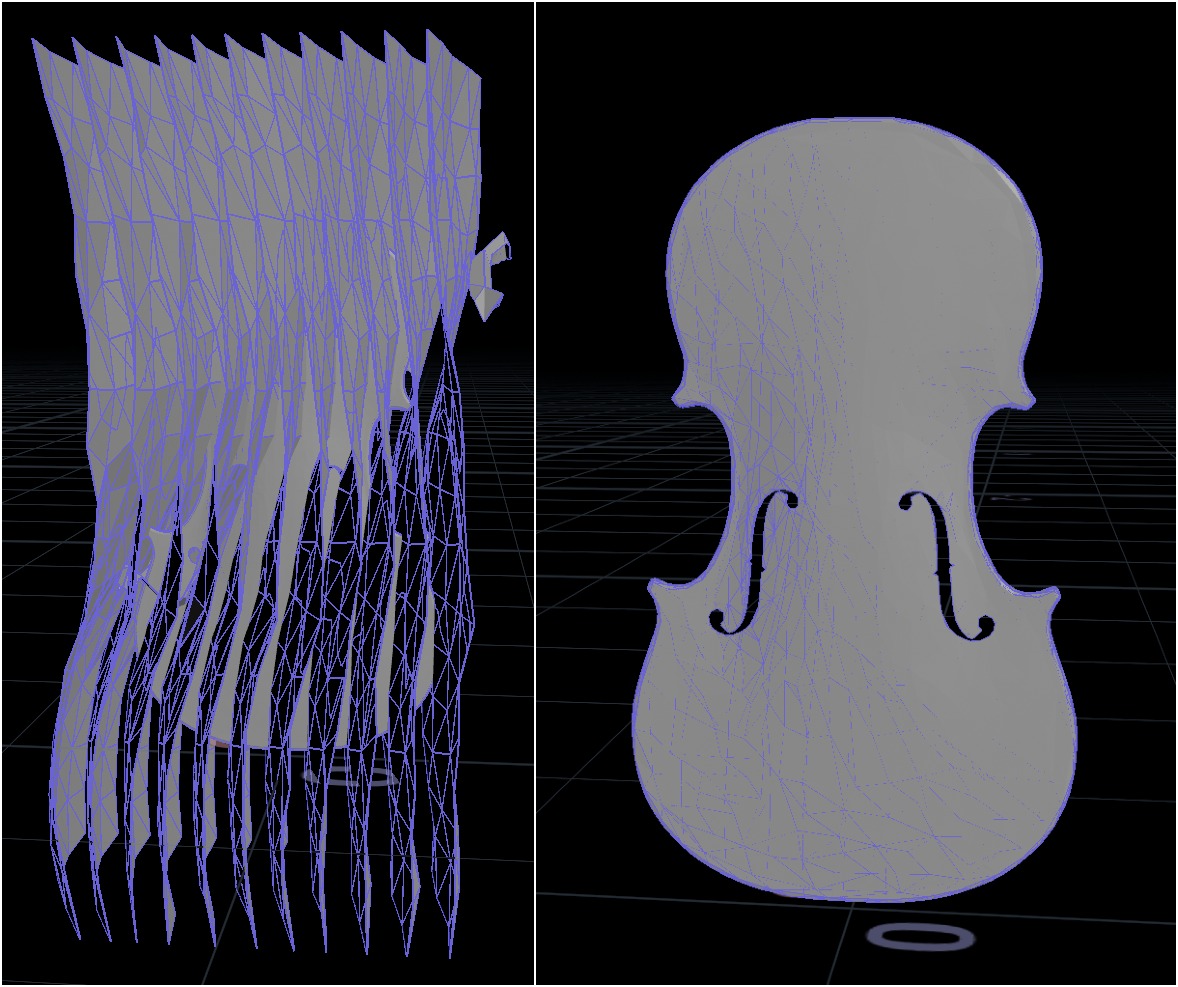
RBD Material Fracture の適用(ジオメトリ修正前と修正後)
まず RBD Material Fracture でバイオリンの木製ケースを破砕しますが、たとえ途中で何度かクリーンアップしても、問題は起こります。この例の場合、RBD Material Fracture ノードで破砕ジオメトリを作る過程で問題が生じるかもしれません。通常、その原因となるのは密閉できていないジオメトリです。修正するには、ピースを一度 VDB に変換してから再びポリゴンに戻します。その際、バイオリンに引き続き元のテクスチャを使いたいので、アトリビュート、特に UV を戻すことを忘れないでください。これにより、穴が消えて密閉され、見た目の良い破砕を簡単に作れるようになります。破砕は大きめに保ちます。その方がシミュレーションをコントロールしやすく、なおかつ木片や切れ端をセカンダリに回すことができます。特に小さいブリッジや魂柱は問題を起こしやすいので、一度拡大してから破砕し、再び縮小するとよいでしょう。
注
ケース正面のピースの UV は手作業で調整してください。ネック裏のジオメトリを再構築したことに伴い、UV にも再構築が必要になるためです。再構築後のパーツの残りの UV は、見えなくなるのでそのままでよく、調整の必要はありません。
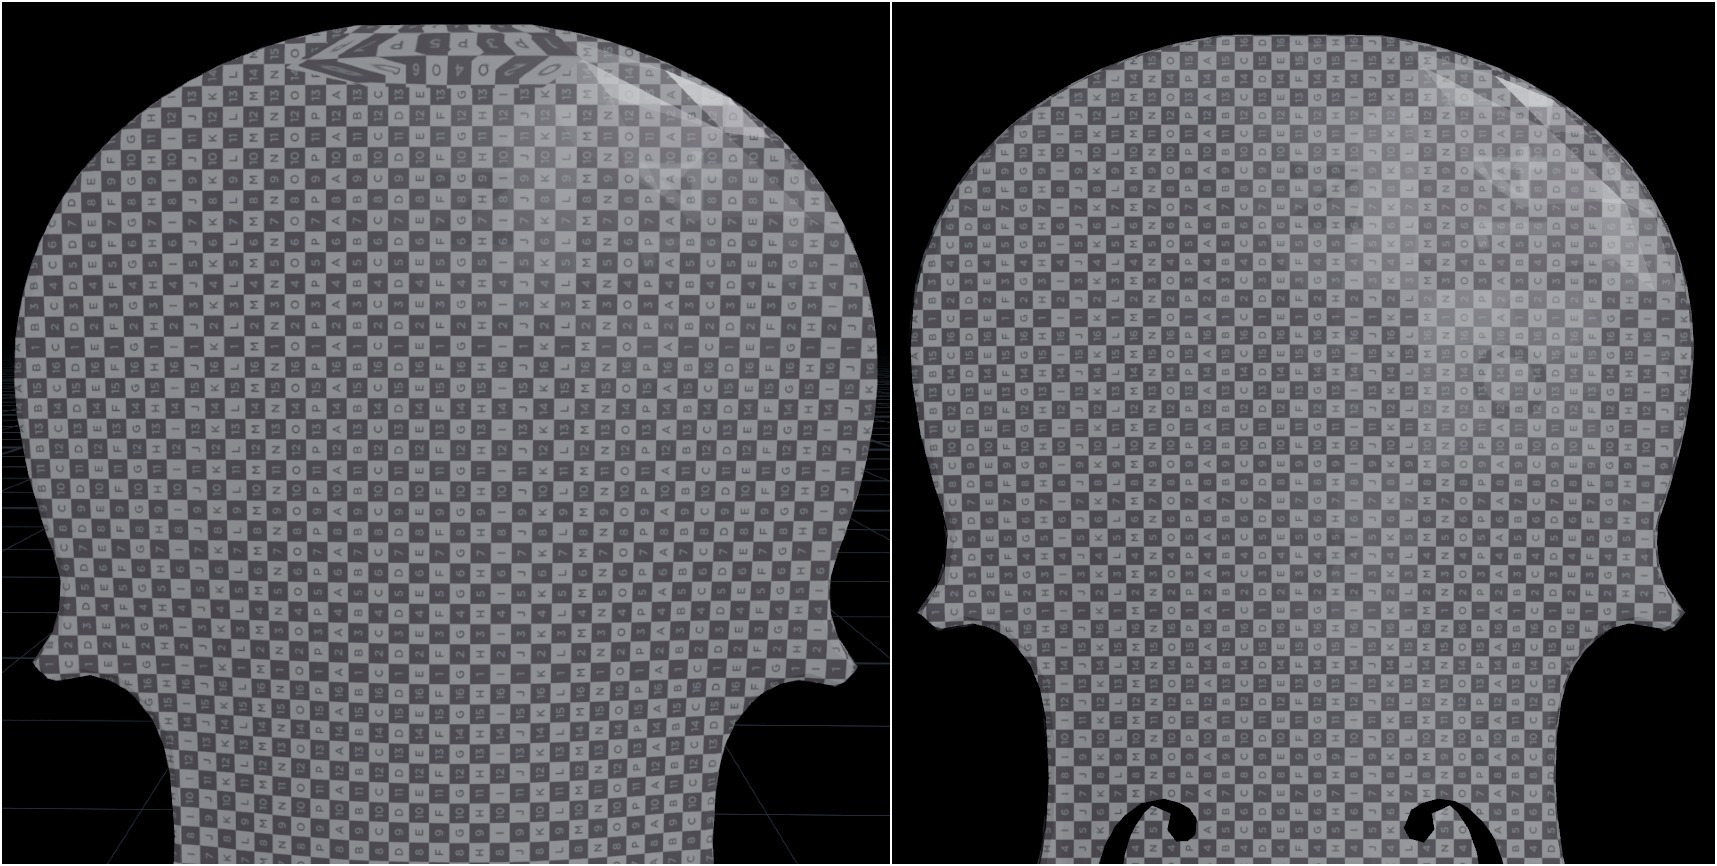
UV の破綻と修正後の UV (上端)
木製ピースの破砕が完了したら、壊れはせずともシミュレーションの一部として使われる、残りのピースに進みます。これらのピースには、RBD Bullet Solver に適した名前、つまり、それぞれに固有の name アトリビュートを付与する必要があります。その方法はいくつもありますが、今回は RBDMaterialFracture の Cutter をオフにし、Fracture per Piece オプションをオンにするのが良いでしょう。バイオリンを再度組み立てたら、RBD シミュレーションのための拘束セットアップに進みます。
ステップ3 - 拘束による結合
次のステップでは、ピースを結合させるための拘束(コンストレイント) を設定します。SOP レベルのツールを使ってコネクションを設定し、拘束を微調整して、壊す場所やピースをコントロールします。
まず、メインの木製ケースの拘束を設定します。この拘束システムが最も複雑ですが、RBD Constraints from Rules ノードと RBD Constraint Properties ノードを使えば多くの作業をそれらに任せて、パラメータ値の設定に専念できます。前面、側面、後面の3ピースそれぞれに拘束を作成したら、ケースの部品用とメインパーツ3個用に異なる拘束セットを作り、先に作った拘束と統合します。拘束タグは分けたままにして、ピースそれ自体と、それらを繋ぐコネクションとを、より柔軟にコントロールできるようにしましょう。
拘束のタイプは Glue を選び、壊れるまで動かないようピースを結合しておきます。ただし、壊れるピースはいずれも Constraint Switching をオンにして Soft を指定します。こうすると、壊れる必要のあるピースの拘束が、衝撃の直前に Soft に切り替わります。Glue 強度による破壊もソルバに計算させましたが、ボールが突然ズレたり、木の強度に負けて動きが完全に止まるなど、不自然な結果になりました。Soft 拘束を使えば、それを回避して、木の破砕の最終的な雰囲気に専念することができます。
破砕時の拘束セットアップ
Override Angular Stiffness と Damping Ratio は、忘れずオンにしてください。これにより衝撃で曲がる木片の強度と振動をコントロールしやすくなります。標準的な Stiffness や Damping Ratio より弱い値にしてください。木材の曲がりやすい性質を再現するためです。
ブリッジと魂柱も同様です。ただし、それ以外の壊れないピースは、できるだけ実際のバイオリンの作りに近い方法でケースに付けるようにしてください。つまり、直接ケースに付けるのではなく、先にコネクタを置いてからピースを取り付けるようにしてください。
注
主に注意すべきは Soft 拘束の拘束値です。何度か試行錯誤すれば適正値が見つかりますが、木材では一般的に振動値を高くして屈曲性を高めます。ただし、壊れない方のピースは、基本的にその場から動かさず、わずかに振動させるだけにして、衝撃の強さを強調しましょう。
ステップ 3.5 - 破壊のコントロール
このセットアップの大部分を占めるのは、破壊が起こる位置のコントロールです。先ほど説明した通り、ここでは一部の拘束を衝撃の直前に Soft に切り替えて、ゴルフボールが木材の Glue 拘束を完全に壊すことなく、きれいに突き抜けるようにしています。このように、素早くきれいに壊れることがわかった状態でシミュレーションに臨めると、時間の制御がはるかに容易になります。
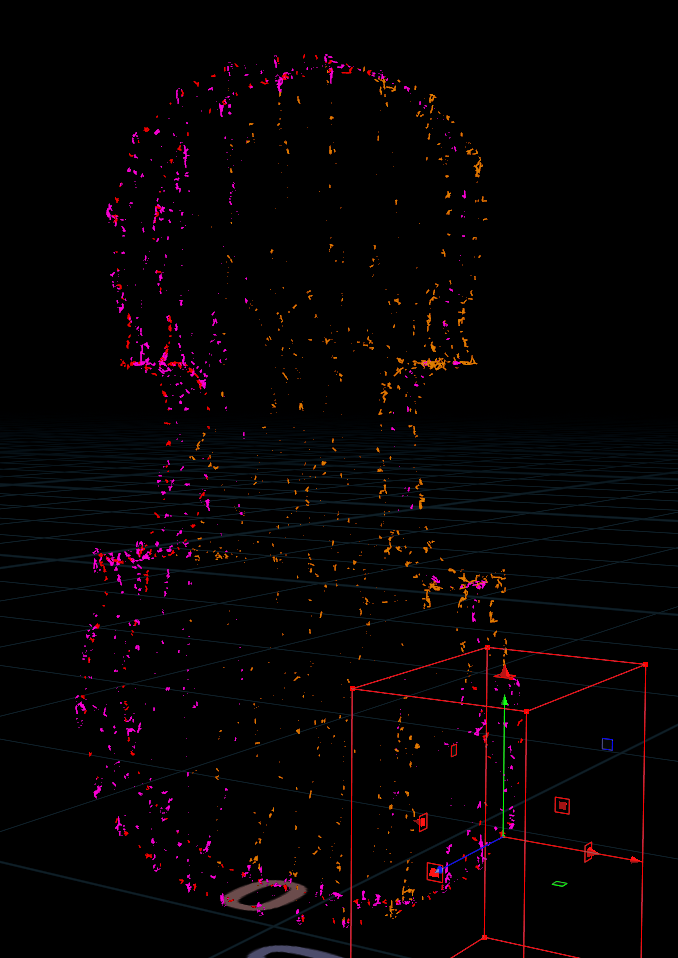
そのようなコントロールをするには、バウンディングボックスを作成して、離したい拘束を選択し、Soft 拘束に切り替えられるようにします。手動による選択だと、破砕/拘束に変更が加わると選択内容が損なわれてしまうため、バウンディングボックスの方がはるかに便利です。後戻りして修正したくなった時でも自由に変更が利き、選択内容の修正で時間をとられることもありません。ただし、一部のピースで微調整が必要な拘束が出てくるかもしれません。
まず、振動や微震用のピースから、壊れるピースを切り分けます。リファレンスを見ると、主に上面右側が壊れており、反対側は概してあまり衝撃を受けていません。この壊れる箇所を囲むバウンディングボックスを設定し、そのグループに、後ほど Break Thresholds でも使える名前をつけます。壊れない方のピースには、何点か細かい微調整のみを加えました。これは、ペグが動かないようにする、振動させる一部のピースに、 Soft 拘束への切替タイミングをコントロールするための別グループを作成するといった、特定の目的を果たすためです。
ステップ 4 - 破砕
目指すルックを完成させるには微調整がいくつか必要なため、シミュレーションの最終工程で RBD Configure ノードと RBD Bullet Solver ノードを設定していきます。
注
これらの値の多くは時間がかかります。適正値を探るためのウェッジ化が何度か必要になるほか、シミュレーションと破砕、セットアップ間での行き来も必要です。拘束の切替が必要なピースを選んだり、一部の問題の回避策を探る作業においても同様です。 ただし、Houdini では、そのプロシージャル性によって作業が簡素化されており、編集や変更のための後戻りは、あくまでフローの一部にすぎません。
始めに RBD Configure で木の密度を設定します。大きめの数字にして重みをつけ、衝撃の直後まで下方のボタンを無効にし、バイオリンが台から飛んでいかないようにします。次に、アセットのトランスフォームを rbdxform ノードにコピーしてバイオリンを位置につけます。最後にゴルフボールを選択し、十分な量の密度とベロシティを設定します。その際、このショットがスローモーションであることと、ティーを離れたボールの速度がごく速いことから、相当な速さが必要になることを忘れないでください。ここではショットの性質と表現したいディテールを踏まえ、バイオリンの密度もボールの密度も、非現実的なほど高く設定しておきます。
最後に、RBD Bullet Solver で、コントロールと欲しいルックを本格的に設定していきます。まずは Time Scale です。このショットはスローモーションなので 0.1 にしてください。具体的な数値なしに判断するのは難しいですが、リファレンスを見たところ、0.1 くらいが適正値でしょう。残りの数値は試行錯誤して決めます。ただし、Bullet World Scale は 1000、Bullet Substeps は 400、Constraint Iterations は 100 の時に、安定した結果が得られることが判明しています。Drag は、衝撃が起こる前の最初の値をゼロにしておきます。ゴルフボールはアクティブオブジェクトのため、衝撃時の値が判断しやすく、値の調整であまり時間がとられません。
Constraints タブでは、先ほどのセットアップの多くを実際に使用していきます。 Soft 拘束の Break Thresholds 設定は、Angle Threshold を 0.45、Distance Threshold を 0.01 にします。これは、ヒンジ状に結合させつつ、距離が広がったら離れるようにするためです。最後に、Impact グループのタブを Switch to Next Constraint に設定し、切替フレームを24にします。これにより、衝撃の直前になると、衝撃箇所の拘束が Glue でなくなり、 Soft 拘束として動作するようになります。
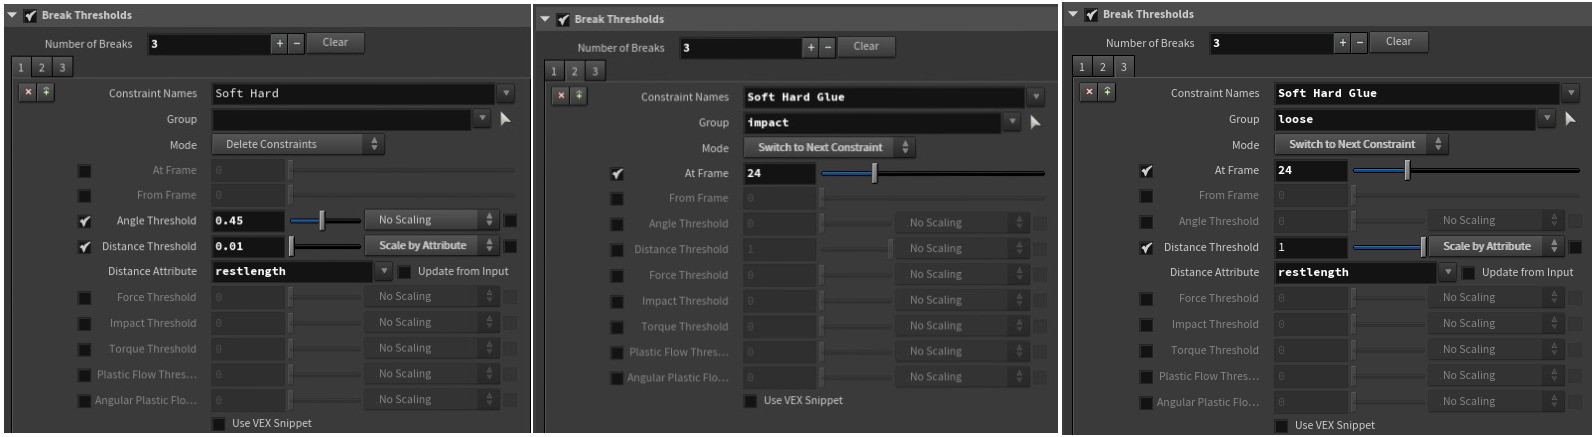
バイオリンの Break Thresholds 設定
注
後ほどレンダリング用の名称設定で必要になるため、RBDBulletSolver の Outputタブ内 Attribute Transfer パラメータに、 name と pname を追加するのを忘れないでください。
ステップ 5 - ディテールの追加と Solaris の準備
これで RBD シミュレーションの完成です。ここからは、シミュレートしない細かなディテールを幾つか追加して、セカンダリに進む前に、衝撃の時の重みや雰囲気をさらに加えていきます。
レンダリングには Karma XPU を使用するため、まずシミュレーションをアンパックして、Solaris 用の名称を設定します。RBD シミュレーションで変更されてしまった命名は、最初に設定した pname アトリビュートを使い、 name アトリビュートをリセットすると手っ取り早いでしょう。その他多くのシミュレーションの場合と同様に、スイッチを使って衝撃の直前に未破砕のオリジナルアセットから切り替えることで、不自然な箇所を目立たなくします。
破壊の内側は新規作成したジオメトリなので、適切な UV の設定も必要です。内側のグループを切り離して名前を付け、Solaris でマテリアルを割り当てやすくします。最後に、タイムシフトさせたジオメトリと、フリーズさせたジオメトリの両方で UVTextures を設定し、その UV アトリビュートをシミュレート後のジオメトリにコピーしましょう。これで内側のピースの UV は完璧です。テクスチャ用の適切な命名ができるよう、バイオリン内部のフェースも切り離したら、振動とペグのねじりのアニメーションに進む準備は万端です。
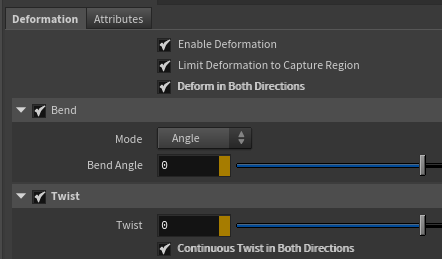
Bend ノードの設定
反響の表現には、衝突で飛び散らないピースを全て選択し、 Bend ノードでねじりと曲げをつけましょう。CHOP の波形ノイズを使い 、Bend Angle および Twist を数フレ後にゼロに向かうようアニメートして、振動がすぐに止むようにします。適切な振動がつくよう Deform in Both Directions および Continuous Twist in Both Directions を忘れず有効化してください。最後に、ペグにねじりのアニメーションをつけます。アニメーションが必要なペグの重心を抽出してタイムシフトを適用し、ねじりのアニメーションをつけたら、元のペグの重心にそれをコピーします。

ステップ 6 - 弦のシミュレーション
これで木材の RBD シミュレーションができましたが、大事な部品である弦が残っています。弦の Vellum シミュレーションには RBD を使いますが、その前に、弦のアセットをラインに変換して、シミュレーションを実行できるようにする必要があります。
その後、数か所に切れ目を入れ、衝撃の瞬間に千切れる切断ポイントを作ります。次に、この切れ目をステッチで再び繋ぎ合わせ、衝撃まで固定しておきます。弦の設定は Hair にして1本ずつに名前をつけ、どの弦が後から切れるかコントロールできるようにします。弦の Edge Length Scale 値は、切断時の「弾け」を表現できるよう1未満にしておきましょう。これは、ふたつの切断ポイントが相手の方に向かって収縮するようにする設定で、これにより切断時の収縮が生じるようになります。
シミュレーションを安定させ、より精度の高い結果を得るには、あといくつか設定の調整が必要です。弦もスローモーションにする必要があるため、VellumSolver 本体の Time Scale を忘れず 0.1 に設定しましょう。また、弦の動きが不自然にならないよう Substeps、Collision Passes および Polish Passes を上げておき、最後に Static Threshold を、衝撃の前は高い値、衝撃の後はゼロになるようアニメートします。これは、弦を駒の上に固定し、滑り落ちないようにするのに役立ちます。
弦の Vellum シミュレーションの最終工程では、Vellum の弦自体に切断を設定します。Vellum Constraint Properties ノードをいくつか配置し、 Remove パラメータを調整して、切断ポイントを繋ぐ拘束を衝撃の瞬間に解除します。あとは、シミュレート済みの弦に元の UV を転送できるよう、Extrude By Thicknes を有効にし、実際にレンダリングするだけです。
注
弦が動きを安定させようとして、数フレームほど変な風に飛んだり不自然な挙動をすることがありますが、これは問題ありません。衝撃前後の数フレームの間さえ安定していれば大丈夫です。不自然な箇所があっても、フリーズやレンダ設定の切替で目立たなくなります。
ステップ 7 - 粉塵
これで破砕の大部分が完成したので、セカンダリに進みましょう。ここでは、瓦礫の雲全体を構成する、微細な瓦礫と粉塵、細かい破片を追加していきます。
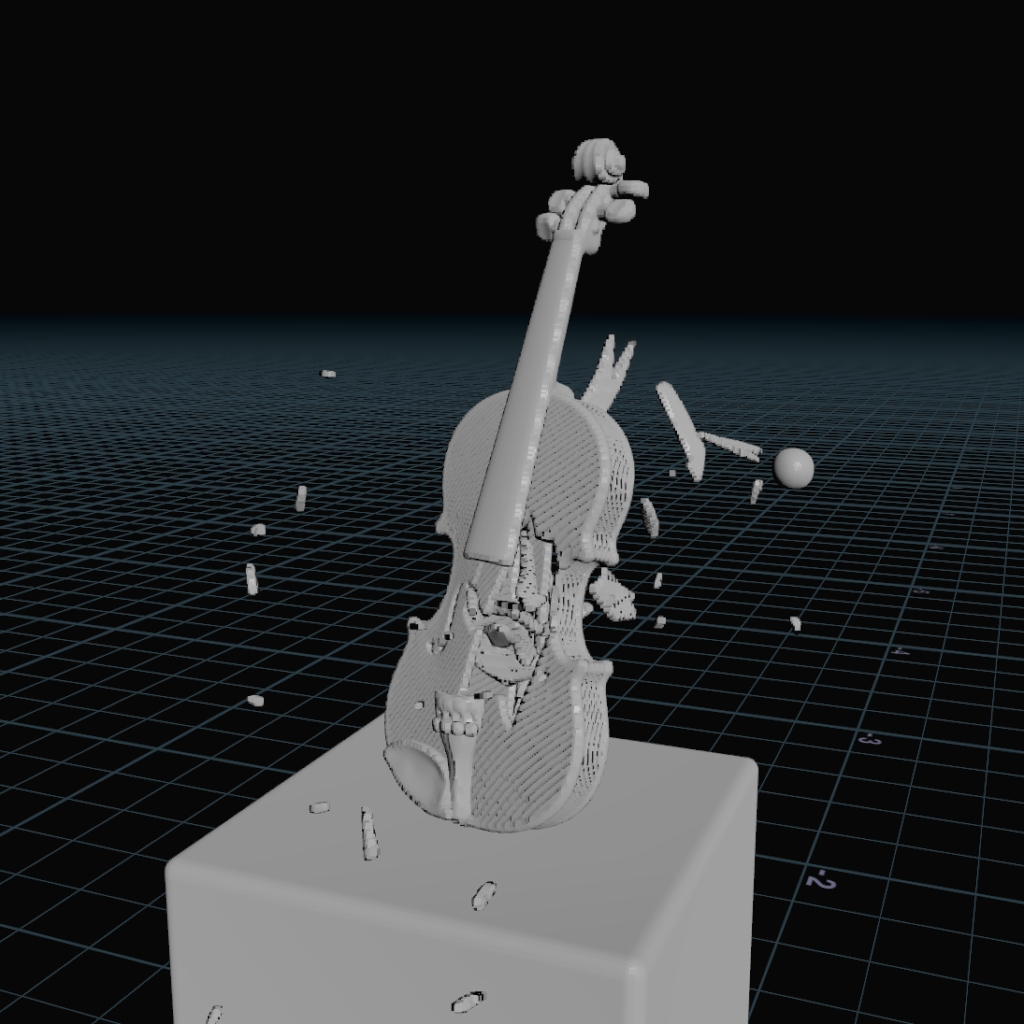
Pyro 衝突用の VDB
まず、バイオリンのシミュレーションと台を合体させ、ふたつとも VDB キャッシュに変換し、それを Pyro シミュレーションの衝突で使用していきます。VDBFromPolygons ノードでバイオリンのディテールをしっかり保てる程度まで Voxel Size を落としたら、 Distance VDB の名前を collision に変更します。Surface Attribute を point.v、VDB の名前を collisionvel に変更したら、最後に Vector Type を Displacement/Velocity/Acceleration にします。これで衝突をキャッシュ化して、Pyro シミュレーションに流し込めるようになります。
注
バイオリンの VDB に穴が開いていないことと、ディテール量が適度に保たれていることを確認してください。これらが守られていないと不自然な衝突になることがあります。VDBは、VDBReshapeSDF ノードの Erode と Dilate で調整可能です。
ポイントのソース元は debrisSource にします。ただし、シミュレーションの Time Scale が 0.1 のため、生成されるポイントの Velocity 値では速すぎます。釣り合いを取るための調整が必要なため、ポイントの Velocity 値に Time Scale を乗算してポイントを修正してください。次に、それを popnet に流し込み、popforce を適用しますが、popsolver の Time Scale を0.1に修正することと、パーティクルをソースするのは数フレームのみにすること、さらにはパーティクルの生存時間をごく短くすることを忘れないでください。0.1 のタイムスケールに対して秒単位の生存時間では長すぎるためです。このポイントに対し、nage を基に密度と pscale を設定、ベロシティにノイズを加えて密度とベロシティをラスタイライズし、 pyrosolver に流し込めるようにします。
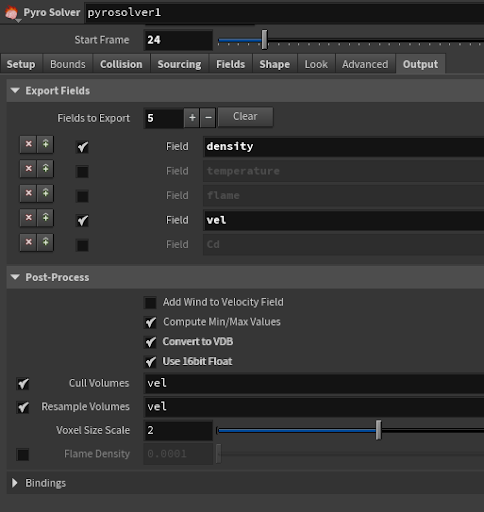
Pyro ソルバの最適化
このスケールのシーンでディテールを保つには、煙のボクセルサイズをかなり小さい数字まで落とす必要があります。今回は 0.02 にし、ここでも忘れず Time Scale を 0.1 に指定してください。pyroSolver 設定で、Collision Type を SDF+Volume Velocity、Velocity Volume を collisionvel(先ほど決めた衝突の VDB の名前)にしてください。煙をキャッシュ化したら、もう少しで完成です。
最適化に関する注意
ダストに使用しないものまで出力するとボリュームがかなり重くなることがあるため、不要なデータはキャッシュ化しないようにしましょう。Temperature や Flame 等の使用しないフィールドをいずれも無効にして一部のポスト処理機能を有効にすると、キャッシュサイズを削減できます。
ステップ 8 - 破片と小片
最後のセカンダリは破片、衝撃の瞬間に発生する微粒子と、衝突の後に飛び散るバイオリンの小片です。
まず、動きの速い大きめのピースのみを放出させるための、もうひとつの Debris Source を用意しますが、元のベロシティではディテールを欠き、リニアすぎるかもしれないので、Velocity ノイズ を加えます。popnet でこれらのポイントをパーティクルソースとして実行し、その際、Collider はバイオリンと台、Time Scale は 0.1 にしてください。ただし、もう少しシミュレーションにディテールを加えたいので、popforce と popAdvectByVolumes も配置し、先ほどの粉塵シミュレーションの vel フィールドを持ち込みます。先ほどと同様に、これらのパーティクルをソースする時間は数フレームにします。ただし、nage を基に pscale をスケーリングして、徐々に縮小させてから消すので、生存時間は先ほどより少し長くなることがあります。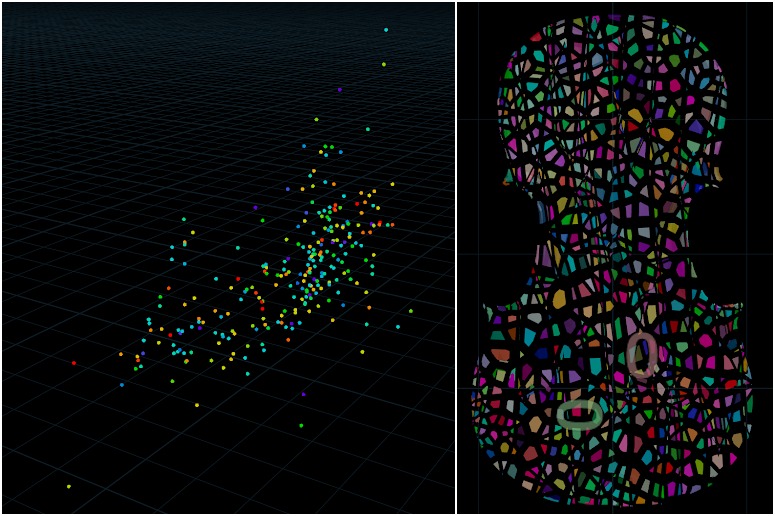
コピーするポイントと、さらに細かな破砕ピース
最後に、Copy to Points で Piece Attribute パラメータをオンにして Piece を選び、 Pack and Instance パラメータをオンにします。最後に、Attribute Randomizeを使って、ピースにランダム化させた名前をつけます。小片にマテリアルを割り当てるのにこの名前を使います。
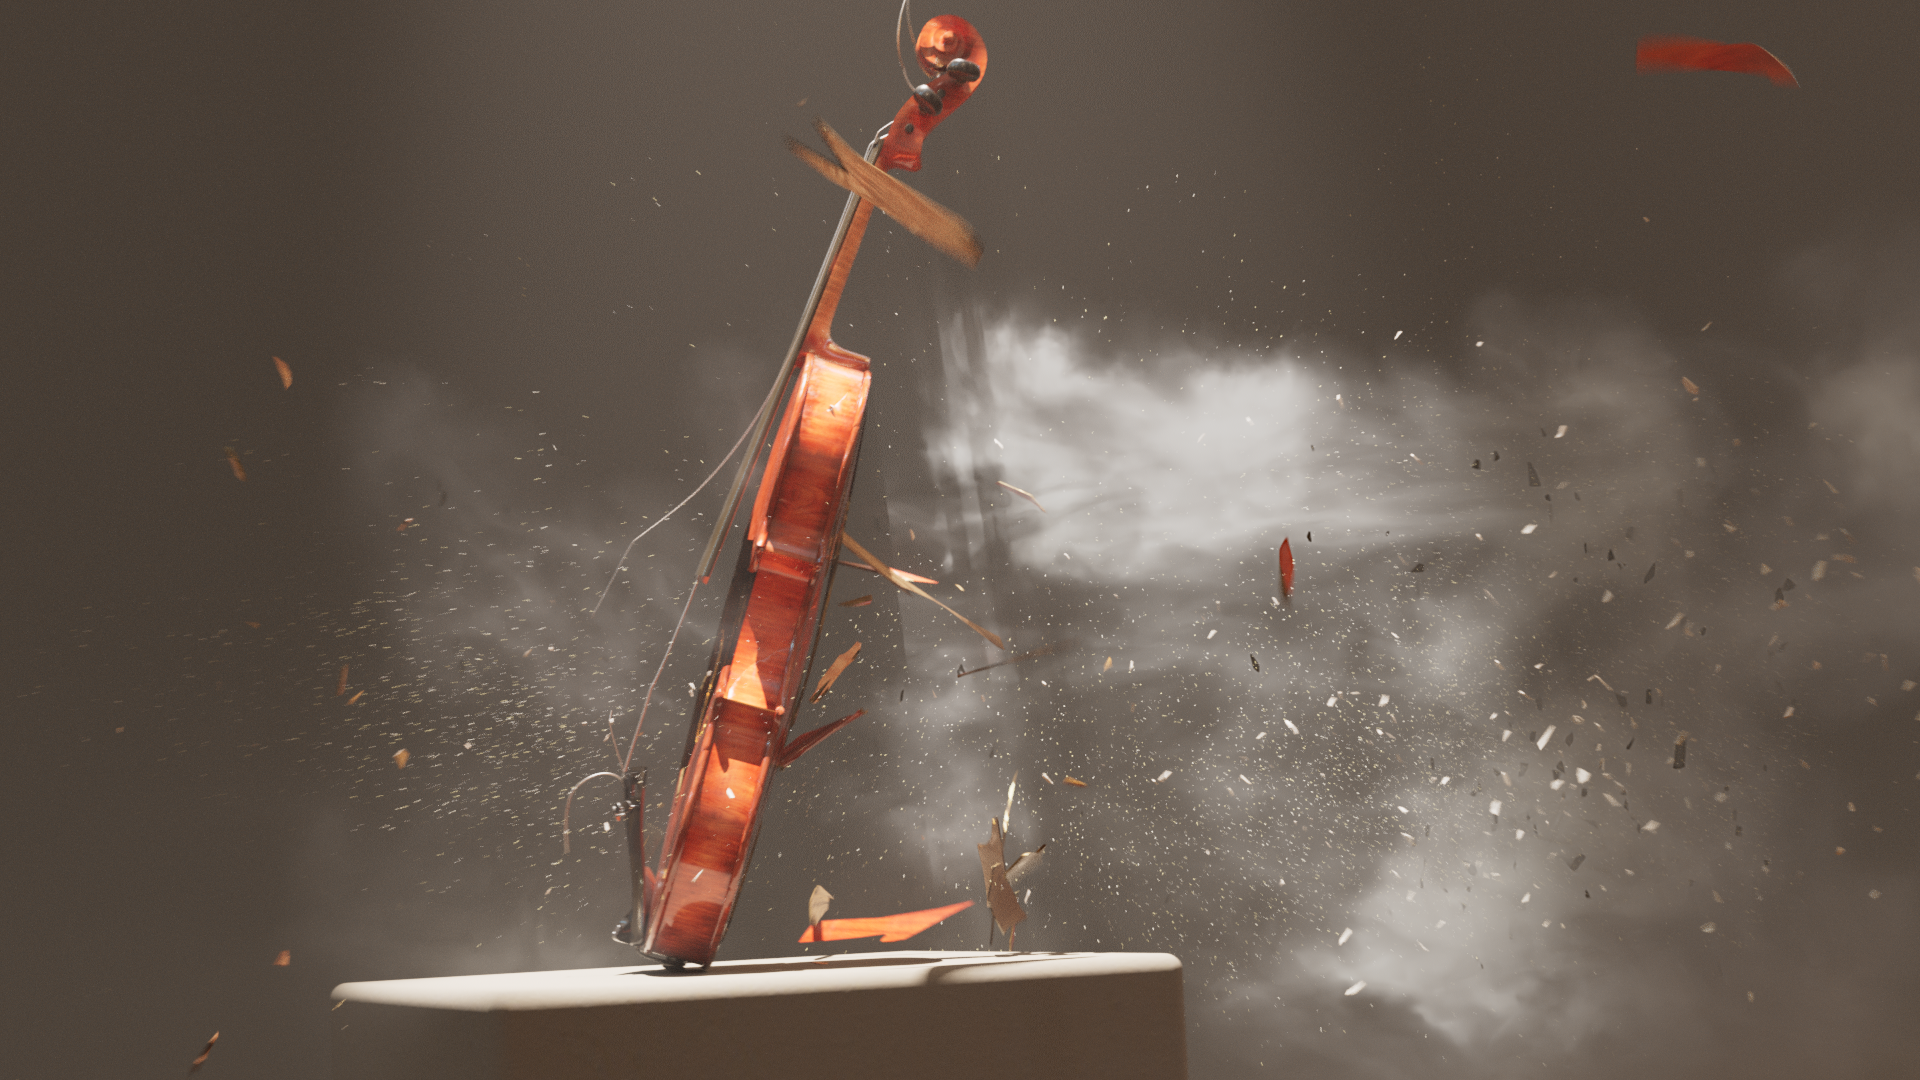
テップ 9 - レンダリング
これでようやく、シーンのレンダリング準備が整いました。
Solaris に移動し、SOP Import ノードを置き、このショットの全ての構成要素、つまり、バイオリンと弦、粉塵、パーティクル、破片、台を読み込みます。バイオリンの内側と破片の内側はいずれも外側と異なるテクスチャを適用するなど、個別のケースを考慮しながら、読み込んだオブジェクトにマテリアルをアサインします。破片はもともとバイオリンの一部なので、バイオリンのマテリアルを使い回せばよいでしょう。マテリアルの割り当てが完了したら、ライトを何灯か配置し、さらに Karma Fog Box で靄感を出します。バイオリンと粉塵、パーティクル、破片はすべて、ふたつのカメラで分けておけるよう、karmaRenderSettings で、それぞれ別のレンダーパスに設定します。karmaRenderSettings では、レンダラに Karma XPU エンジンを使用、 Motion Blur をオン、Depth of Field をオフに設定してください。あとは、 Velocity Blur を有効にすれば、ショットの再現に必要な作業は完了です。このチュートリアルが皆さんのお役に立つことを願っています。
CREATED BY

コメント
Manuko 2 ヶ月 前 |
Love this kind of walkthrough-tutorials!
Keep going!
QuantumCabbage 2 ヶ月 前 |
Great tutorial, thanks a lot! One thing I noticed: The front and back pieces of the violin are airtight, they've just got their normals reversed. That's why the RBD material fracture doesn't work. As soon one flips the normals and they are facing the right direction, the fracturing works without any issues.
alucula 1 ヶ月, 3 週間 前 |
Beautifull! Great work, Gur! :)
Please log in to leave a comment.