| On this page |
You need a fast method to apply feathers to an object’s surface or its points? If the answer is “yes”, you should try the feather scattering method. With feather scattering you can also paint and create masks to restrict the appearance of feathers to certain areas.
Basic setup 
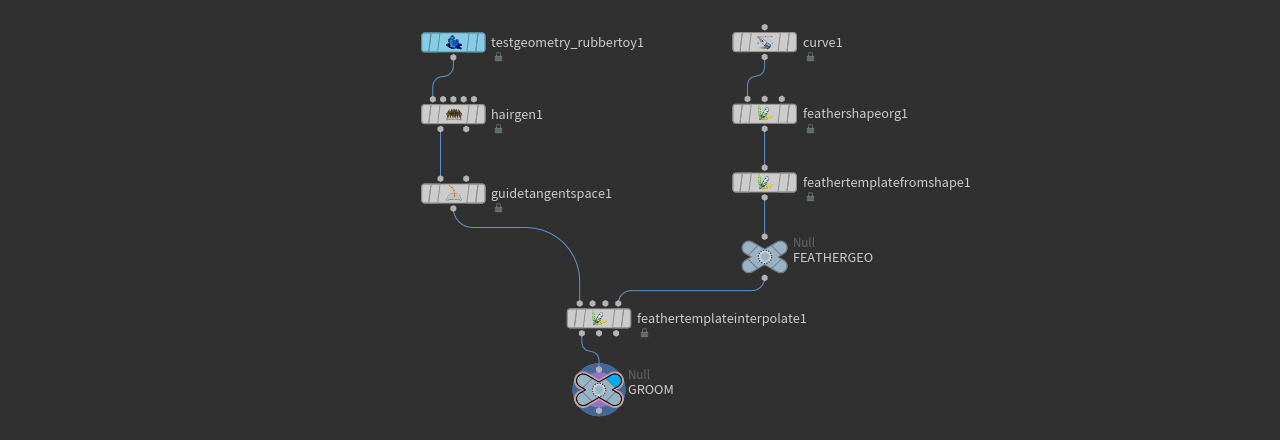
The following network is the basis for all further explanations and descriptions. As always, everything starts with a feather. Here’s a preview of the network you're going to create here.

-
On the obj level, press ⇥ Tab to open the tab menu. From there, create a
Geometry OBJ and double-click it to dive inside.
-
Open the tab menu again and choose the Feather Template tool to create a network for a basic feather. You can modify the feather’s curves or go on with the default shape.
-
Add a
Null SOP and connect its input with the output of the
Feather Template from Shape SOP. Rename the null to
FEATHERGEO.
Scatter points 
The scatter points will be the seeds for the feathers and there’s a versatile node to create those points on any surface. Before you can create the points, you need an object or a character.
-
Set Uniform Scale to
0.5to make Flippy smaller. -
Put down a
Hair Generate SOP and connect its first input with the output of the toy. This node uses the connected object’s normals to create guides. The feathers will then follow the guides.
-
On the Total Count parameter you can define the exact number of feathers. Start with a value of
5000. -
Go the Unguided Hairs section and change Length to control the size of the feathers. In later chapter you can see how to use an attribute for randomizing the parameter.
-
Add a
Guide Tangent Space SOP and connect its first input with the first output of the hair generating node. This node takes the normal direction of the guides' root points to orient the feathers correctly.
-
From the Normal Mode dropdown, choose Constant Normal Vector. This option uses the Normal Vector parameter to determine the value of the
barborientattribute. -
Turn off Normal Name and Tangent Name. They're not required and would only allocate resources.
-
Turn on Orient Name and replace the default entry with
barborient.
You won’t see any changes in the viewport when you adjust orientation. The effect of your settings will kick in when you add the feathers.
Connecting the networks 
Right now you have to separate network streams: the feather and the groom guides. The following node brings everything together and applies the feathers to the guides.
-
Lay down a
Feather Template Interpolate SOP and connect its first input with the output of the tangent space node. The fourth input is linked to the output of the
FEATHERGEOnull. -
Go to the Templates section. From the Lookup Method dropdown, choose Group. Since there’s only one feather template in this project you don’t have to specify the Template Group. The node just takes the first template it gets from its fourth input.
-
Add a
Null SOP and connect its input with the first output of the interpolate node.
-
Rename the null to
GROOM. -
Turn on the null node’s blue Display/Render flag to see the feathers.
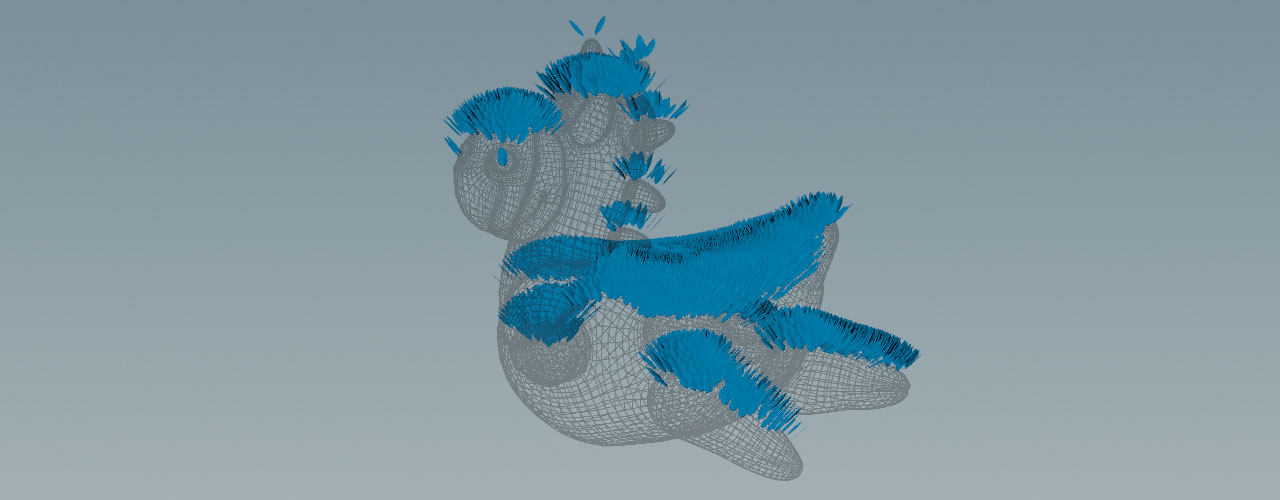
If everything is correct, you should get a result that is similar to the image below.

Colors 
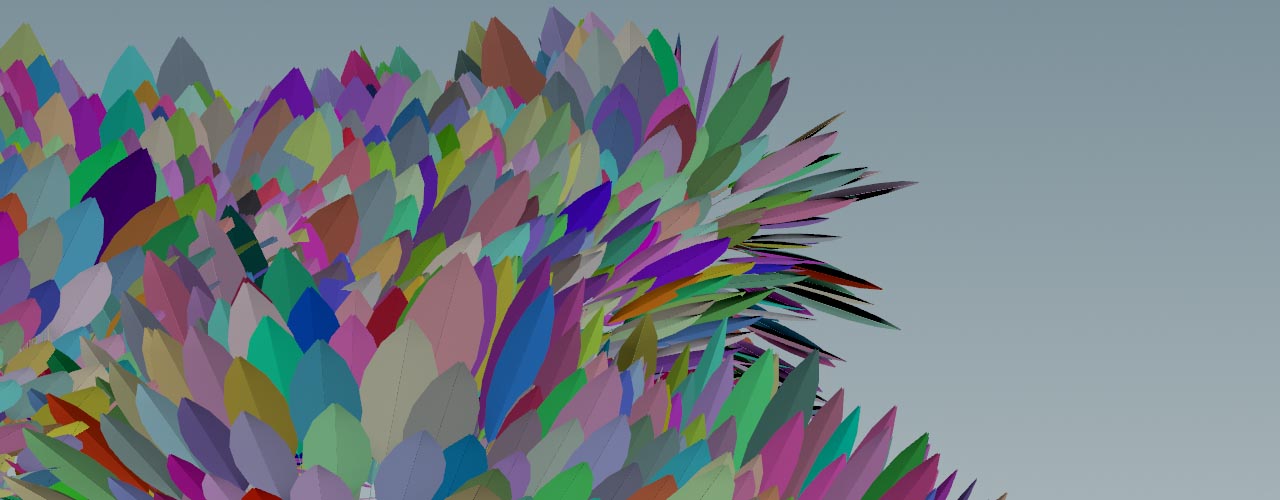
The image, directly above, looks pale and you can hardly see the feathers. Colors are a good way to differentiate the feathers visually. You can also add colors to make attributes and their values visible.
-
Put down a
Color SOP and place it between the hair gen and tangent space nodes to connect it.
-
Change Class to Primitive to color the feather objects.
-
From the Color Type dropdown, choose Random.

Masking 
The Hair Generate SOP lets you use masks to control the distribution of the scattering points and you have several possibilities explained below.
Tip
All methods, described below, are also available for custom grooms, where you apply and plant guides to your character manually through brushes or by adding feathers one by one.
Wrangle 
When you look at image you’ll notice that the feathers are placed all over the toy. You can find feathers on the eyes and nose, the bottom, the flippers, and so on. To make the feathers appear on the toy’s upside only, for example, you can use a wrangle. There you create a slope attribute together with a custom Threshold parameter (chf("threshold")) to control the distribution of the guides.
The slope attribute calculates the dot product from the vertex normals and an up vector that points into Y direction. Both vectors are normalized. The result is then fit into a range between 0 and 1 to make it more controllable. If the dot product is greater than the given Threshold, slope is set. This results in a mask.
-
Add an
Attribute Wrangle SOP and place it between the toy and the hair gen nodes to connect its first input.
-
Copy ⌃ Ctrl + C and paste ⌃ Ctrl + V the complete code snippet from below to the wrangle’s VEXPression.
-
Click the
Creates spare parameters… icon to add a custom Threshold parameter to the node’s UI. Now you can interactively adjust the value with the parameter’s slider.
vector normal = normalize(v@N);
vector up = normalize({0, 1, 0});
float threshold = chf("threshold");
float dot_product = fit(dot(normal, up), 0, 1, 0,1);
if (dot_product > threshold) {
    f@slope = dot_product;
}
-
On the Hair Generate SOP’s Distribution section, go to Density. From the associated dropdown, choose Skin Attribute.
-
For Density Attrib, enter
slope. -
Change Total Count if necessary.

Painting 
You can also paint a mask interactively directly onto the character to define, where the feathers should appear. A convenient option lets you mirror your brush strokes to accelerate the painting process. Furthermore, it’s possible to manage several attributes through one paint node.
Note
If you have followed the Wrangle or Randomizing length guides already, delete all nodes you've created there. Then press ⌃ Ctrl + ⇧ Shift + S to save your project under a new name.
-
Add an
Attribute Create SOP and place it between the rubber toy and hair generate nodes to connect it.
-
On the Name parameter, and enter
density.densityis a floating number and a point attribute. -
Put down an
Attribute Paint SOP and place it between the attribute create an hair generate nodes to connect it.
-
Open the Attributes tab and go to Attribute Name. Replace the default entry with
density. -
Click the Symmetry tab and turn on Enable Mirroring.
-
Select the paint node, hover the mouse cursor over the viewport, and press Enter to turn on the brush node.
On the Brush tab you can customize the brush, e.g. by adjusting Soft Edge. The brush itself is displayed as a red sphere in the viewport that follows the character’s surface. You can change brush size interactively with the mouse_wheel.
Keep the LMB pressed to paint your mask. Later, the feathers will appear on the brush strokes.
-
On the Hair Generate SOP, go to the Distribution section. Next to Density you can see a dropdown menu set to No Override. Change it to Skin Attribute. The default Density Attrib is
density, so you don’t have to change anything here.
When you turn on the Feather Template Interpolate SOP’s blue Display/Render flag, you will see the feathers in those areas where you've painted the mask.

Randomizing length 
In the Noise chapter you're using an Attribute Noise to drive a mask, but you can also use this node to randomize attributes, e.g. the feathers' unguidedlengthscale. When turned on. the attribute controls the Length parameter on the Hair Generate SOP.
-
Add an Attribute Noise SOP and place it (somewhere) between the rubber toy and hair generate nodes to connect it.
-
Go to Attribute Names and change the dropdown to Float, because the attribute’s value is a single floating number.
-
On the input field, replace the default
Cd(color) entry withunguidedlengthscale. -
Open the Noise Value section and change Range Values to Min/Max.
-
The associated Min Value and Max Value parameters let you define the length of the smallest and longest feathers. Try values of
0.2and2.5. -
Open the Pattern Section and decrease Element Size to
0.01. This parameter is the resolution if noise. With a value of1, for example, the noise elements are huge and you’ll hardly see any differences in length.
Connecting the attribute 
Now you have an attribute to control the Length parameter on a per-feather basis.
-
On the Hair Generate SOP’s Unguided Section, go to Length. From the associated dropdown menu, choose Skin Attribute. The Length Attrib has the correct entry already and you don’t have to change anything.
-
With Length you can change the global length of the feather: the attributes values are multiplied with the parameter value.

Brushing and simulating 
Right now, the feathers follow the guides created by the Hair Generate SOP, but in most cases you want to brush them to get a certain look. For this task, you can use a Guide Groom SOP. The Working with brushes and tools chapter tells you how to groom your feathers to achieve exactly the look you need.
All tools and workflows in Houdini’s feather system are interchangeable. This means that the grooming tools will work with the scattering method and vice versa. This also applies to other techniques like masking, length randomization or viewport acceleration.
You can also use Houdini’s versatile Vellum technology to simulate effects like gravity, wind, or turbulence.
Viewport acceleration 
The following tip is not only interesting for scattering, but for grooming in general. With feathers you can easily create several millions of points and curves. Displaying such a huge amount of data can be challenging, esp. with not so up-to-date hardware. One method is to branch out a network stream for previewing your groom. In this example, the new part of the network is added after the Feather Template Interpolate SOP.

-
Add a
Feather Resample SOP and connect its first input with the first output of the template interpolate node.
-
On the Shaft section, turn on Resample Shaft.
-
Decrease Segments to
10or smaller. This will drastically decrease the number of barbs. -
If your feather template has lots of barbs, you can also turn on Resample Barbs and set Barb Segments to
3.The viewport is responsive again, but now the feathers are hardly visible anymore.
-
To see the groom again, lay down a
Feather Visualize SOP and connect its first input with the first output of the resample node.
-
From the Barb Mode dropdown, choose Surface.
-
Turn on the display node’s blue Display/Render flag.
You now have a low-res version of your groom, displayed as surfaces. Just a few figures:
For a scene with 15,000 feathers, playback rate on an NVidia GeForce 1080 is 2 fps for the GROOM node. The same scene reaches 100 fps when the Feather Visualize SOP’s Display/Render flag is turned on.