| On this page |
The Houdini Engine is officially supported on Windows and macOS. You can unoficially install Houdini Engine using Linux.
Minimum Requirements:
-
Windows 10 or macOS 10.12 or Linux (compatible versions with both Houdini and Unity)
-
Latest Unity LTS release
-
Houdini or Houdini Engine 18.0 or newer
Installing Houdini Engine 
These instructions are for Windows, MacOS, and Linux.
Windows
Mac
Linux
-
Install the launcher if not already installed.
-
Open the launcher.
-
Select Houdini ▸ Install. If you are not already logged in the web browser will pop open asking you to login to your SideFX account. The launcher will move to the front once the login process has completed.
-
In the
Choose a Version to Installselect either Production Build or Daily Build depending on your desired build version. If you need to select a specific version then selectChoose Another Versionand install the version desired. -
In the Preferences pop-up window, turn on Unity Plug-in and click install.
-
Create a Plugins folder in your Unity project’s Assets folder.
-
The default location is different for each OS:
-
For Windows: \Users\yourusername\yourproject.
-
For Mac: \Documents\yourproject.
-
For Linux: \opt\hfsX.Y.Z\engine\unity. X.Y.Z means your Houdini Version.
-
-
-
Copy the HoudiniEngineUnity folder into your project’s Assets\Plugins folder.
-
If you previously installed the plugin, make sure to delete the previous Assets\Plugins\HoudiniEngineUnity folder.
-
-
Open Unity, the content should automatically import the necessary files.
-
Restart Unity.
Verify plug-in in Unity 
Once you install the Houdini Engine, verify the plug-in is loaded properly.
-
# In the Main Menu, you can see Houdini Engine as a new item.
-
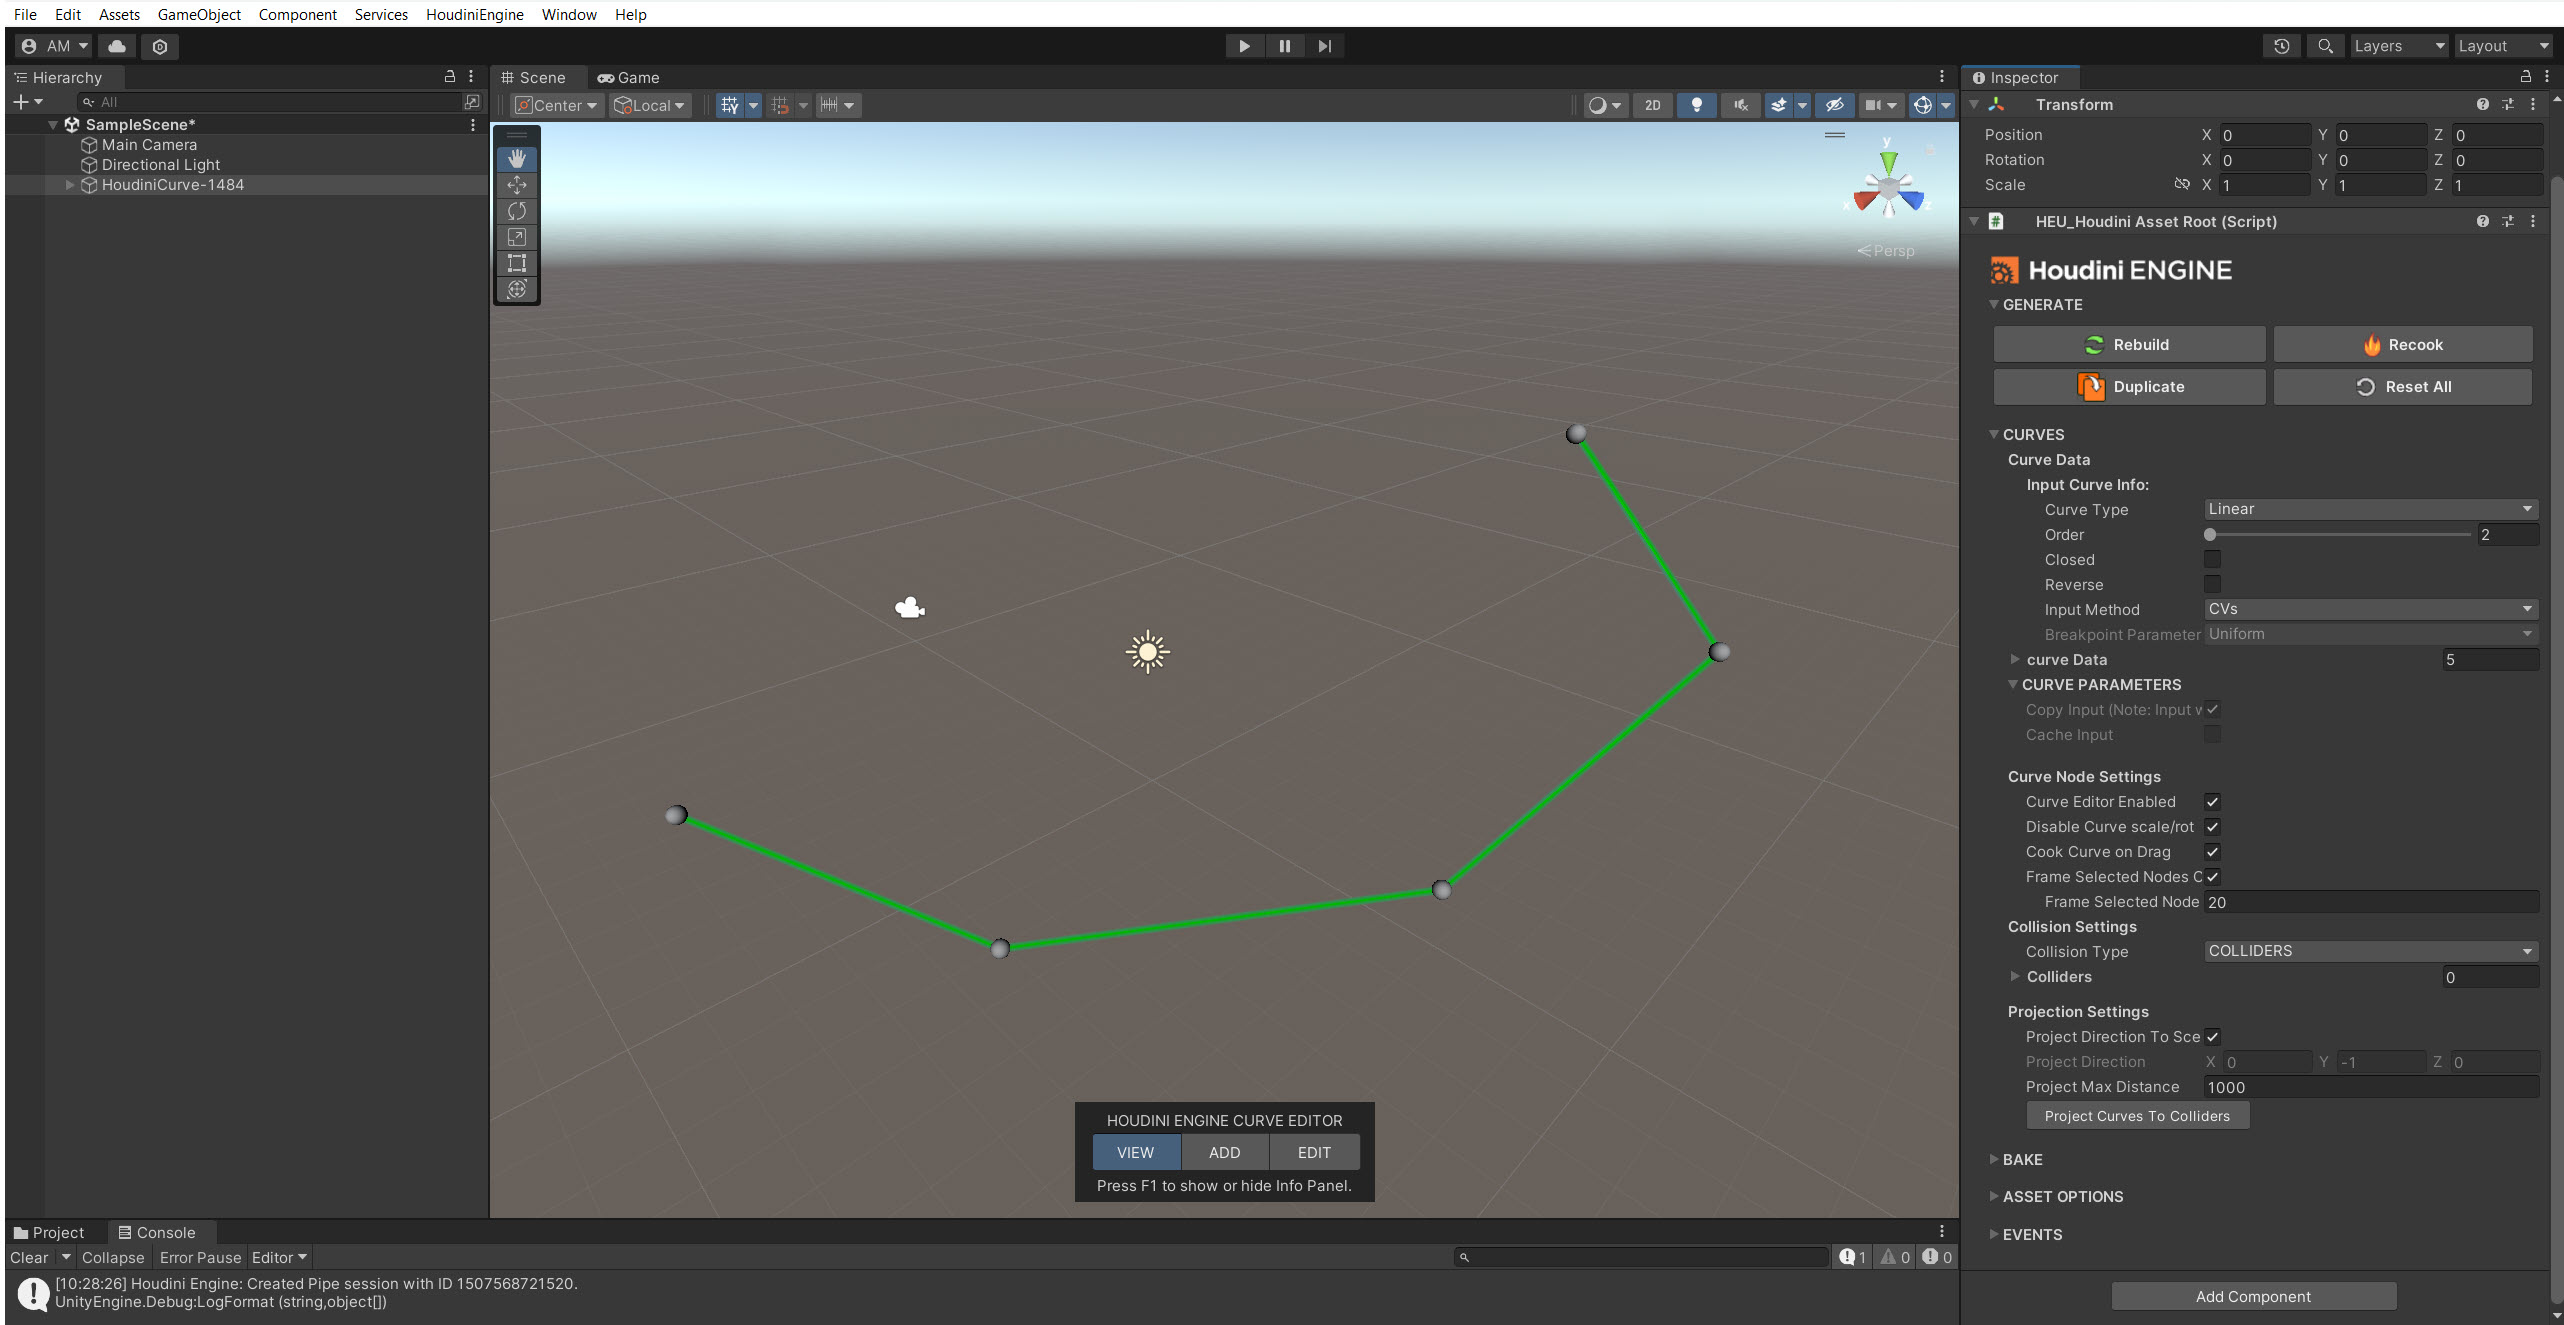
Select HoudiniEngine ▸ New Node ▸ Curve.
If successfully installed, a new GameObject will be created in the Hierarchy window and automatically selected. The Scene window will display the new Curve Editor, and the Inspector will display the new interface for working with HDAs. See image below:

Troubleshooting 
If there’s no HoudiniEngine in the main menu or the curve doesn’t create, check the Unity Console Window located in Window ▸ Panel ▸ Console for any errors and log messages.
Errors about not finding Houdini or Houdini Engine installation or version mismatch:
-
Check the correct version of Houdini or Houdini Engine is installed.
-
If the Houdini or plug-in folder has moved at any point, t he plug-in won’t be able to connect with Houdini.
-
Delete the Assets/Plugins/HoudiniEngineUnity folder, reinstall Houdini, then restart Unity, and finally reimport the plug-in package from the instructions.
Errors about sessions issues and there’s correct version of Houdini and Houdini Engine.
-
Restart the sesssion from the main menu in HoudiniEngine ▸ Session ▸ Restart Session.
Upgrading the Plugin 
If you have an older version of the plug-in in your Unity project, it’s recommended to have a clean upgrade:
-
Close Unity.
-
Re-open unity and open a new empty scene
-
A non-empty scene might cause asset references to be lost when upgrading
-
-
Delete the folder within your project Assets/Plugins/HoudiniEngineUnity
-
Shut down Unity (this ensures that any Houdini Engine sessions are closed)
-
Re-open Unity and open a new empty scene (note: a non-empty scene might cause asset references to be lost when upgrading)
-
Delete the following folder from within Unity: Assets/Plugins/HoudiniEngineUnity
-
From the main menu select Assets ▸ Import Package ▸ Custom Package.
-
Select the
HoudiniEngineUnity.unitypackage. The default location is \Side Effects Software\Houdini Engine\Unity\X.Y.Z.-
X.Y.Z means your Houdini Version.
-
-
Select Import.
-
It should install the plug-in into your project’s folder Assets/Plugins/HoudiniEngineUnity.
-
-
Restart Unity.