| On this page |
Overview 
This SOP constrains and aligns an ![]() RBD Car Rig along a path while adjusting the constraint geometry’s attributes to match its intended steering and speed. It can optionally stick the vehicle to a collision ground, turn and spin the wheels, adjust the wheels and chassis to compensate for the suspensions, add drift and overshoot, while allowing for manual adjustments to be made.
RBD Car Rig along a path while adjusting the constraint geometry’s attributes to match its intended steering and speed. It can optionally stick the vehicle to a collision ground, turn and spin the wheels, adjust the wheels and chassis to compensate for the suspensions, add drift and overshoot, while allowing for manual adjustments to be made.
This node supports the SOP and DOP contexts. In SOPs it behaves as an animation tool, and DOPs it can be used in a ![]() SOP Solver DOP to drive the constraint attributes and target velocity on the RBD pieces.
SOP Solver DOP to drive the constraint attributes and target velocity on the RBD pieces.
Understanding Path Types 
Animation mode
Instead of drawing a path for the curve to follow, if you had animated the car itself upstream (with an RBD Transform SOP), you can use that animation as the input. The ![]() RBD Car Follow Path node will build a path by evaluating that animation over the frame range. You would typically choose this option if you already have some animation you're bringing in and want to drive the dynamic simulation of what the car should be following. This option lets you bring in the animation from elsewhere and get that into the system.
RBD Car Follow Path node will build a path by evaluating that animation over the frame range. You would typically choose this option if you already have some animation you're bringing in and want to drive the dynamic simulation of what the car should be following. This option lets you bring in the animation from elsewhere and get that into the system.
Note
Both the high-res and low-res proxy geometry have to be animated together. The ![]() RBD Car Follow Path node expects them to be in sync before it starts doing any additional motion on top of that. You can achieve this by using an RBD Transform SOP to keyframe the animation, instead of a regular
RBD Car Follow Path node expects them to be in sync before it starts doing any additional motion on top of that. You can achieve this by using an RBD Transform SOP to keyframe the animation, instead of a regular ![]() Transform SOP.
Transform SOP.
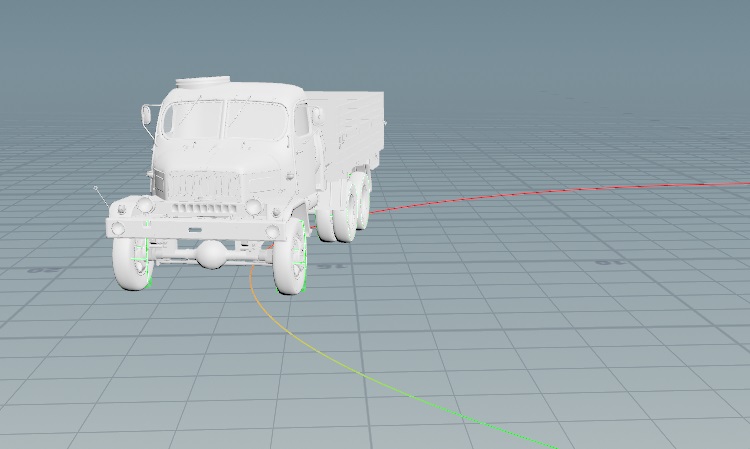
Curve mode
This mode is the more likely use case, as it allows you to draw a curve and make the car rig follow it. It’s best to use a nurbs or bezier curve, since it will give your car some smooth motion to follow.
Once you have your car rig set up, draw a ![]() Curve in the viewport and wire it into the fourth input of the
Curve in the viewport and wire it into the fourth input of the ![]() RBD Car Follow Path node. You can then use the Curve Position parameter to keyframe points along the curve to control how the car moves along it. It will animate between 0 to 1 along the length of the curve, which represents the frame range.
RBD Car Follow Path node. You can then use the Curve Position parameter to keyframe points along the curve to control how the car moves along it. It will animate between 0 to 1 along the length of the curve, which represents the frame range.
Visualizers 
The default Visualization of the curve is the Speed that the vehicle is moving relative to the min and max speed limits specified by the Speed color ramp parameter on the ![]() RBD Car Rig.
RBD Car Rig.
You can also change the Visualization to Excess Speed, which shows areas along the path where the vehicle animation exceeds either the maximum turning speed or the vehicles maximum speed defined by the ![]() RBD Car Rig SOP. This is useful for DOPs, as it can indicate areas where high speeds will cause the vehicle to veer away from the curve and how realistic the animation will be.
RBD Car Rig SOP. This is useful for DOPs, as it can indicate areas where high speeds will cause the vehicle to veer away from the curve and how realistic the animation will be.
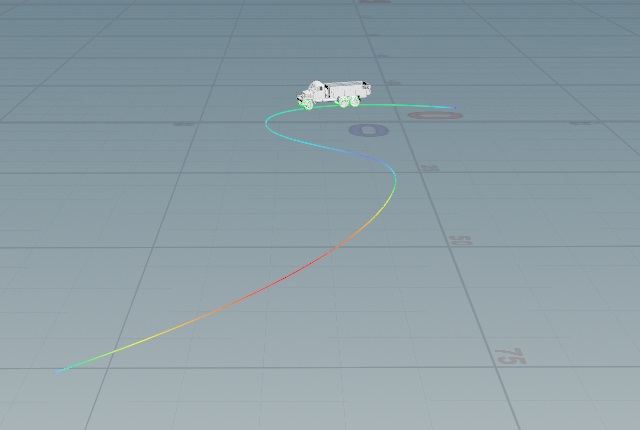 Visualizer showing Speed along the path
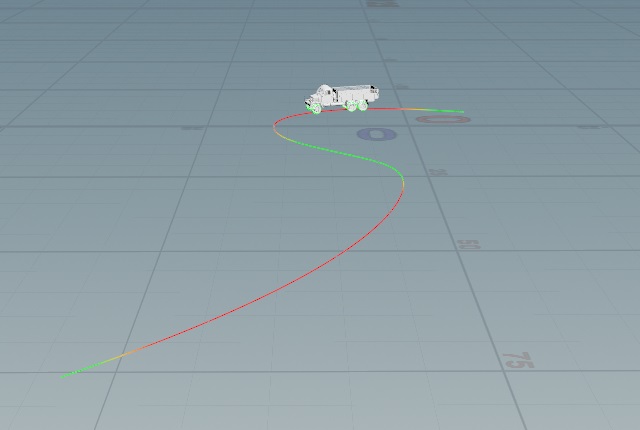 Visualizer showing Excess Speed along the path
Creating realistic motion 
Body of the vehicle 
There are parameters on the ![]() RBD Car Follow Path node that you can use to achieve a more realistic look without going into dynamics. For example, you can use the Drift parameter to control the amount of back sliding when the car turns a corner. This is dependent on the vehicle’s speed and the maximum turning speed along the path. You can also use the Overshoot parameter when drifting to allow the vehicle to move away from the path. Setting up Banking is another useful way to add realistic motion to a vehicle as it makes a turn with high speed, causing the outer wheels' suspension to compress and the vehicle to lean under the weight of the vehicle.
RBD Car Follow Path node that you can use to achieve a more realistic look without going into dynamics. For example, you can use the Drift parameter to control the amount of back sliding when the car turns a corner. This is dependent on the vehicle’s speed and the maximum turning speed along the path. You can also use the Overshoot parameter when drifting to allow the vehicle to move away from the path. Setting up Banking is another useful way to add realistic motion to a vehicle as it makes a turn with high speed, causing the outer wheels' suspension to compress and the vehicle to lean under the weight of the vehicle.
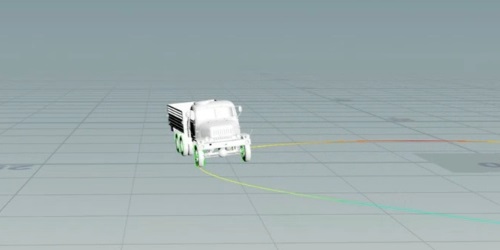 With Banking
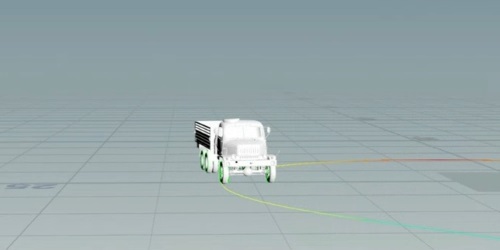 Without Banking
Wheels and suspension 
Turning on the Animate Wheels and Suspensions parameter allows for the animation of wheels turning and spinning as the vehicle travels along the path, and adjusts the wheel and body positions to compensate for wheel suspensions when in contact with the ground. If this isn’t turned on, the wheels will remain straight as the vehicle drives along the path and turns corners. However if it’s turned on, the wheels will be steered for you based on the settings in the ![]() RBD Car Rig as you go around corners.
RBD Car Rig as you go around corners.
 Animate Wheels and Suspensions turned off
 Animate Wheels and Suspensions turned on
This also takes into account all of the configured wheel and suspension parameters from the ![]() RBD Car Rig, such as Ackermann Steering, Camber, Caster Angle, Tire Friction, Tire Bounce, Wheel Wobble, etc.
RBD Car Rig, such as Ackermann Steering, Camber, Caster Angle, Tire Friction, Tire Bounce, Wheel Wobble, etc.
Additionally, you have the option to override the steering with the Steer parameter if you want to animate the the wheels turning more dramatically than they would naturally with the path following. You can adjust the wheel direction by steering left (-1) to right (1). The Blend parameter lets you blend between the override and the default steering from the path following.
If you're using a Height Field instead of a Ground Plane, turning on the parameters in the Dynamic Springs (Suspensions) section will improve the look of your simulation. These controls will add some springiness to the animated vehicle’s position and orientation, reducing some jerkiness that results from driving over rougher terrain.
DOP level 
When using the Quick Setups dropdown menu on the ![]() RBD Car Rig SOP, there’s an option called Dynamic Follow Path that adds an
RBD Car Rig SOP, there’s an option called Dynamic Follow Path that adds an ![]() RBD Car Follow Path SOP, which shows you a preview at the SOP level of what the motion will be. All of the parameters are channel referenced with the DOP level
RBD Car Follow Path SOP, which shows you a preview at the SOP level of what the motion will be. All of the parameters are channel referenced with the DOP level ![]() RBD Car Follow Path node. This allows you to do almost all of the parameter tweaking at the SOP level. You only need to dive into the DOP if you want to edit any of the dynamics specific parameters.
RBD Car Follow Path node. This allows you to do almost all of the parameter tweaking at the SOP level. You only need to dive into the DOP if you want to edit any of the dynamics specific parameters.
Some of the dynamics specific parameters include the Response Time, which is how quickly it starts trying to turn the steering wheels with the motor constraints in DOPs to try to follow along with the target curve. Air Resistance controls how important it is to match the animated position and orientation along the path. Higher values will result in the vehicle matching its target velocity faster. Setting this value too high can cause the resulting dynamics to feel unnatural. Respect Vehicle and Turning Maximum Speed enforces speed limits on the vehicle, which should result in a more physically plausible simulation while allowing the vehicle to deviate from the animation. The default values for the DOP level parameters usually have a good balance between driving the car with the motors and following the path in a smooth way.
This quick setup also turns on the Solve on Creation Frame checkbox on the ![]() RBD Bullet Solver. This makes sure that on the the very first frame, it moves the car over to where the start frame of the curve is. For example, if the original car is at the origin, it won’t move anywhere on frame 1. This ensures the car is in the right place when the simulation begins.
RBD Bullet Solver. This makes sure that on the the very first frame, it moves the car over to where the start frame of the curve is. For example, if the original car is at the origin, it won’t move anywhere on frame 1. This ensures the car is in the right place when the simulation begins.