THE COMPLETE A-Z TERRAIN HANDBOOK: ND EDITION
Made in Houdini 19 by Nikola Damjanov
This tutorial series covers everything that you will likely ever need, to understanding how to create terrains in Houdini. Starting from foundation layer of HF nodes and their functions, to using generated masks to create textures in COPs, to scattering geometry using said-masks, to applying and rendering them in a LOPnet with Karma.
Choose Your Own Biome Adventure!
Yes, of course this is not an actual book. But how you choose to navigate this tutorial series depends entirely on you. You can choose to watch it all in one continuous go.
Or you may choose to skip to the ice, fiery or dusty biome and see how that specific terrain was created.
Follow the colour trail!
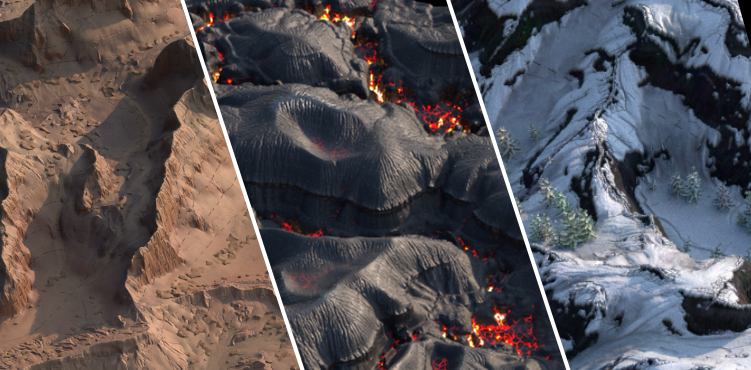
Dusty Biome
Fiery Biome
Icy Biome
If you are unfamiliar with the heightfield tools in Houdini, then at least you should watch the dusty biome in order. After which, you can jump to the fiery or icy biomes to see how those were achieved. They will have the colour tags as seen above, so that will guide you to watch it in a non-linear version if you should wish to. Otherwise, I hope that you will find my general workflow as well as tips and tricks useful. If you have any tips and tricks of your own that you would like to share, I would love to see and learn from it as well!
Here we go!
TOOLS LIST
The various tools that will be covered in this video tutorial series.
COPs and LOPs are indeed contexts, so we will be looking at the compositing and layout nodes available in their respective contexts.
Heightfields![]()
Labs![]()
COPS![]()
LOPS![]()
01 INTRODUCTION | Brief Overview
What is this collection of videos going to be about? Yeah download the project file on that orange button above and crack open a Houdini session! This is basically a braindump of how I make environments, from start to end.
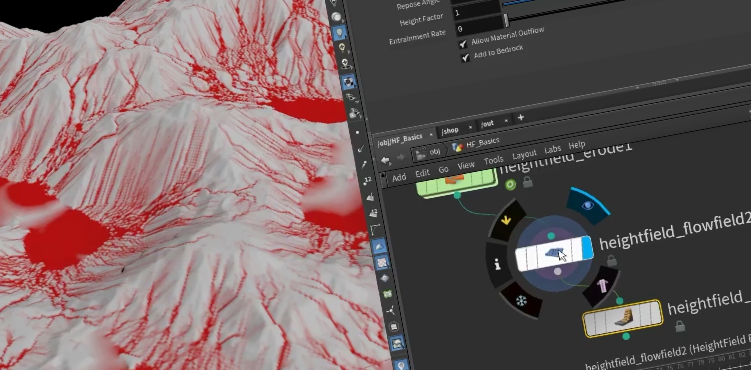
02 HEIGHTFIELDS | Basics
Fresh to terrain tools in Houdini? Here, I go over the main heightfield nodes that will be used to create our biomes. In the end, we are working with noises and masks, but we need to know how to control those.
DUSTY BIOME
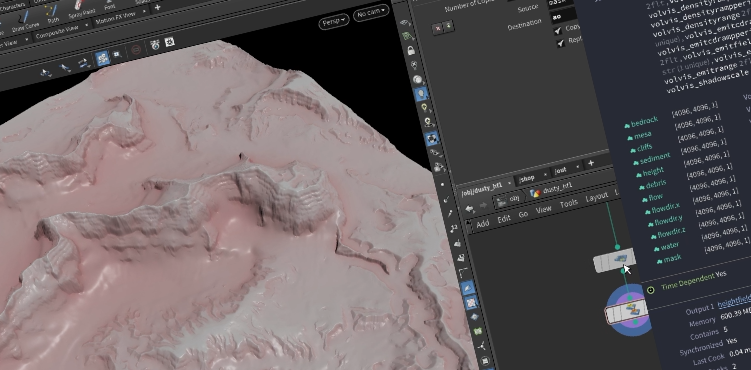
03 | Making the Heightfield
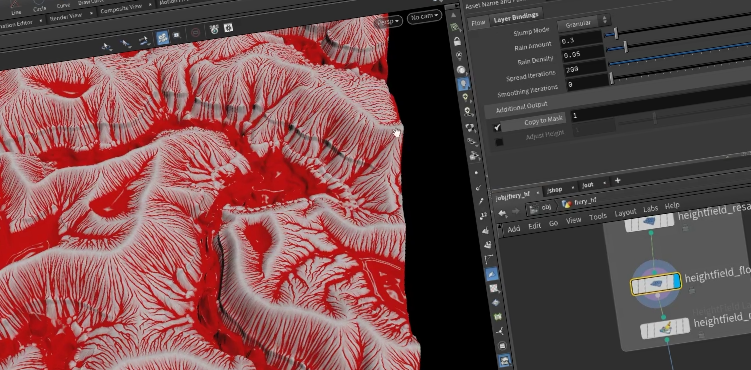
We start with drawing some curves to define our mountain ranges and then gradually build up all the ridges and terrace details. We will also prepare the masks, which will be important when we go to the texturing step.
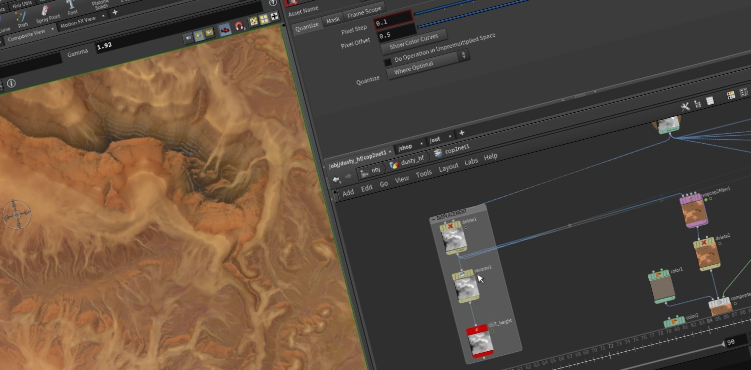
04 | Textures in COPs
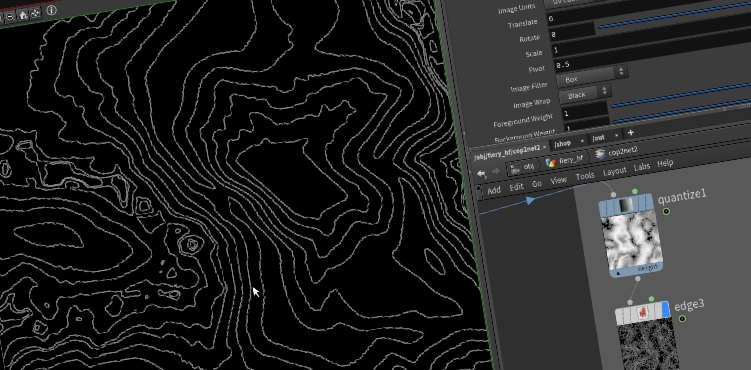
The beauty about heightfield masks is that you can use them for not only sculpting your terrain, but you can use same masks to shade it after, without any additional work. We go to into COPs context, pull in our masks and use composite nodes. All of them. We also add some extra cartography details.
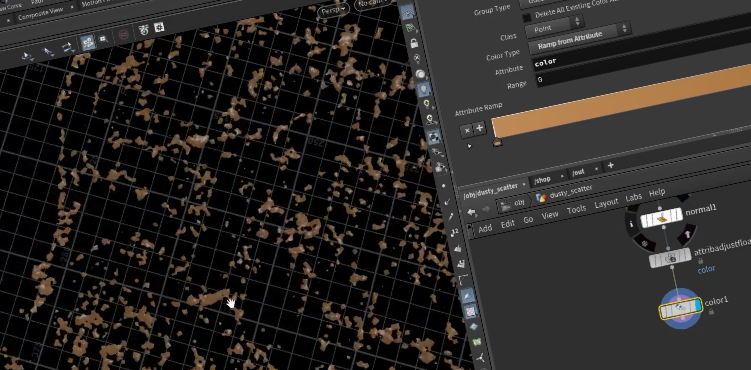
05 | Scattered Details
Now we will dress our terrain with rocks. We will do the initial scatter with a cube. Yes, with the humble cube, you will be surprised how you can create some effective shapes, especially after some VDB processing!
FIERY BIOME
06 | HF Breakdown
Heightfields are limited to 2D axis, but I will show you a trick in which you can get overhang details! We do some post-processing and keep the details to the lava bits, but you can at least keep this trick in the bag and know that you can get interesting results from tuning the noise types and settings!
07 | COPs Texture Breakdown
Now we will colour the lava rocks using the same methods of grabbing masks into COPs and compositing colours over each other. Be sure to have SideFX Labs installed, if you want to generate colours quickly (like from reference images) using Sample Screen Colours.
ICY BIOME
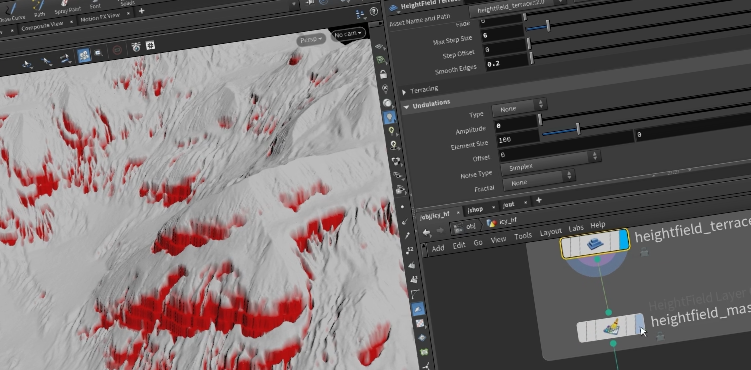
08 | HF Breakdown
We're going to make some crunchy snow, push some terrace cliffside details out - and of couse we'll do the usual prep work of writing out masks, which we're going to plug into COPs to generate displacements, snow, and some hint of colour.
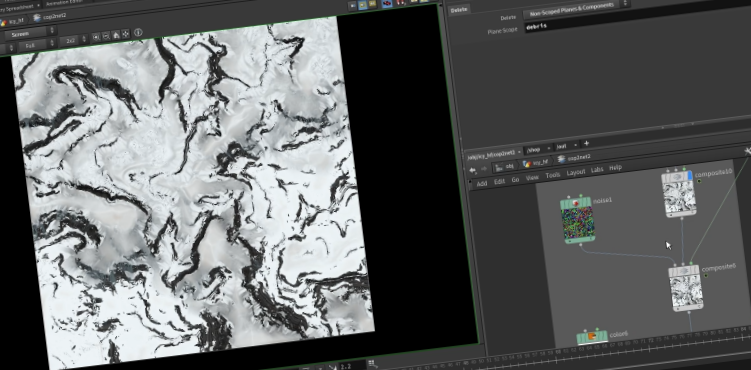
09 | COPs Texture Breakdown
Nothing really new here, if you didn't already watch the Dusty/Fiery biome parts. If you haven't, then hey - we're going to use VOP COP2 Filter, Composite, Color, Levels, Noise and a few more nodes in the COPs context to generate our textures. We stay in Houdini and do it all here!
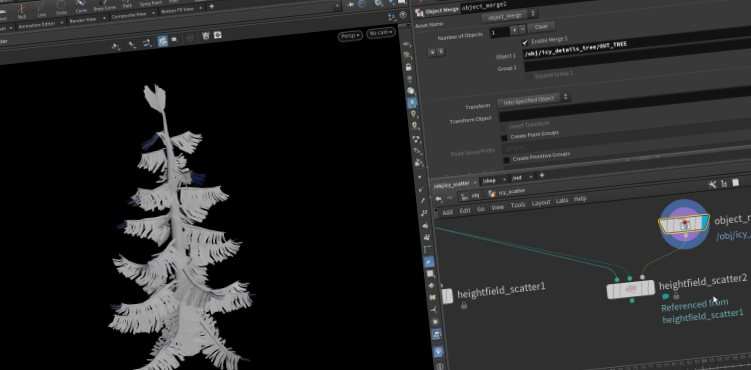
10 | Scattered Trees
A sprinkle of a small forest of trees, which we're going to generate the base tree, using the Labs Tree tool. We'll prepare some simple UVs for it and then do the actual scattering across our icy terrain using... yes of course, you guessed it, masks.
SHADERS & RENDERING
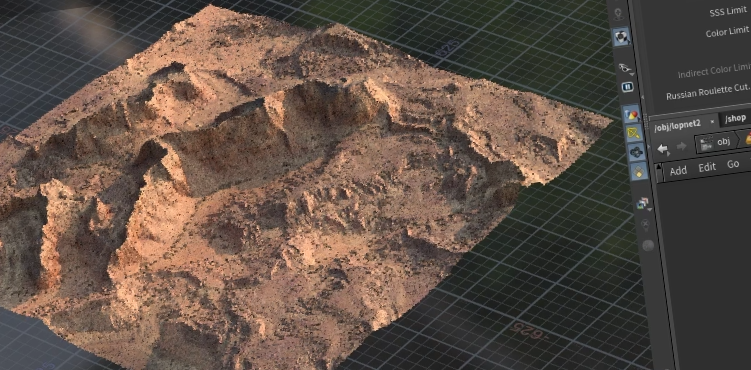
11 | Dusty Biome
So, the final part is to prep a piece of geometry with UVs, on which we will apply all the textures we generated for it. Since we are going to be using a displacement map, it'll just be a grid that we create. And yes, we will take this and the scattered rocks into LOPs and assemble our textures/materials, to render out some crunchy sharp pixels in Karma.
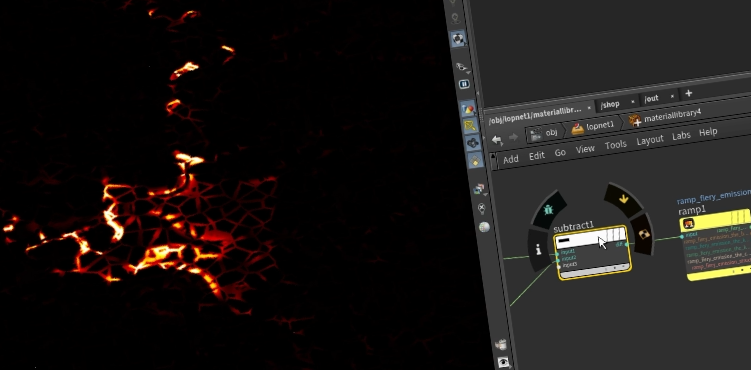
12 | Fiery Biome
We will run through the setup which is the same as I used for the Dusty Biome. If you want to see step-by-step, then hop back to that video. We look at the material network for the rock and lava, and do some final colour adjustments to our texture maps. Just final tweaks to get it a bit tighter with contrasts and stuff like this.

13 | Icy Biome
We use just a grid with UVs, on which we will apply our displacement map to displace the geometry with. We grab also the trees and scatter them in LOPs, using the Copy to Points Instance LOP. Yep, we're still using the scattered points we generated previously in SOP context. Let's put it all together and do the final tweaks, while looking at Karma in the viewport.