Overview
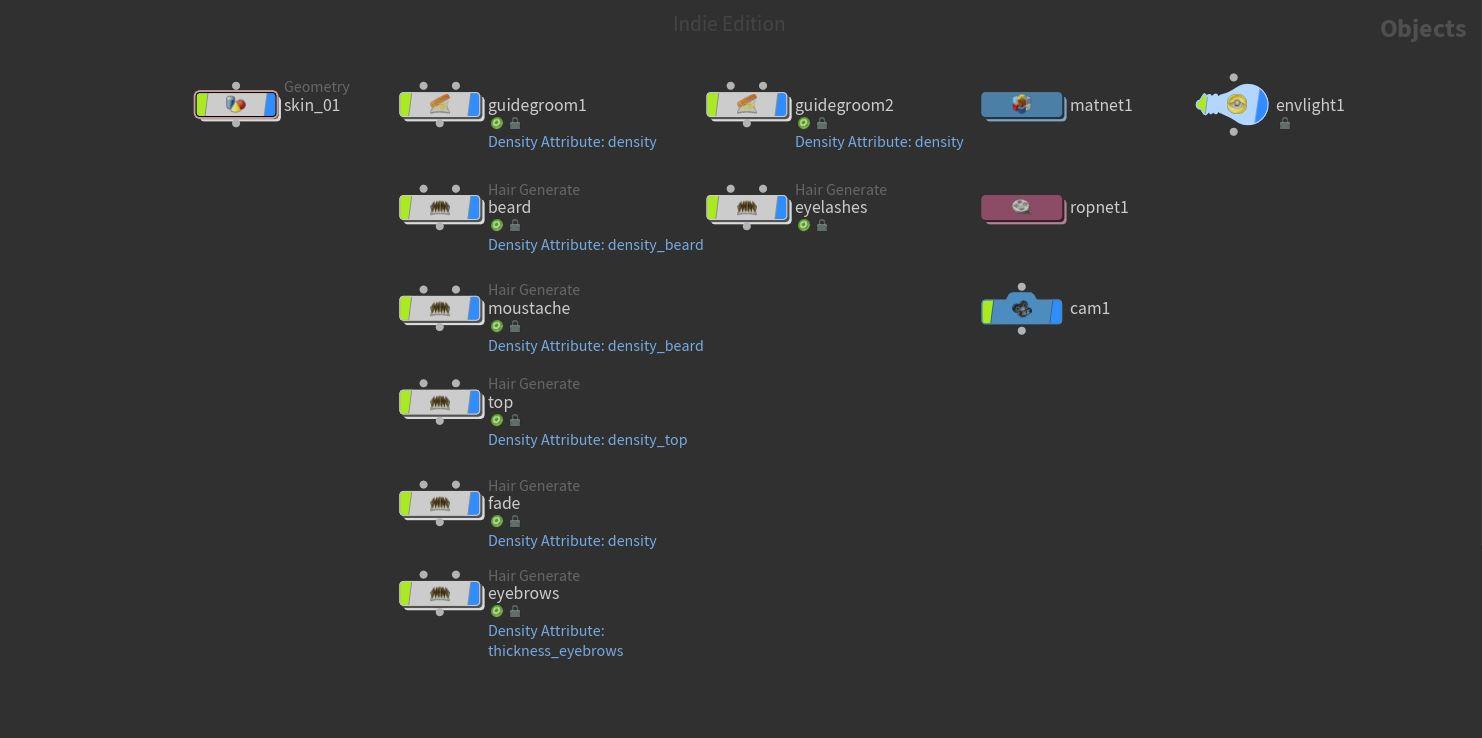
The final setup will follow the image above and is broken up into these primary elements:
- Skin Object, which contains our skin geometry and any modifications it will require for the grooming process, as well as any of our master groom attributes.
- Guide groom 1, which is the primary guide grooming node that houses the majority of the guides except for the eyelashes, which fall into guide groom 2.
- Hair Gen objects for each group created in the guide groom objects.
- Magnet for materials
- Camera and ROP net for Mantra Render
- Basic environment light containing a simple HDRI
Skin Setup
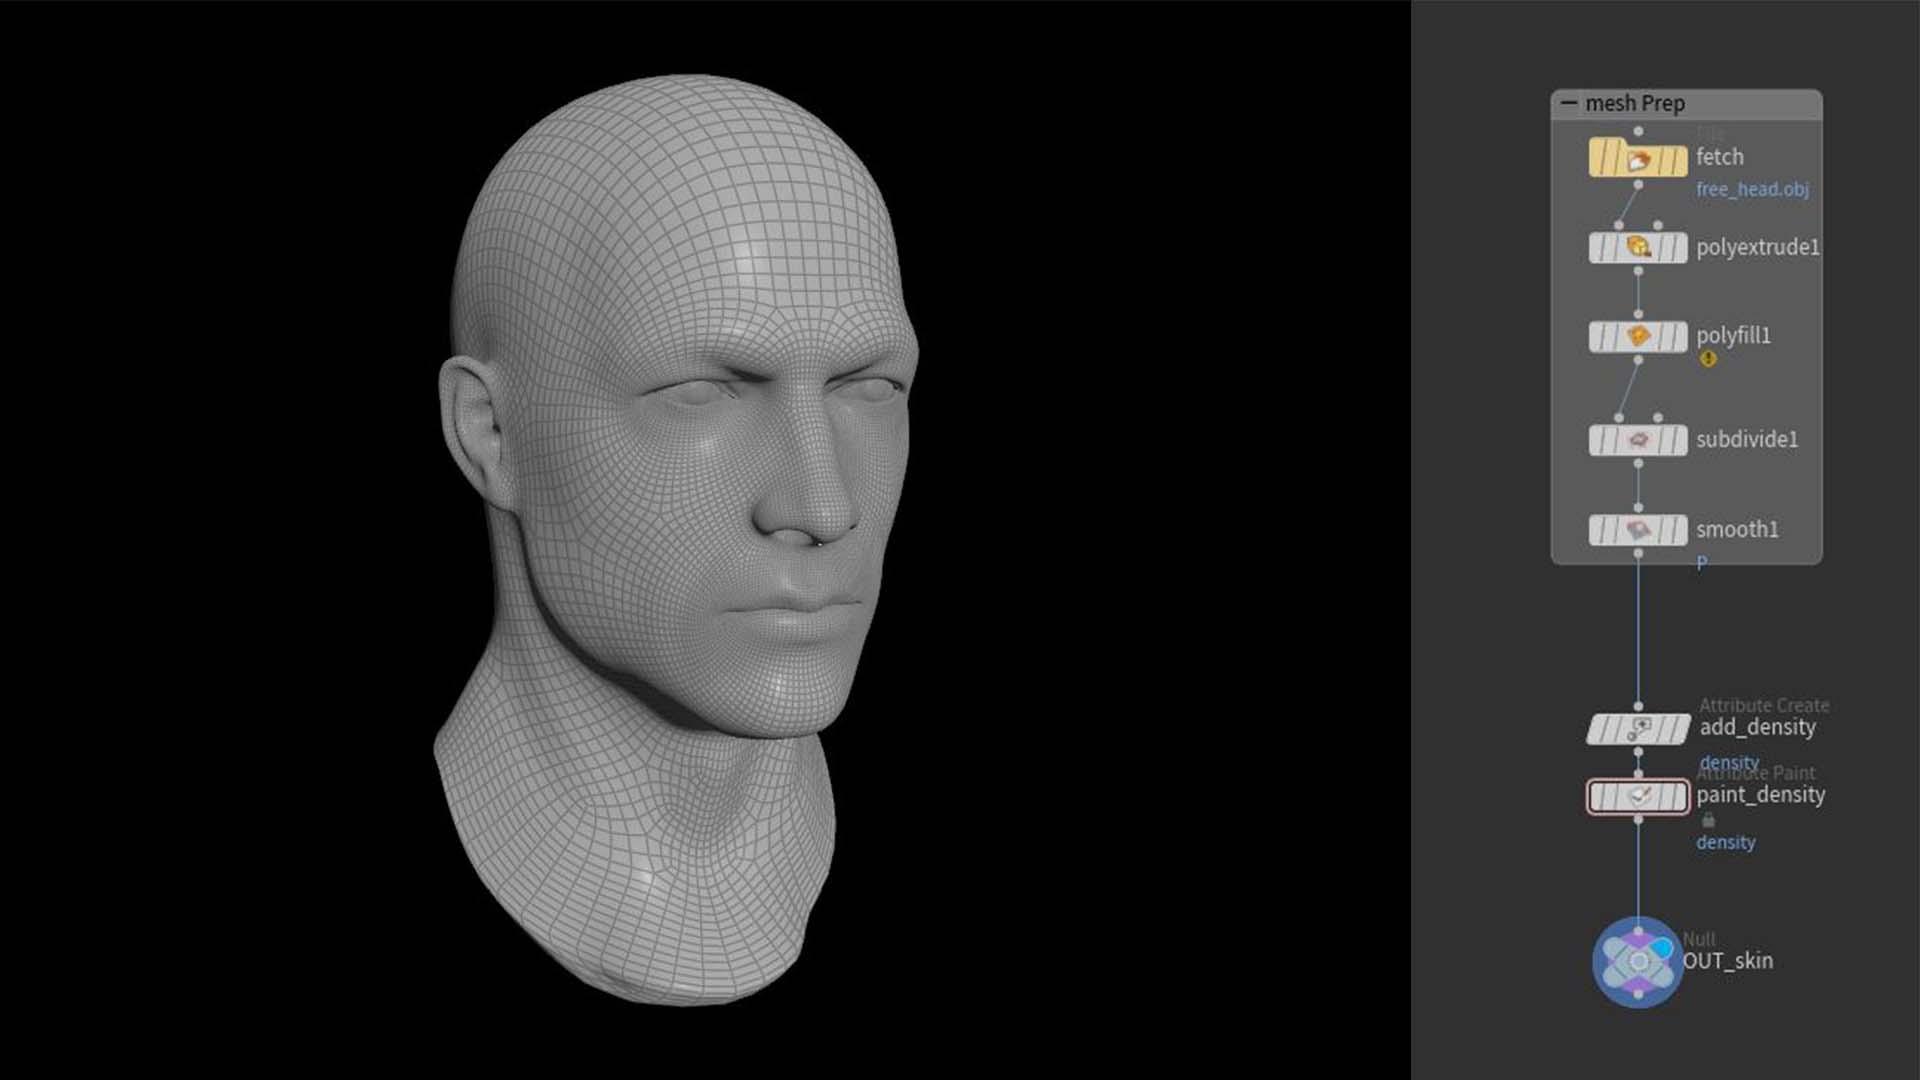
The Skin Object will be where the skin geometry for the groom is set up and handled as well as where the guide skin attributes will be housed. The chain consists of a file node to fetch the geometry, this may also be an Alembic or an FBX import file.
A Poly Extrude node is used to pull out the base of the neck slightly, and a PolyFill node to seal the hole in the neck. This is to allow for a solid volume for the internal VDB process the guide groom uses.
Use subdivision if you need to achieve a higher resolution mesh to assist with a more detailed attribute painting process, the OpenSubdiv Bilinear algorithm works well, but you should experiment with your mesh to determine which results in the best detail/form retention post subdivide.
Lastly, smooth out to correct any faceting from the subdivision. Place down a Null named OUT_skin, this is the Null we will be linking to the guide groom, above which the attributes we paint will be kept.
Attribute Painting
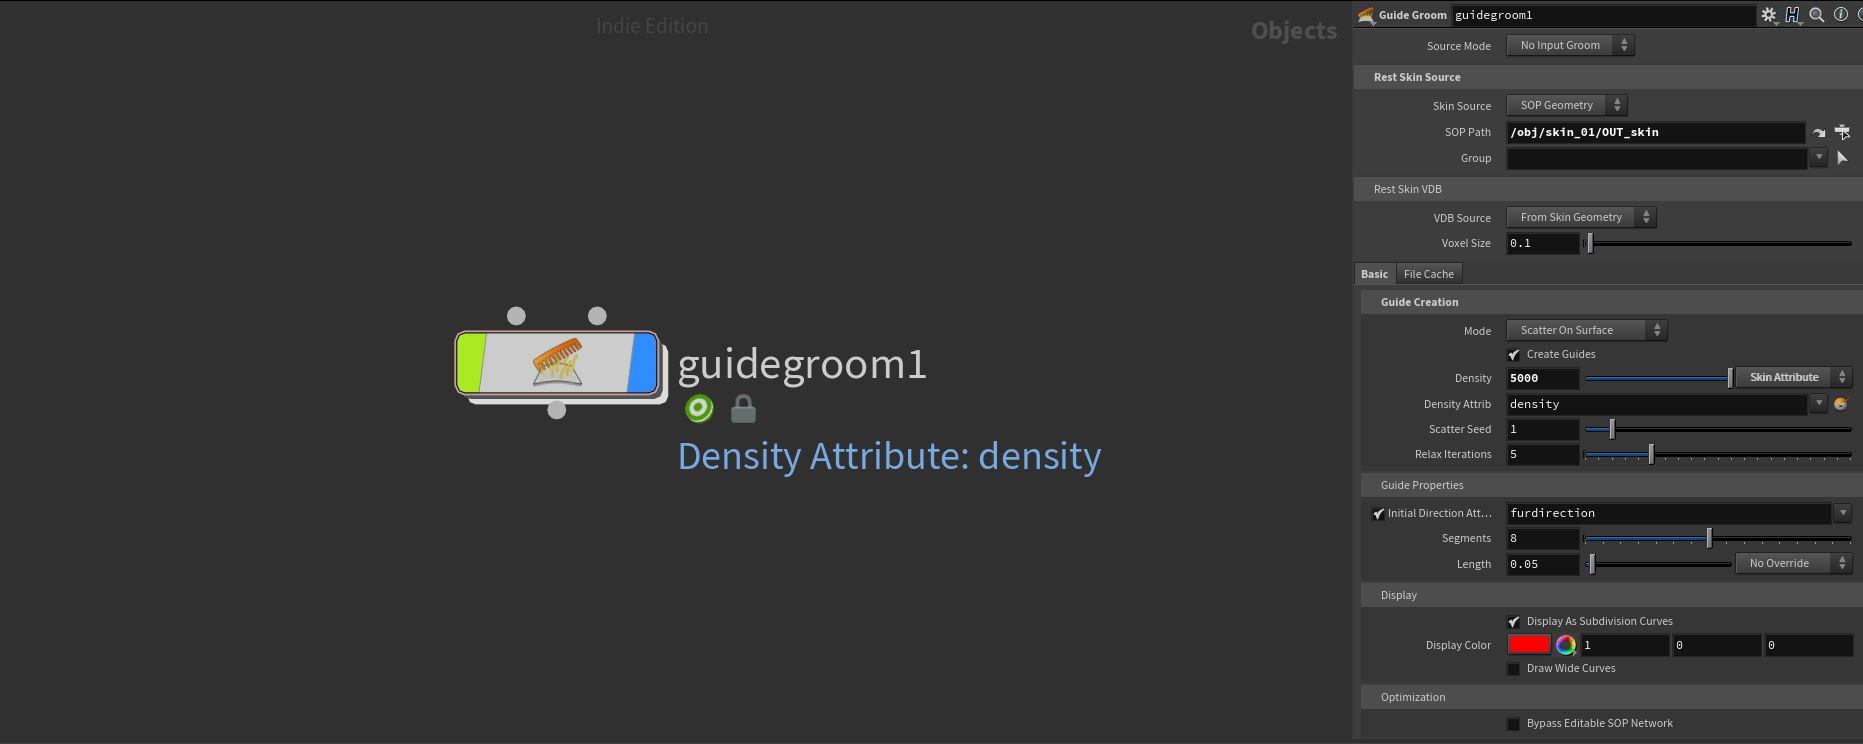
Placing down a Guide Groom node, assign the OUT_skin Null from the skin object to the SOP path. The simplest way is to select the Null node, press ‘ctrl+C’, and in the input field next to the SOP path press ‘ctrl+V’.
This will assign the skin to our guide groom node, and it will scatter guides across the surface of the skin. The next step is to isolate the area those guides grow on, this is done using an Attribute Paint node and painting the density attribute onto the skin. Select the skin attribute from the override drop-down next to the slider of the density parameter, the density attribute field will appear under the density parameter. Clicking on the small orange and gray icon next to that field will create an Attribute Create node and an Attribute Paint node above the Null in the skin object field.
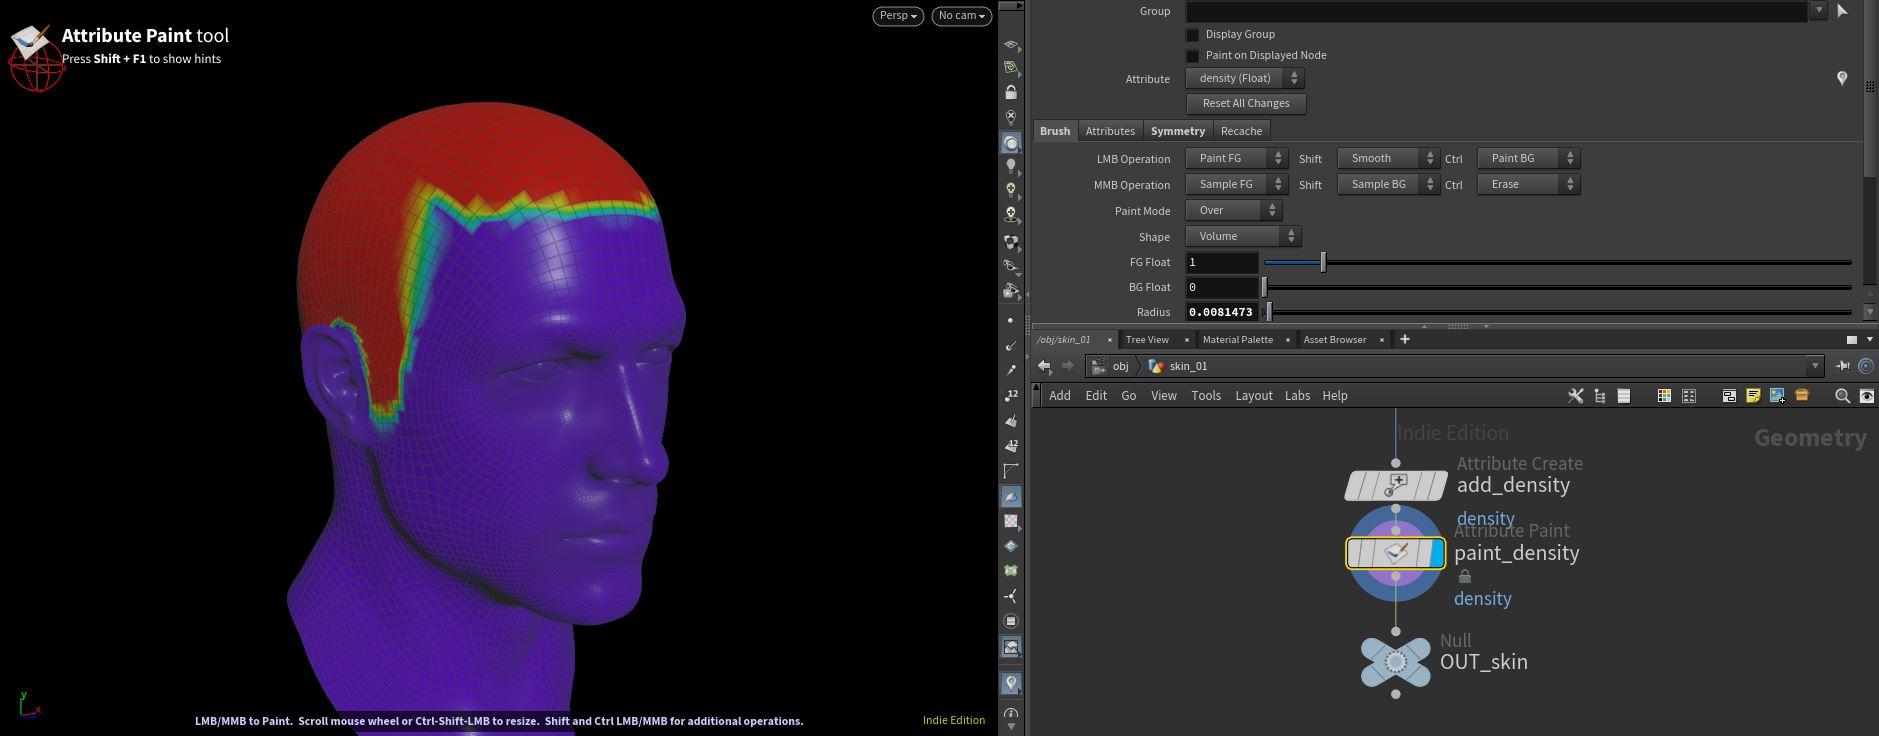
Using the Attribute Paint node, press ‘Enter’ while the cursor is in the viewport thus activating the paint mode. Select the Fill option from the shape parameter drop-down and, holding down ‘ctrl’, click on the mesh. This will fill the mesh with a 0 density value represented by the blue color, where the red represents the 1 value. Next, select the volume from the shape options again and paint the desired area for hair growth. A list of commands for the brush tool will be visible on the left side of the viewport.
Guide Grooming
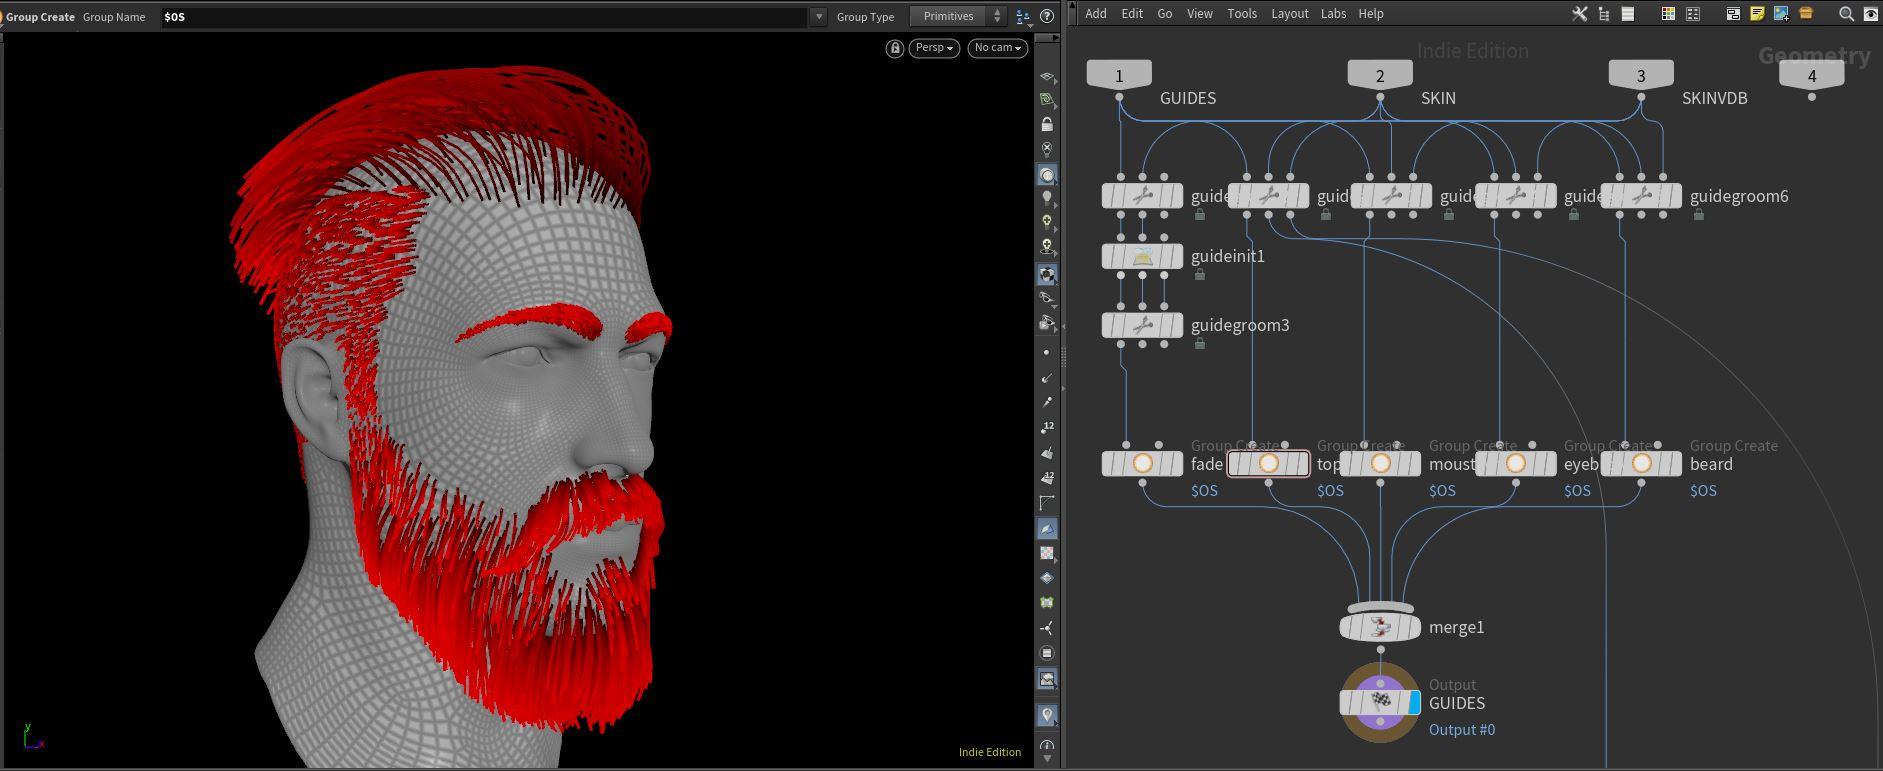
After the initial Density attribute has been painted, the grooming process can begin. Inside the Guide Groom node, you will find the guide grooms grooming workspace. This is where the processes and tools used in the grooming process for the guides are housed.
In this workflow, the guide groom SOP will be used as the basis for building the various groom pieces separately. This is to allow for easier management of the different elements. Above, you will see the final result of the grooming structure. Each chain follows the similar structure of the Guide Groom>Group>Merge, except for the side hair, which has a guide initialize, and another guide groom, which, although not required, will make that specific area easier to groom.
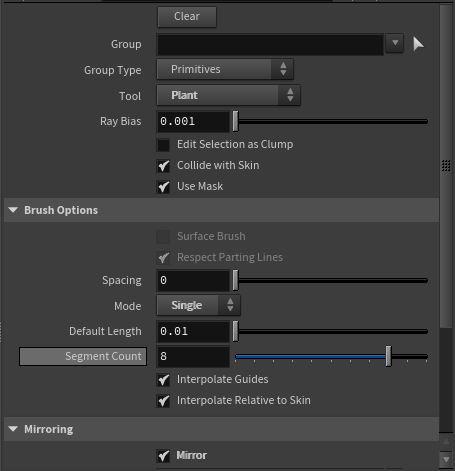
To start the grooming process, place down the first Guide Groom SOP, select the "Delete from the tool parameter" drop-down menu. Place the cursor over the viewport and press ‘Enter’, this will enable the guide brush.
Clear away the guides currently on the mesh and then select the draw tool from the previous menu, draw out the first guides, you can also use the sculpt, brush and adjust length tools respectively to aid in the grooming process. Feel free, however, to experiment with the various tools as they are all very useful.
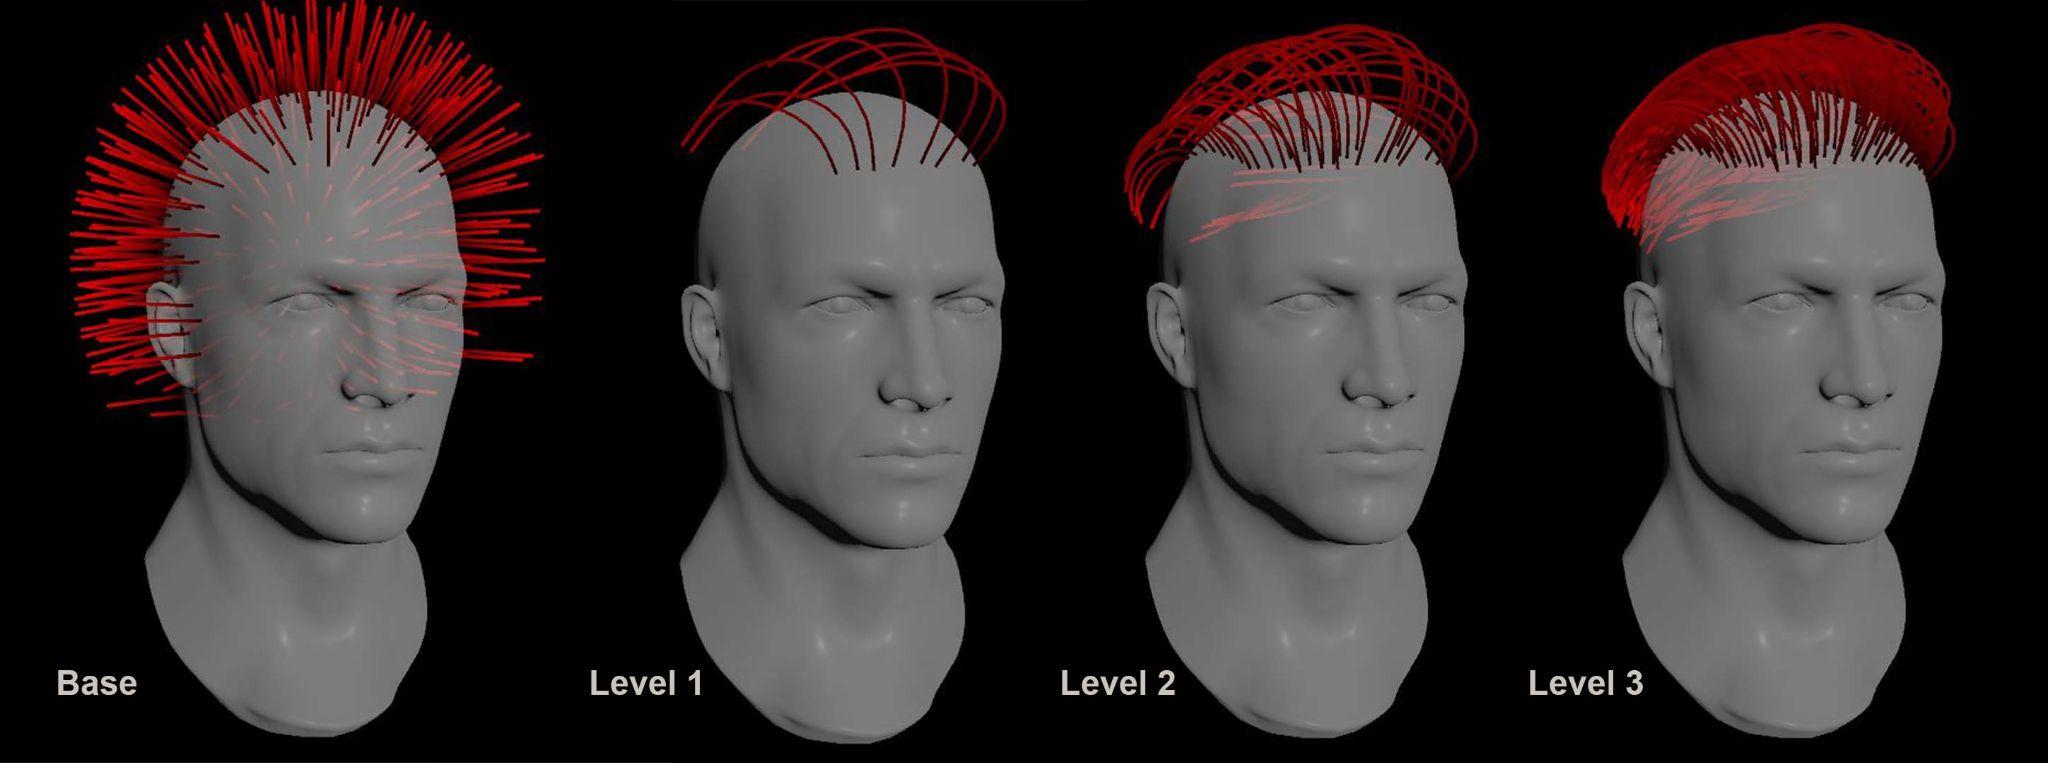
I find that it is easier to break down the guides into 3 levels: the first level is seen as the anchors or tentpole guides that will support the rest of the groom going forward. They dictate the primary flow and direction as well as the starting length for the rest of the groom.
After the level 1 guides are placed, select the plant tool and change the mode to single, then start outlining the contour of what would be the hairline/boundaries of the current groom element, sculpt and shape this level to get the final profile of the desired groom.
Level 3 is the density level of the guides. Using the plant tool on either scatter or single place down an equal density of guides inside the boundaries created in level 2. The density displayed above is a good gauge of what would be considered a light-medium density, well suited for most groom requirements. For a highly detailed simulation, however, roughly double the amount may be required.
After the guide grooming process for an element of the groom is complete, place a Group node underneath the Guide Groom node. Ensuring the group type is set to primitives, name the group according to the groom element.
After all groom elements are complete, merge them and run the merge into the output.
Hair Generation
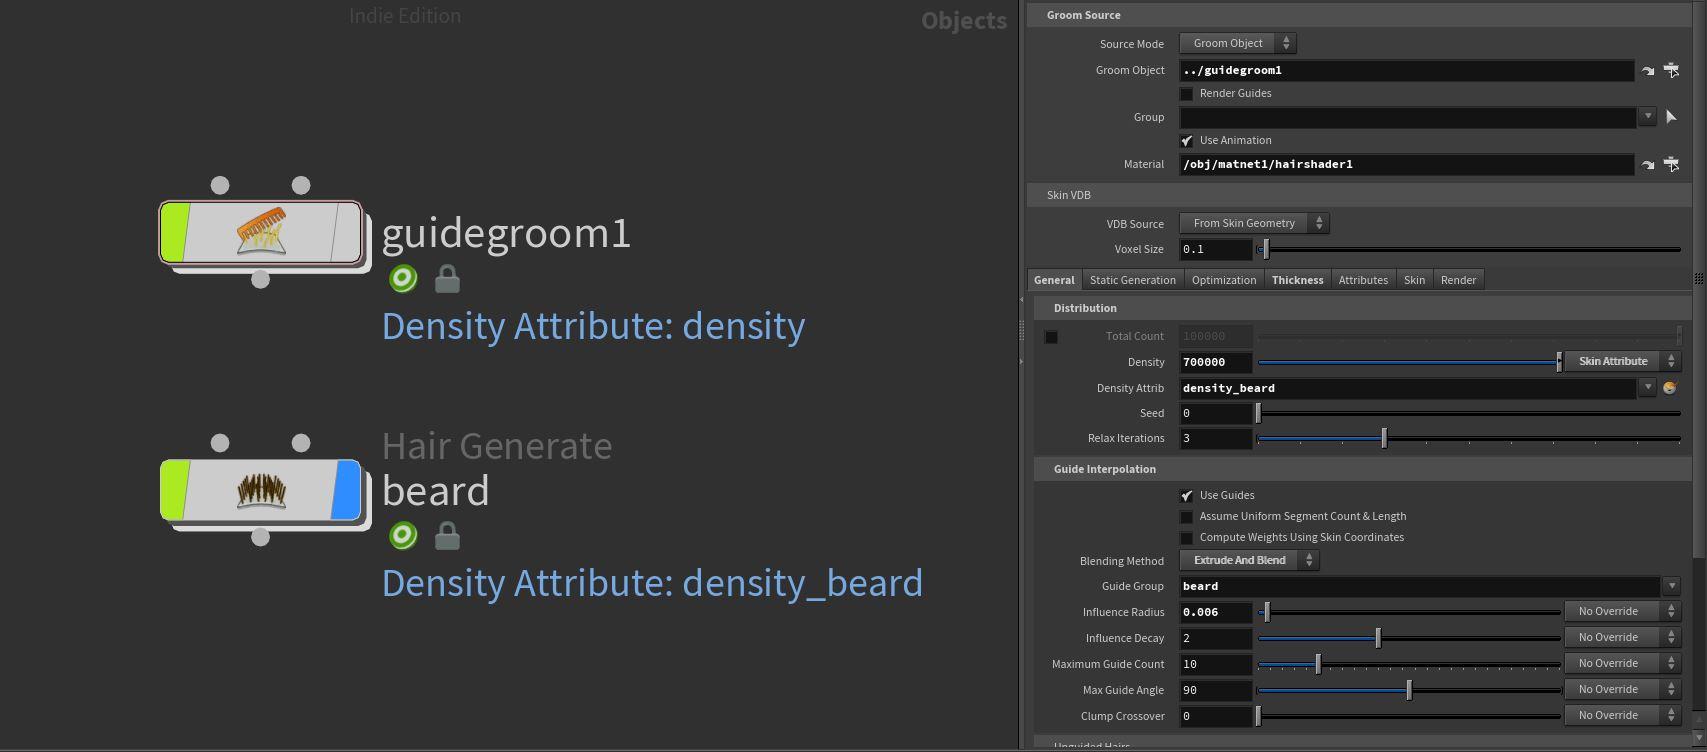
After the guide process is complete, place a Hair Generate object. This is the node in which the hair curves are generated that are visible when rendering. The guides are simply just that, guides that the hair interpolates around. To link the Guide Groom to the Hair Generate, select the latter so that its parameter window is displayed, then drag the Guide Groom node into the groom object field, the path will change to ../guidegroom1 in this example.
To select the group you wish to generate hair for, go to General > Guide Interpolation > Guide Group and type in the name of the group you wish to target. In some instances, the names will not appear in the drop-down menu. In this case, simply type the name.
The next step is to set the density and thickness of the generated hair. We already have a generalized density attribute for the scalp, which can be referenced in the density override as a skin attribute. For the beard, eyebrows, and eyelashes, this will not be viable. In those situations, repeat the process but in the Hair Generate override instead of the Guide Groom. This will place the Attribute Create and Attribute Paint nodes into the Guide Groom node.
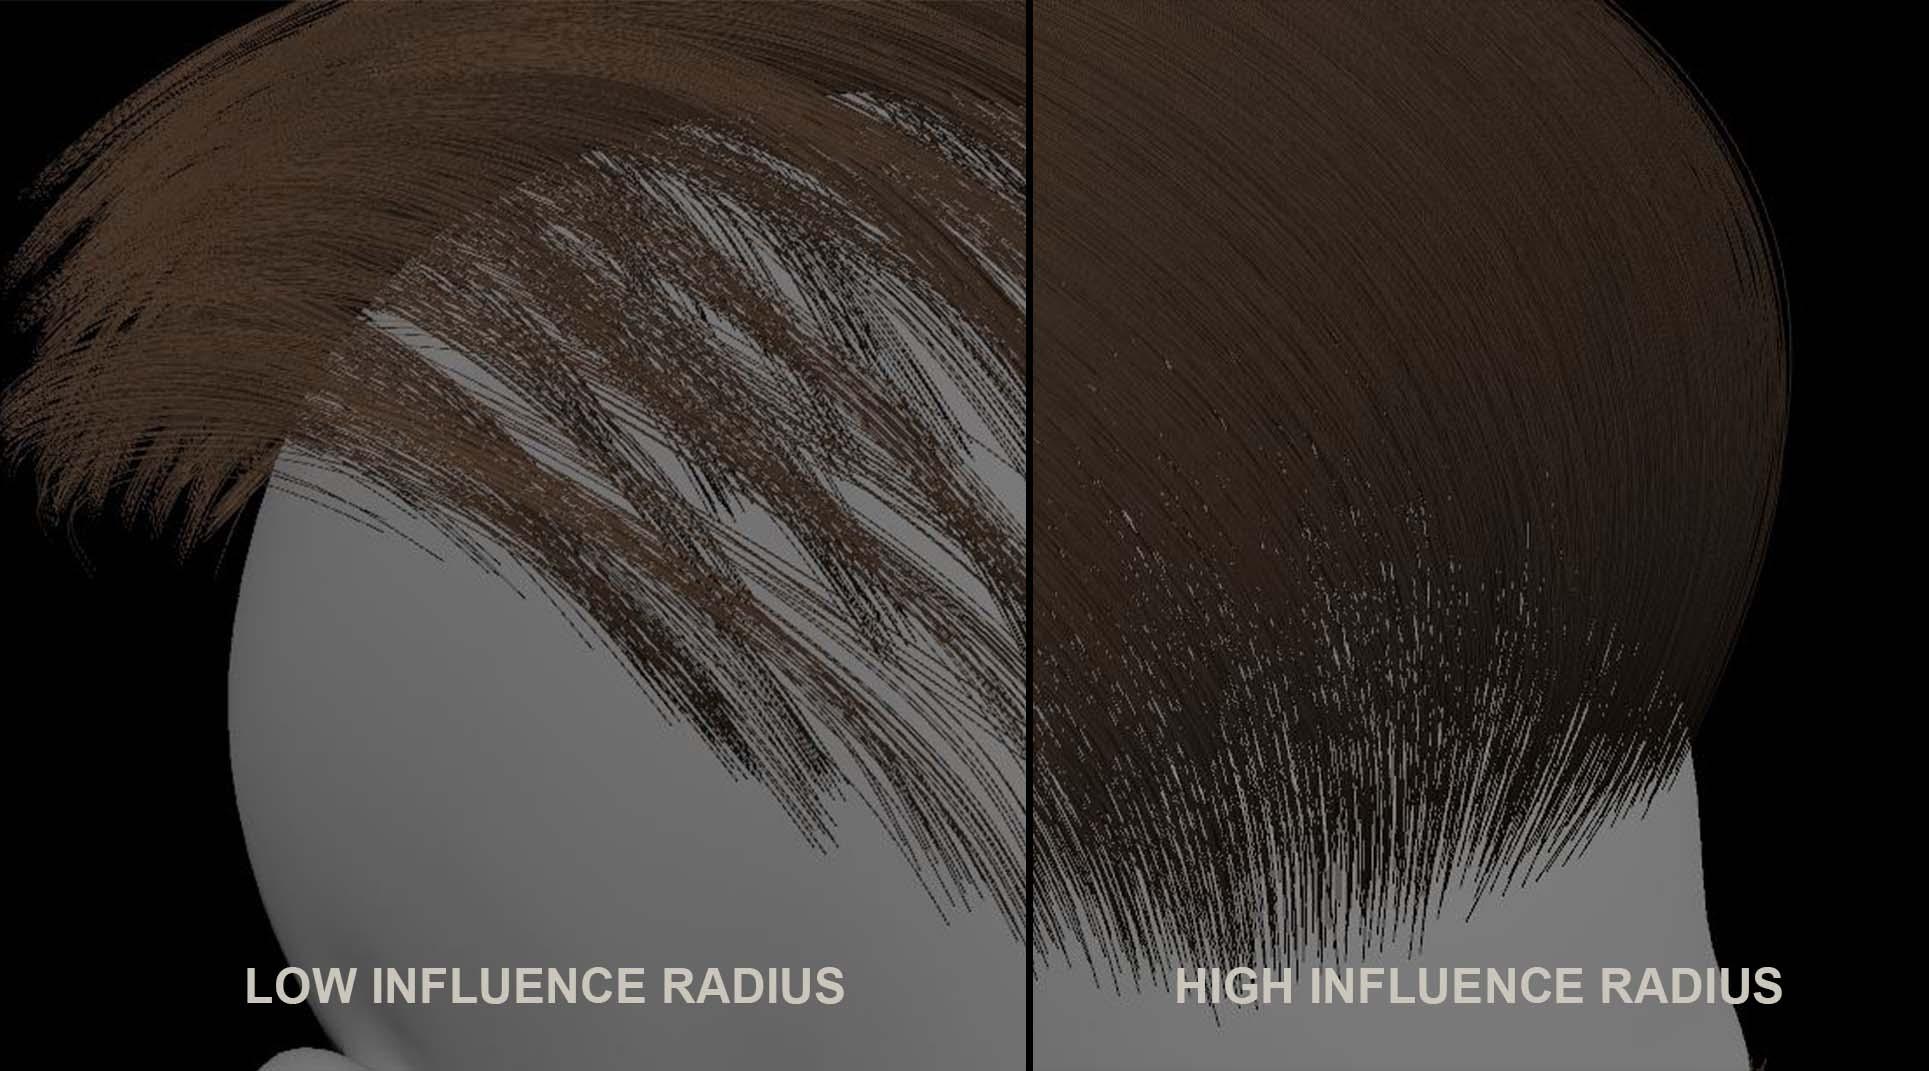
An important note: there is a distinction between density and influence radius. If you see the distribution of hairs like in the left image above, it means the influence radius on the Hair Generate is too low, you can set this higher to have the hairs spread out more from each guide, thus increasing each guide's radius of influence. Should you find that the hair is spilling into unwanted areas, you can assign an attribute override and paint a mask to constrain the hairs to only grow in the desired location.
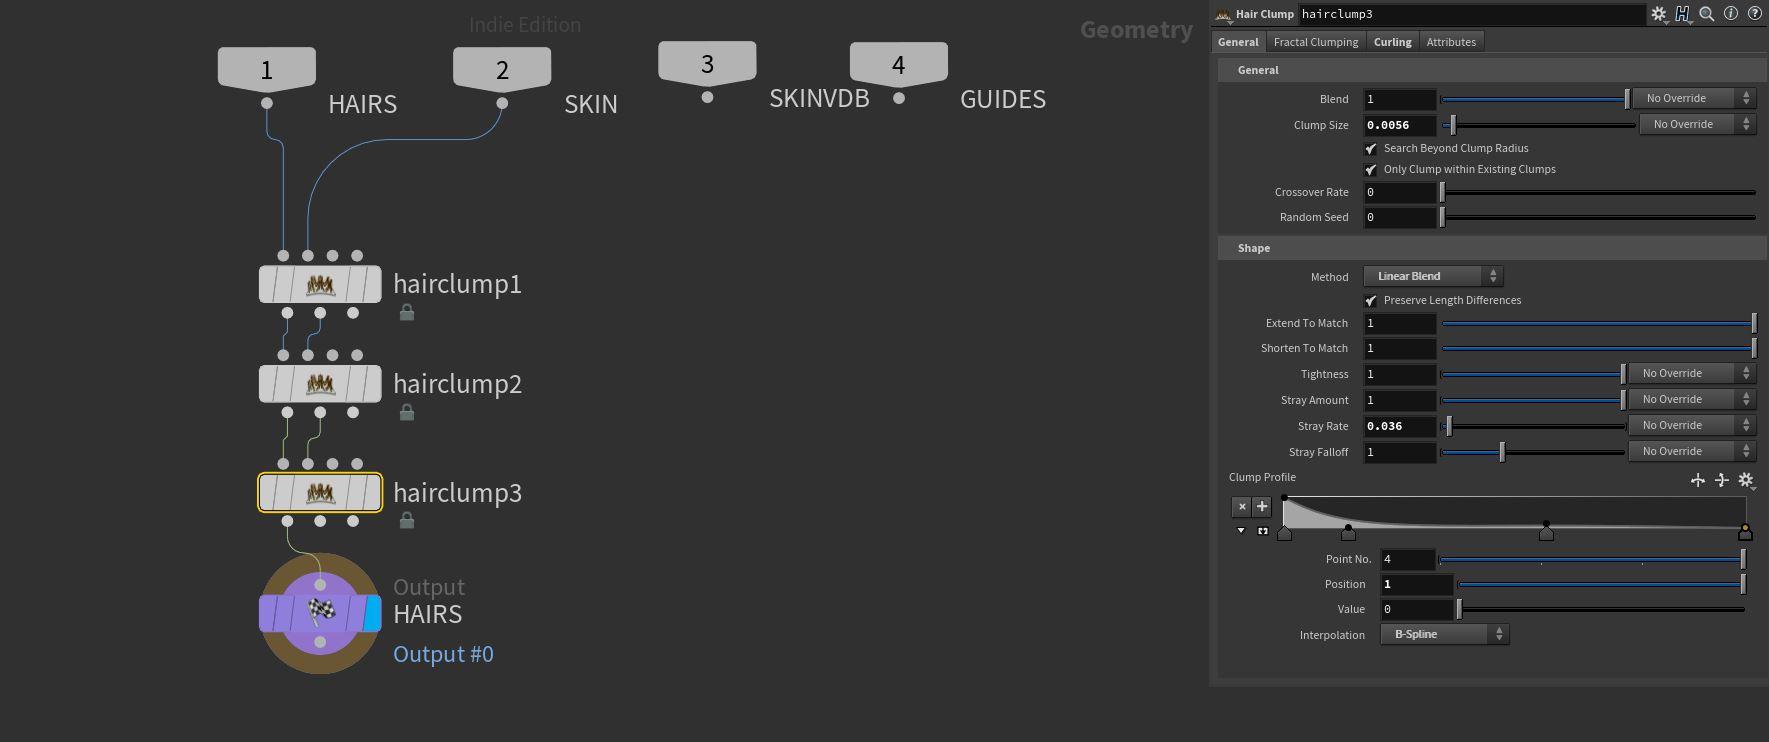
Using the top of the hair as an example, we will go over the Clump node and its function. One of the most powerful tools in the grooming toolkit, clumping is fundamental in creating a realistic groom.

Above, you can see the full view of all the parameters available in the Clump node, I encourage you to visit the full documentation for the node on SideFX’s website.
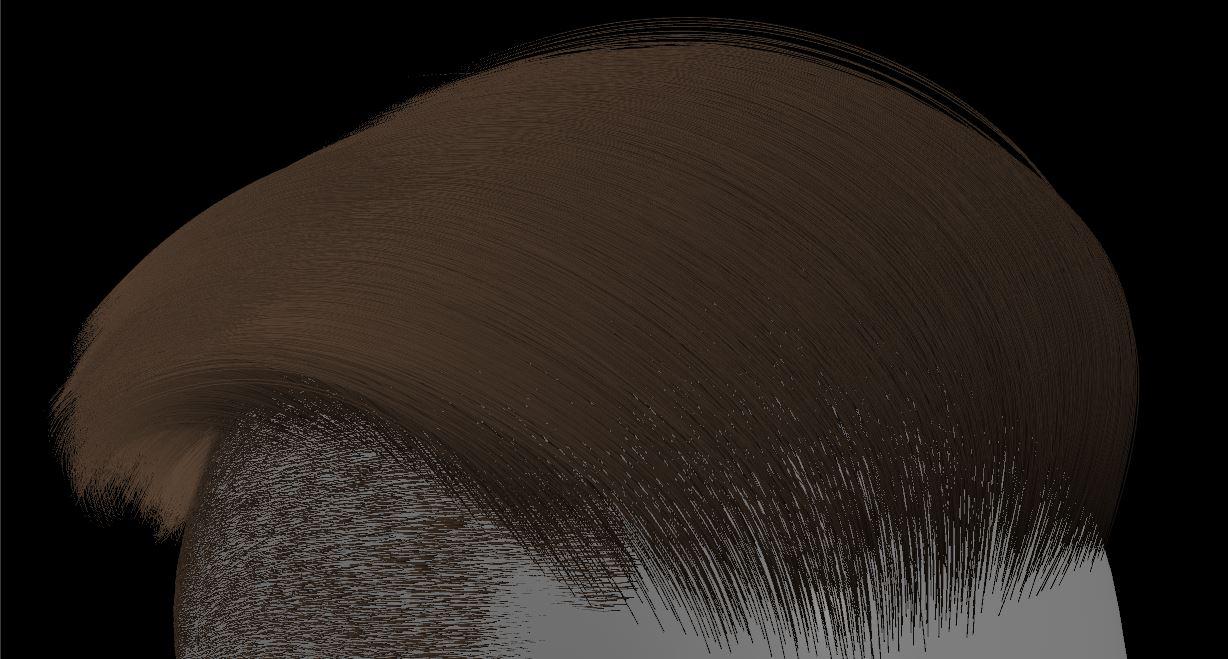
BASE GROOM
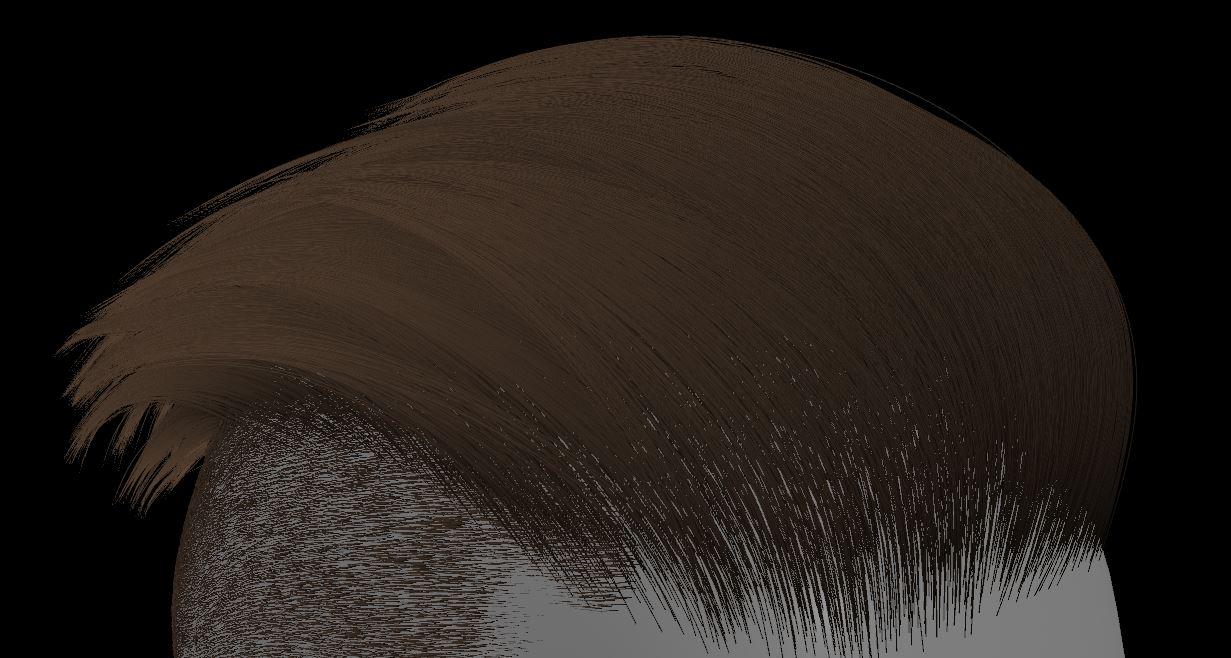
For this example, I will be going through the methodology of using the Clump node to affect the groom in layers, or levels of detail, starting first with the base layer of large shaping clumps.
A high crossover rate on the clumps ensures a natural-looking clump distribution when looking at the scalp. Adjusting the clump profile, match the more convex shape of the reference. Introduce some curling and fractal clumping as well for a more natural breakup.
The next layer is a further refinement of the previous step with smaller clumps, the process is very similar and can be treated as experimental.
Push and pull various parameters until the desired shape is achieved. In addition, start to introduce some stray rates at this point
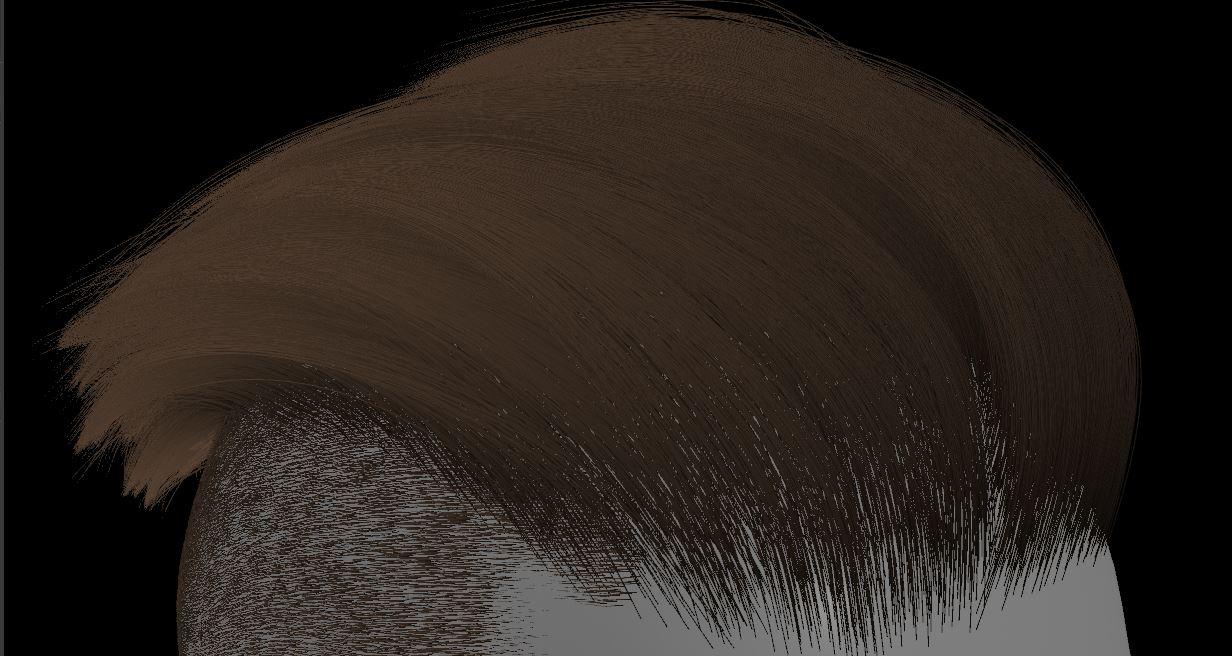
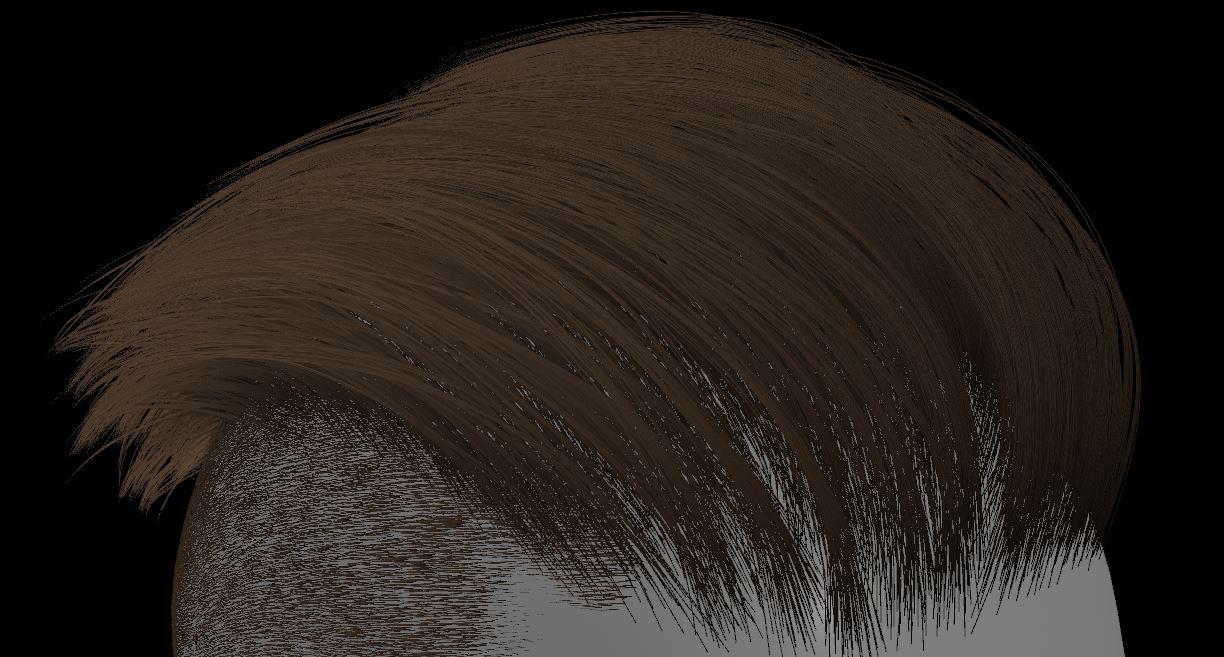
The final clump layer will be the most granular in control, using a very small clump size and a linear clumping method to achieve the tight clumps caused by hair products. Also, with the usual stray rate, curling, and fractal clumping to preference.
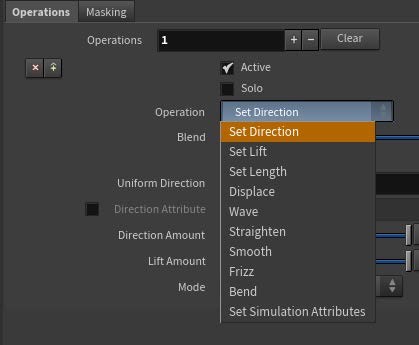
The next tool we will discuss is the Guide Process node. This is a node that allows for a number of different modifiers to be applied to the hair easily. It is my preference to use this only after the clumping process as otherwise, it may result in nullifying some of the processes.
The other is Frizz, it's is a basic noise modifier. It is also worth noting that the Guide Process node has a built-in masking function, which can be accessed from the masking tab; this can be used to quickly generate contained attribute masks to limit the influence of the Guide Processes effect to a specific area. Skin Attribute overrides can also be applied across most of the parameters to offer further granular control.
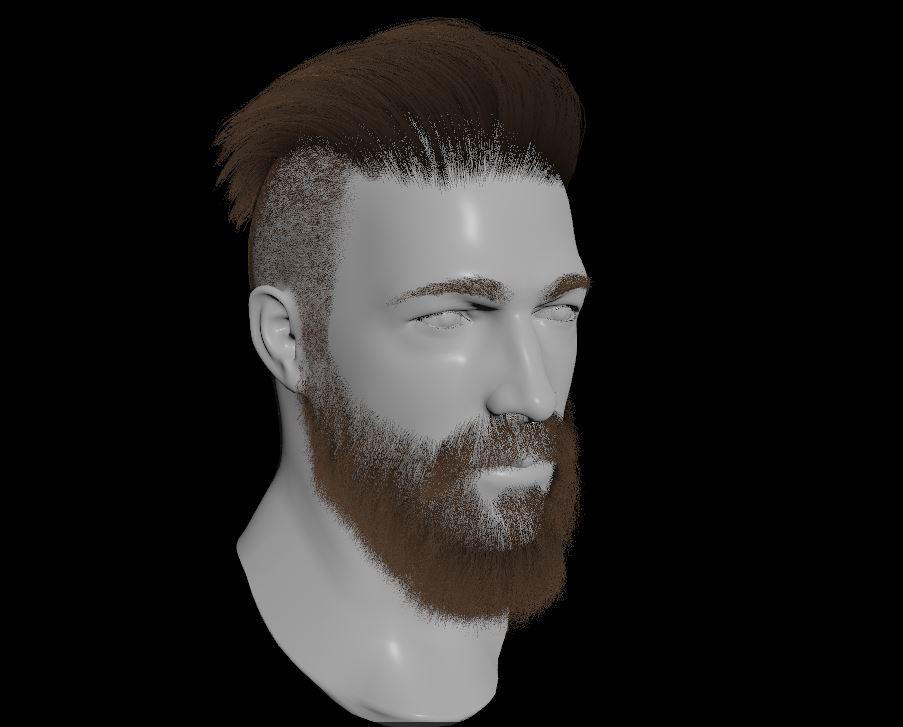
Utilizing these tools and techniques creates Hair Generate nodes for each of the desired groom elements, adjusting the various workflows according to your needs
Shading and Rendering (Mantra)
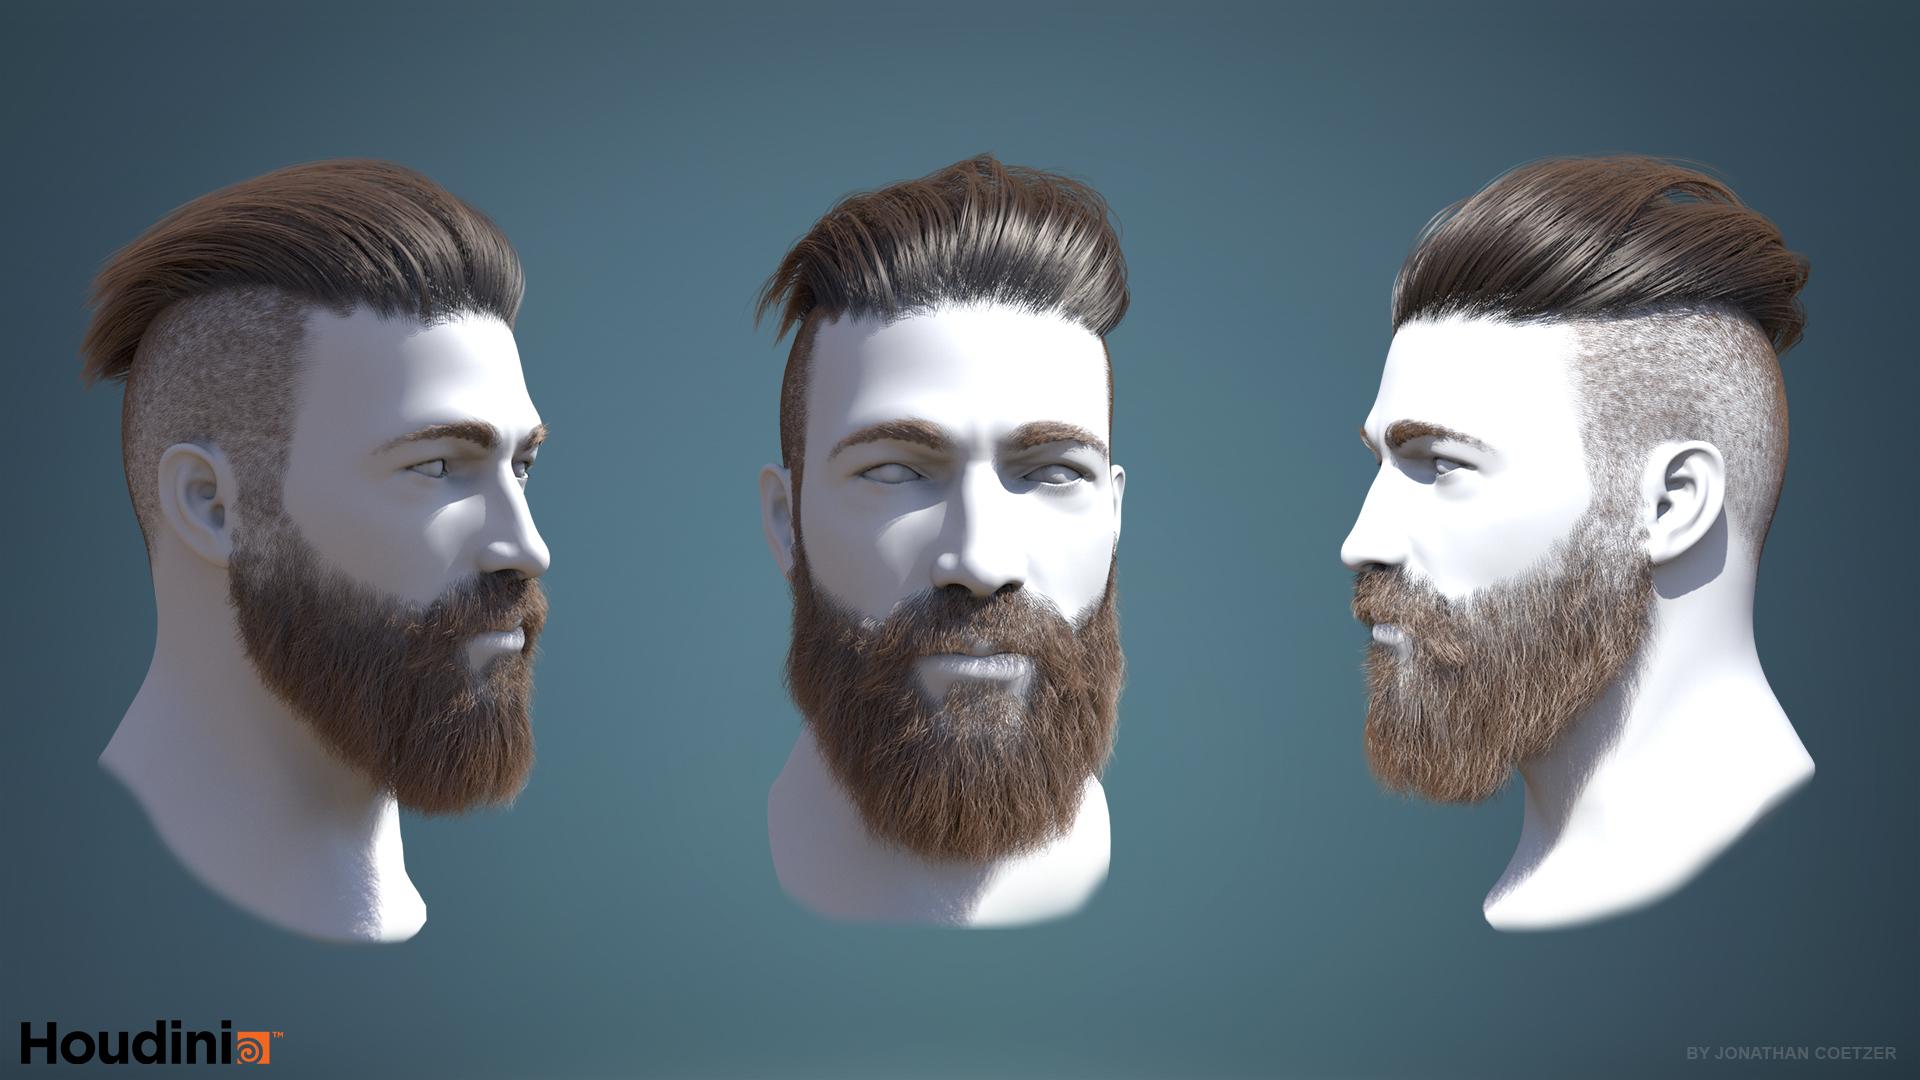
For this example, we will be rendering using Mantra, Houdini’s native render engine. Please feel free to experiment with whatever render engine you have at your disposal.
We will keep the setup simple for the sake of this tutorial, creating a basic material network on the object. This will contain all of our relevant shaders.
Create two Hair Shader nodes inside the material network. We will use one of them for the overall brown hair and another for the eyelashes.
The Hair Shader node consists of primary and secondary reflection tabs, this may be confusing upon first use, however, it may be easier to view these as primary being the Diffuse Color and secondary being the Specular Value. The default settings for most of these parameters are pretty good for most applications and are a great place to start adjusting from.
Beginning with primary reflection, you can adjust the root hair color to be slightly darker and more saturated by adjusting the color picker found next to the name. Do the same for the tip color except make it lighter and slightly more desaturated, leaning more towards the red spectrum if the natural look is desired.
The secondary reflection tab can be adjusted in a few ways to get different results: smaller size and higher intensity will result in a ‘wet’ look, and large size with low intensity will result in a matte dull look.
Transmission can be overdriven to some great effect to get more light to pass through the hair, simply adjust the intensity and introduce a slight amount of orange to red into the transmission depending on hair type.
Randomness is a collection of modifiers that can apply a random range value to the parameters of the shader, I recommend using the specular intensity often, it adds a feeling of realism to almost any groom.
Under the Opacity tab, there is a setting I would like to draw your attention to. Enabling transparent shadows is a great way to achieve a distinct look of hair. Enabling this softens the hair by adjusting the shadows cast by the hair strands. Disabling will result in hair that is more defined and looks thicker. This setting is very useful when it comes to soft animal fur.
After you have applied the materials to your desired Hair Gen objects, ensure that all object level nodes are display flagged. Hair Generates can only render in their nodes if the Guide Groom node they are assigned to is display flagged ‘on’. To get around this, you can pull out the hair outputs into object merges located in another geometry node.
After this, create an ROP network, place a Mantra node inside, create a camera, select your camera angle, and create an HDRI using an environment light. You can now render your scene.
Thank you for taking the time to check out this tutorial.
COMMENTS
Arvan 2 years, 9 months ago |
Thanks! I've been trying to find good H19 grooming info, this looks great!
jaya999 2 years, 3 months ago |
Hi, Jonthan is it possible to access the video on Vimeo.
Michela Ledwidge 2 years ago |
Thanks for excellent overview.
Please log in to leave a comment.