When Walt Disney Animation Studios set out to bring its animated hit Zootopia to life they faced a mammoth task. The animated animal world had many unique zones and inhabitants. Environments as diverse as a rainforest and a frozen tundra were key story points in the film, each requiring its own sense of scale and even a unique climate and atmosphere. Inside each zone would live a mix of often furry creatures who would need to also interact with rain, water, vegetation and even …flies. Here’s how Disney Animation pulled it off.
All Creatures Great and Fur
In building environments and crafting animals the studio relied on its own proprietary fur, vegetation and rendering toolsets. Along with those in-house solutions, Disney Animation’s technology department also embarked on a effort to integrate its tools with Houdini. For example, the studio’s solutions for fur and vegetation relied on tools called XGen and Bonsai with rendering carried out in their in-house renderer Hyperion. But in order to deal with the enormous file sizes that would have been generated if fur or vegetation was pure geometry in XGen, the technology department instead wrote some tools to replicate the geometry generation process and store what they needed in Houdini.
“Once in Houdini,” outlines head of effects animation Cesar Velazquez, “we were able to use the various procedural/simulation based approaches to animate the fur and vegetation and push the changes back into the XGen pipeline. This allowed the effects department to use Houdini to easily animate interaction between, for example, Nick and his surrounding grass without loading all the grass in the entire set. It allowed our tech anim department to use fluid fields to animate wind blowing through Nick’s hair.”
“We took advantage of the hooks our effects department already laid out in previous shows in our proprietary - and open source - expression seExpr,” explains technical animation supervisor Nick Burkard. “These hooks, such as particle samplers, allowed us to take baked data from Houdini and inject it into our stateless XGen fur/hair generator.”
With so many fur-covered characters, this approach allowed the tech anim team to push fur generation through Houdini’s procedural networks without having to craft time-consuming individual character rigs. “An example of this would be using CHOPs to apply a simulation like follow through motion on our characters without the effort of actual simulation,” says Burkard. “This was accomplished by taking the delta of the product of a lag node and the original animation and using that to offset the tips of our fur. The majority of character shots employ this technique in Zootopia and it brings additional life to the character and a subtle softness to the main character animation that our animators found appealing.”
Two shots in Zootopia did require fur simulations, as Burkard describes: “In a shot where Nick's hand rubs Bellwether's pompadour, we baked out the primitives around that hand interaction, and in Houdini we were able to simulate 771,000 points on 7,000 wires in the wire solver. In comparison, the number of wires we simulated on Elsa's hair in Frozen was 122. We were able to feed these simulated wires back into XGen to totally replace those primitives. In other packages this would normally be something that you would have to hit in one sim pass as it would take so much time, but Houdini afforded our artist many sim iterations until we honed in on the look we wanted.”
Further realism came in the form of the effect of wind on the fur. For this, a pyro solver in Houdini was used to push air over a character and sample the resulting velocity in seExpr. “This gave us a natural look that was previously only achievable through many iterations of many noise fields,” notes Burkard.
“We were able to simulate 771,000 points on 7,000 wires in the wire solver. In comparison, the number of wires we simulated on Elsa's hair in Frozen was 122.”
Nick Burkard, Technical Animation SupervisorDrawing a Crowd
In a world full of animals, Disney Animation Studios leaned significantly on the generation of crowds to show the creatures in their many habitats. Artists again looked to Houdini’s procedural tools for the crowds as a means of following, according to crowds artist Josh Richards, “a general-purpose workflow that gracefully reacted to last minute upstream changes.”
For example, in one shot we see Judy Hopps crossing the street while an oncoming herd of wildebeest flows around her. The movement of the crowd around her was accomplished with Houdini DOPs. These were constrained to a 2D plane, with artists making “heavy use of POP Wrangle nodes to dial in the specific behavior,” states Richards. “The motion was then further refined by running the result through CHOPs to smooth the effect with filters.”
Furthermore, a fully procedurally-generated traffic system created in Houdini was utilized for much wider establishing shots in the film. Here, artists gave cars “controls for speed, braking, avoidance, stop signs and decide on their own which turns to make,” says Richards. “They use the street geometry as input and are spawned along it. The core system was written in VEX inside of a Solver and refined with CHOPs. The flexibility of a procedural system allowed for the roads to be customized per-shot without having to re-layout the traffic by hand.”
Richards suggests, too, that employing Houdini for the crowds work made it easier for the team to make creative decisions, especially with the software’s Operator Type Libraries. “Using OTLs and shared setups designed to leverage a procedural workflow provided us with small building blocks that we could assemble in different ways to achieve various crowd effects. Because we could reuse these pieces the pipeline allowed us to address notes more quickly.”
“Using OTLs and shared setups designed to leverage a procedural workflow provided us with small building blocks that we could assemble in different ways to achieve various crowd effects. Because we could reuse these pieces the pipeline allowed us to address notes more quickly.”
Josh Richards, Crowds Artist
The crowd pipeline also relied on the use of Houdini Digital Assets. Says Richards: “We developed layout tools based on the Stroke node that allowed artists to paint crowd characters and control their direction. We used character bounding boxes with camera frustum culling to quickly generate large layouts only where needed, and the power of Python nodes let us make calls to Shotgun to query Disney specific metadata.”
Some of the most challenging crowd shots turned out to be for the film’s closing concert number featuring singer Gazelle. Here, artists relied on what Richards describes as “a common setup based on our various layout OTLs and high level controls to dial in the overall crowd behavior.” Richards also highlights the power of the VEX language in Houdini as a stand-out feature used on the film. “The ability to specifically define behavior let us address notes without risk of destabilizing the entire scene. VEX when used with the Solver node let us build complex behaviors that ran quickly over all the characters in a shot.”
Make It Rain
Make It Rain
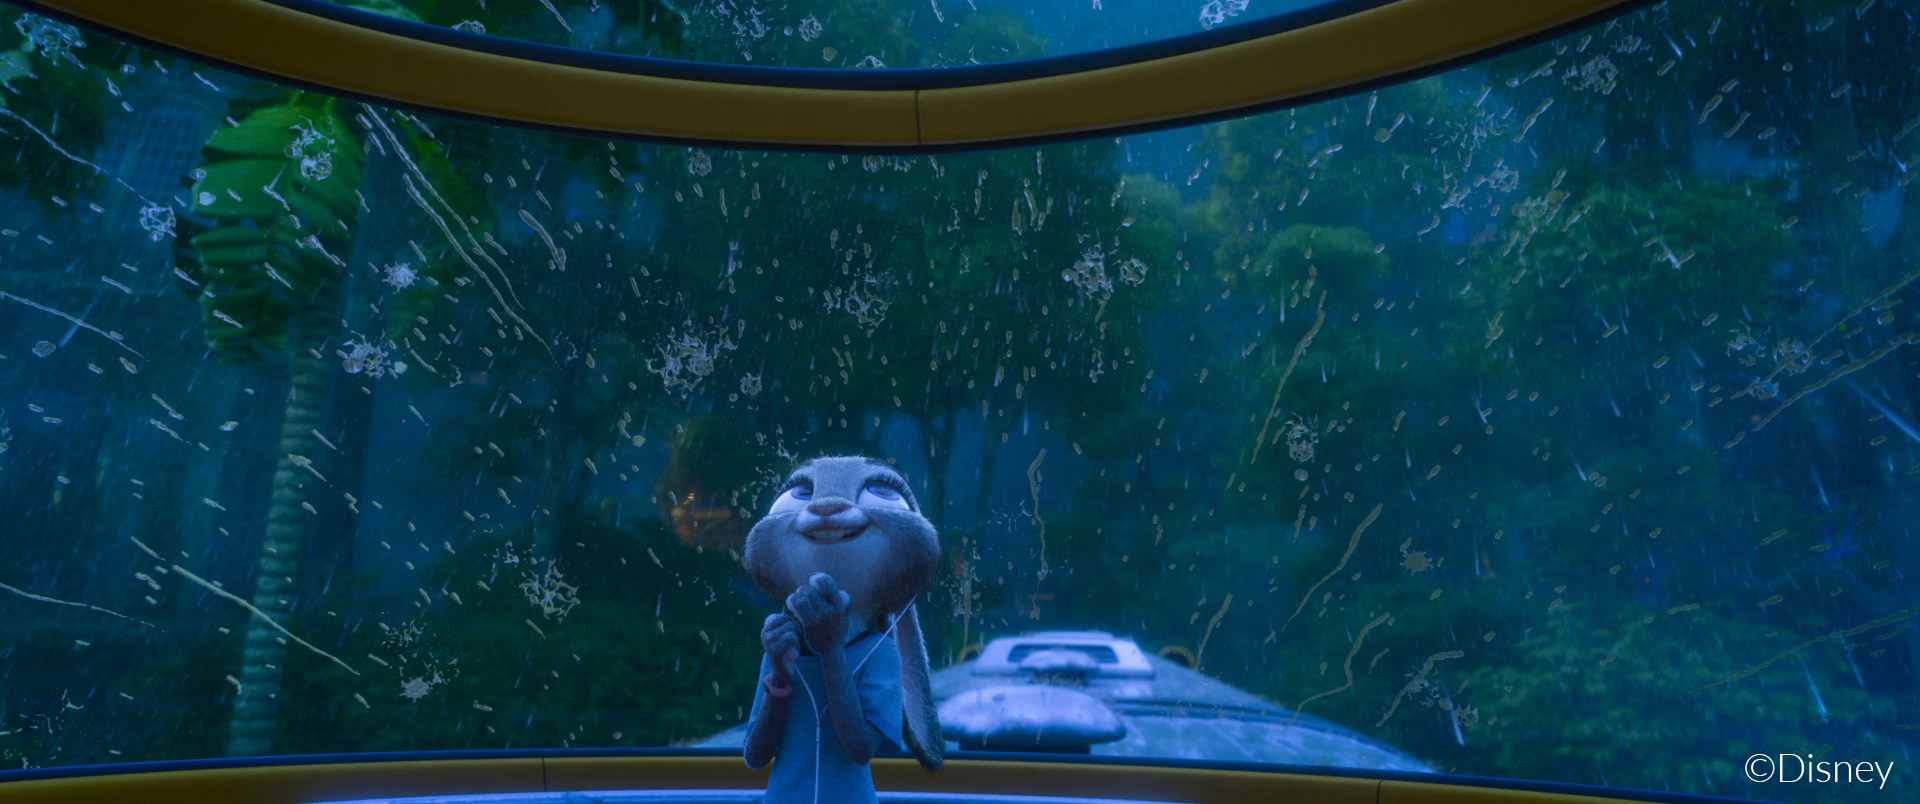
In one dramatic sequence in Zootopia, Hopps and Nick are chased through the rainforest by Manchas before escaping. A major element in this environment was rain, but not just normal rain - there needed to be many different types of precipitation in many different shots. “With over 100 shots to achieve,” notes effects lead Thom Wickes, “our goal was to create a series of rigs and procedures that could easily be distributed throughout the effects team, so shots could be worked on by multiple artists but still remain high quality and cohesive throughout the sequence.”
So what kind of rain was required? The first was traditional falling rain and impact splashes and for this Disney Animation relied on POPs in Houdini. Rain seen running down surfaces was realized by bringing scene geometry into Houdini first, then using trailing particles meshed together to create running droplets. “For the background elements, we generated a series of seamless animated textures in Houdini and NUKE. When the shots reached lighting, these textures were projected onto surfaces and modified the displacement and specular parameters of the existing materials,” says Wickes.
Other incidental rain effects included foot splashes and rain on the characters. Mist was also a large factor in building out the rainforest and was achieved by generating and sculpting volume elements in Houdini. “As nothing was simulation based,” adds Wickes, “we could add mist elements to a shot and quickly turn over notes from the art directors regarding composition.”
Crafting Waterfalls and Water Fountains
Rain wasn’t the only Houdini-generated fluid in the film. Waterfalls within the world of Zootopia were also required. To begin this kind of fluid element, effects artist Rattanin Sirinaruemarn made a procedural water surface for the waterfalls rather than simulating it. “Being able to control the depth, speed and scale of the water by just changing the procedural noise was a big benefit. The procedural workflow of Houdini makes this approach much easier. So whenever the cliff changes the water surface will change the shape automatically.”
The dropping water for each waterfall was constructed by wrapping the waterfall rig around the flip solver. “The main function in Flip solver that plays the most important role for our waterfall is the droplet,” explains Sirinaruemarn. “Houdini gives me a lot of flexibility, so I can jump inside DOPs and add or change almost everything in DOPs, so I dig down inside the flip solver and make my custom droplet function give me what I’m looking for.”
“Being able to control the depth, speed and scale of the water by just changing the procedural noise was a big benefit. The procedural workflow of Houdini makes this approach much easier. So whenever the cliff changes the water surface will change the shape automatically.”
Rattanin Sirinaruemarn, Effects ArtistThe final result, which also include the addition of mist, involved between 12 million and 54 million particles per shot. The biggest waterfall in the film, seen at the Asylum, was produced by clustering the flip source into small sections instead of having one big source and one container. “The same rigs were employed to sim all the small sections,” says Sirinaruemarn. “Because of the procedural power of Houdini plus a little help of python script (which is very easy to implement in Houdini) I don’t have to worry about forgetting to change the minor things like a container’s position or some parameter's value, every time I submitted the sim to the farm.”
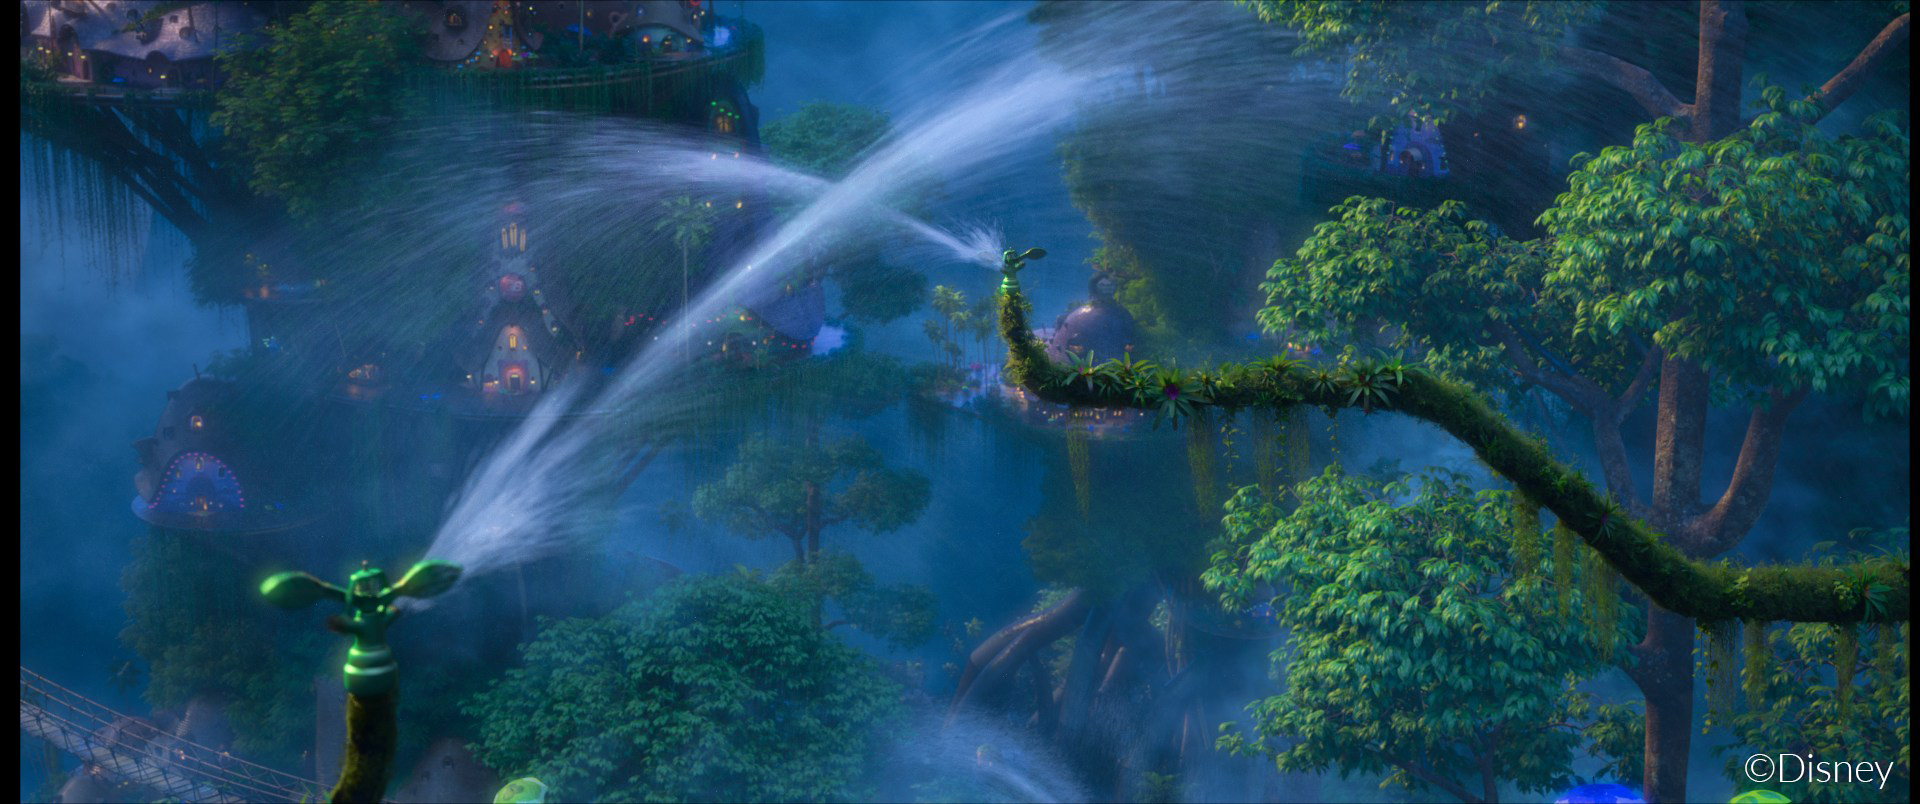
Fluid sims made a further appearance in the form of water fountains, especially in the film’s closing Gazelle concert. It was important that the pressure of the fountain nozzles be animated to make attractive shapes and motion for the animal world. “We used the particles simulation, the volume simulation and procedural animation approaches for making each component of water fountain,” says effects artist Dong Joo Byun. “And then we composited them together to make the final look.”
A behind the scenes look at the development of the water fountain
Artists began with a 500 frame water fountain cycle in Houdini, but they then had the flexibility to re-time the cycle to create different compositions and motion. For the concert sequence, several new fountains were added toward the end of production, requiring changes in layout and control. Using Houdini, explains Byun, “we developed a system which allowed the rearrangement and retiming of cached water fountain geometry. The nozzle positions on the original and new layouts were used as reference for the position offset. Stored ‘emitterId’ and ‘emissionId’ let us apply per-nozzle and per-emission control. This localized control let us match the motion of the water fountains to the music beats and to the character motion.”
The Smallest of Details
With its hordes of animals and elaborate worlds, Zootopia is not short on detail, even down to some of the tiniest things in the film: flies. These were unique to the character Yax the Yak, a naturist whose messy hair is adorned a multitude of the insects. Although Disney Animation initially crafted just a noisy sphere of points that was parented to Yax’s head, there was a need to have the flies react and respond to the character’s performance while still able to be creatively directed. “My goal was to have the feel of a cohesive swarm,” says effects artist Paul Carman, “while at the same time each individual fly can be followed and be seen to behave in a way that makes sense.”
To achieve this goal, Carman created a fly swarm in Houdini “with a pathfinding AI built from VOPs inside a SOP solver. I find the VOPs workflow to be fast and easy to visualize. I separated out each major task of the AI - heading, speed, movement, triggers, etc - into its own separate VOP network which made it much simpler to parse.”
“Using Houdini's visualization tools in the viewport helped a great deal with analyzing and troubleshooting the fly swarm behavior, especially the vector displays,” adds Carman. “Each fly tracked attributes on the Yak's base hairs to trigger whether it had been shaken around fast enough to be startled and take flight.”
“Each fly tracked attributes on the Yak's base hairs to trigger whether it had been shaken around fast enough to be startled and take flight.”
Paul Carman, Effects Artist
Each fly went through four main states:
1. passive - walking around on the hair
2. startled flight - initially flying away faster, further, and in a straighter line
3. normal flight - returning to a set distance range from Yax's head and buzzing around more calmly
4. return flight, once it sees the hair has calmed down.
In order to control the swarm, artists could set values in a control panel. These ranged from ‘how long you wanted them to fly’ and ‘how easy they are to startle’, which were combined with parameters like speed and how far to stay away from nearby objects. “This gave the swarm a general cohesive shape,” notes Carman, “but adding extra per-fly variation to each parameter still allowed each fly to have its own individual and at times interestingly divergent behavior.”
It’s a technique and set-up Carman says he would use again. “This was one of my first set-ups with such a heavy use of VOPs and now I use them for everything. They are powerful and fast like a script, but for me the visual elements make them easier and faster to build and rearrange without having to worry about syntax issues.”
Breathing Out
Another effect small in nature but rich in detail was the addition of cold breath when the characters visit the frozen Tundratown. The characters in this world varied from large polar bears to tiny shrews - that meant Disney Animation had to design a breath rig that worked at several scales. “Another challenge,” identifies effects artist Jesse Erickson, “was that this task consisted of 36 shots spread between 10 different artists with a very short turnaround time, meaning they’d have to pick up the rig and be off to the races without much time to master the ins and outs. We needed a rig that was simple and flexible, and since the tool was being developed as we went along we would need the ability to push changes on the fly.”
To craft the cold breath, artists isolated the jaw set from an incoming character and then, using Houdini, would “measure the distance between upper and lower jaw in the T-pose,” says Erickson. “This gave us a global scale and also a relative baseline to compare jaw distance with over the animation range. The jaw distance ratio was stored as an attribute and processed in CHOPs to add noise, lag and user input. This had the added advantage of enabling us to build a HUD for the user in SOPs by applying the CHOPs channel to a curve and adding a little time slider. From there the user had additional control over time shifting, masking/adding emission and velocity, as well as various fluid shaping properties.”
“The interface building is really fun to work with and lets you quickly put together nice-looking, easy-to-read tools with very little investment.”
Jesse Erickson, Effects ArtistThe effects team also packaged the cold breath rig as a Houdini Digital Asset, something Erickson says helped enable quick fixes and the pushing out of new features. “It even allowed for multiple people to work on the rig at the same time,” notes Erickson. “The interface building is really fun to work with and lets you quickly put together nice looking, easy-to-read tools with very little investment.”
The addition of these small details like flies and cold breath to scenes in Zootopia are evidence of the levels Disney Animation went to in order to create an immersive and believable animal-filled universe. Their inclusion - just like the crowds, or the many types of rain, or the structures of waterfalls and water fountains, and even the types of fur - actually came from extensive research about how a world like Zootopia would actually exist.
“The studio brought in a climatologist to describe in detail how changes in temperature and humidity affect the look of each environment,” relates Cesar Velazquez, head of effects animation. “We had to ask ourselves - What makes the desert appear hot, the rainforest feel humid and the tundra look cold?” Only then could the artists use their expertise and the studio’s toolsets to produce animation and effects to match.
COMMENTS
David Inlines 5 years, 1 month ago |
Oh yeah!
Tapas_karmakar1985 1 year, 7 months ago |
spellbound_Lovely..Wow..Great Work..
Please log in to leave a comment.