Tutorials
Geometry Visualizer
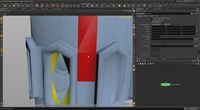
This video will demonstrate a color visualizer that will help us to identify and correct if needed, polygon topology – specifically quads, triangles and ngons. First we click on the Visualizer button and create a Color Visualizer, then set Color Type to Polygon Vertex Count. Note each color that represents each polygon type (yellow for triangles, blue for quads and red for ngons); you can change these colors to different ones if you wish. Then we start dropping in edges to correct the surface topology and see the color visualizer update accordingly!
0:05:00
OpenGL Displacement
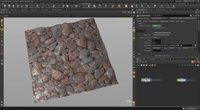
This video will look at OpenGL Displacement within your Houdini viewport. We'll throw on a principled shader on a grid and use some of the textures that ship with Houdini, to show a mapped Texture Displacement in the 3D Scene View pane. We'll adjust the Offset and Effect Scale to get it to the look we want and then also bring up the Display Options Window to see where we can increase the level of detail by adjust the Displacement Level amount in the Effects tab.
0:05:00

PolyBridge
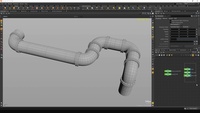
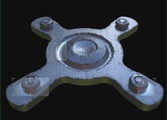
For this video, we'll be creating some rim spokes for a wheel using the PolyBridg tool. By selecting faces in a sequential order (and you can always easily re-select those faces), from both the inner and outer destination geometry, and changing the Destination/Divide Into "Individual Elements (from Connected Components), we can observe how it affects our polyBridge geometry. There are in addition, many options to tweak the polybridged geometry with, like Destination Magnitude, Spine Shape, Thickness Ramp and others.
0:05:00

PolyBevel
This video will demonstrate the PolyBevel tool and the number of option controls that exist inside. You can apply PolyBevel on either an entire geometry or on a grouped selection that has been made previously (you can just select the geometry you want, hit TAB key and type Group to assign them into a grouped selection). Once that is done, it's just a matter of tweaking Offset (Fixed Distance/Fixed Width), Fillet Shape (Solid/Crease/Chamfer/Round/Profile), number of Divisions and Vertex Splitting (Allow Vertex Splits/Split Miterable Joints/Split over All Incident Edges). Keep in mind that based on what your selections are (for example, face loop vs edge loop), you will get different results – with the same settings. So don't be shy to try out all those options!
0:05:00
Point Beveling
This video will show how you can use PolyBevel on points to create essentially a fillet, on a curve, as well as beveling points on geometry (e.g. chamfer points). The option to bevel points was added in the 15.5.565 production build, so you should make sure that you are using at least this build version and onwards.
0:07:00
TopoBuild | Build/Split/Brush/Smooth
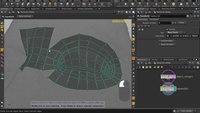
This video will go over the 4 modes within the TopoBuild tool – Build, Split, Brush and Smooth. By default, TopoBuild starts off in Build mode, which allows you to drop down geometry (guide points and then create polygons from them). There are additional controls within Build mode, which give you options to straighten your selection, evenly space points along an edge and convert selection to a circle. Split mode allows you to add a point along an edge, split edges manually from edge to edge and also holding down SHIFT key, drop down edge loops. Brush mode lets you move an area of geometry based on the size of your brush, while being “shrinkwrapped” to your templated surface (most likely your high res mesh that you are rebuilding a low resolution of). This is ideal for when you don't want to individually select a point/edge/face to move and edit, but wish to position a general area, for example. Smooth mode relaxes the interior geometry, while respecting the border edges (they remain locked in position).
0:05:00

PolySplit
PolySplit allows you to split polygon surfaces a la “free-hand”, which means drawing along edges, from points etc. There are additional options like Close Path, which closes the edge path for you; and Quad Autocompletion, which creates additional edges to ensure quad geometry output when you split your geometry. Middle-mouse button scrolling will activate and control the number of divisions that are shown as a guide, and allows you to split an edge in specific amounts (for example, the midpoint of an edge).
0:05:00
Edit Straighten
We will be looking at how to straighten and evenly space your geometry using the edit SOP. We'll select a series of partial edge loops and straighten them by hitting T key and using either the right-mouse button to select “Straighten selection” or the SHIFT+S hotkey. Then we select some other partial edge loops and hit the T key and RMB to select “Evenly space selection” or use the SHIFT+E hotkey.
0:05:00
Edit Circle
The Edit SOP has an function that allows you convert a selection into an evenly divided, perfect circle shape (or the closest it can get to it, depending on your geometry selection). Just make your selection – points, edges or faces – hit the T key and using right-mouse button to select “Make Circle” or SHIFT+C hotkey.
0:05:00
Edge Loops
This video will look at the Edge Loop tool inside Houdini. We will be inserting some edge loops, but more importantly, we'll be seeing how to activate Edge Snap which lets us essentially have divisions (e.g. midpoint of an edge, or however many divisions lie across an edge you want to split). There's also controls like Edge Loop – Number of Loops and Edge Percentage.
0:05:00

VR Lens Camera
The VR Camera allows you to output your scene to several formats which are supported by various devices. You can set your renders to Projection types Latlong, Perspective, Cube Map – NVIDIA and Cube Map – 3x2 and Layout you can choose Left/Right, Left Over/Right Under, Left and Right. Additionally depending on the projection type, there are controls for Eye Separation, Eye to Neck Distance, Field of View, Near/Far Clipping and more.
0:05:00
Triplanar Project VOP
This video will look at the UV Triplanar Project VOP inside Houdini. UV Triplanar Project VOP allows you to texture any surface without the need to create UVs (they are generated for you), using 3 images of your choosing. You'll find available parameters per image axis projection like Mask Sharpness (with option for Separate Axis Controls), Angle and Scale (per axis) – which you can use to control the amount of blending, orientation and size of each image, as each are projected onto your geometry.
0:05:00
Curvature VOP
This video demonstrates the Curvature VOP in Houdini. The Curvature VOP uses your geometry to find the highlights of the surface, as well as the creases, which you can explicitly control. We will use it to add procedural grunge on a gear object and use the same procedural noise driven by the Curvature VOP to generate accompanying displacement on the geometry as well. We do so by creating a (base) Principled Shader, and then layer-mixing a Brushed Metal Shader and using the Curvature as a mask to blend the two together.
0:05:00
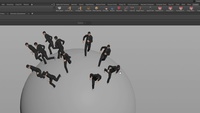
Crowds 15.5 | Workflow Update
This video goes over some of the workflow updates for Crowds in Houdini 15.5. We begin by baking out 2 animation clips with the Mocap Biped 3 character, populating the scene with crowds, using Paint Density to control our agent placement, projecting those agents to walk on a globe by turning on Enable Terrain Project with Up Attribute, and setting the Adjust Up Vector option to Set to Terrain Normal.
0:07:17
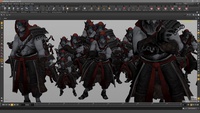
Houdini Crowd Agent | FBX Load
This lesson covers how to import an .fbx character file and set it to the clip you want to use. Then you can make a crowd with that character and break up the uniformity of the crowd by using Randomize Clip Time and Randomize Scale options to offset the start of the clip for each character, as well as their size.
0:03:25
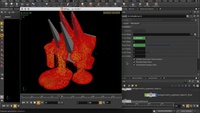
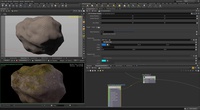
Melting Object
This video will cover the Melt Object tool within the Viscous fluid shelf set in Houdini. We are going to drop a pig head on some spikes and see it pool on the ground. Using the Melt Object tool, the pig head is converted to a flipfluid filled object. To ensure that we're getting accurate collisions on the static object (the spike), we turn on Collision Guide to see the actual shape of our collision object and adjust the Uniform Divisions value to get a closer representation of the spike shape.
0:05:00