| On this page |
This workflow covers how to setup a landscape in Houdini and then import it into Unreal. This example creates a mountain landscape with cliffs
A few key things you will learn in this workflow:
-
Houdini landscape generation
-
create and edit Heightfields
-
Simulation using
Heightfield Flow Field SOP and
Merge Packed SOP
-
work with masks
-
expose parameters to HDA for edits in Unreal Engine
-
material attribute setup for both HDA and Unreal Engine
Create basic landscape 
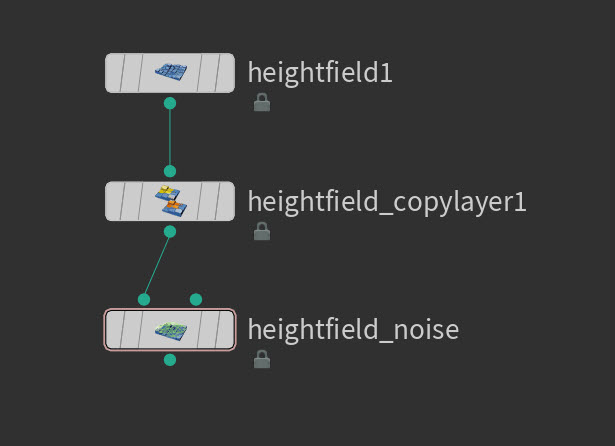
-
Create a
Geometry SOP and enter it to work in the Surface Operator network view.
-
Create a
Subnetwork SOP and name it
Landscape_Generation. Double-click the node to work in the folder. -
Create a
Heightfield SOP node.
-
Select the Heightfield SOP node, turn on its Display flag, and then open the Parameter Editor.
-
In the Parameter Editor, change the Initial Mask parameter to
1.-
This allows you to use the entire landscape as a mask to apply things such as a base material.
-
-
Create a
Heightfield Copy Layer SOP and connect the input to the output of the Heightfield SOP node.
-
In the Heightfield Copy Layer SOP node’s parameters, enter base in the Destination parameter.
-
You use this layer later to create a base material in Unreal engine.
-
-
Create a
Heightfield Noise SOP and connect the input1 to the output of the Heightfield Copy Layer SOP node.
-
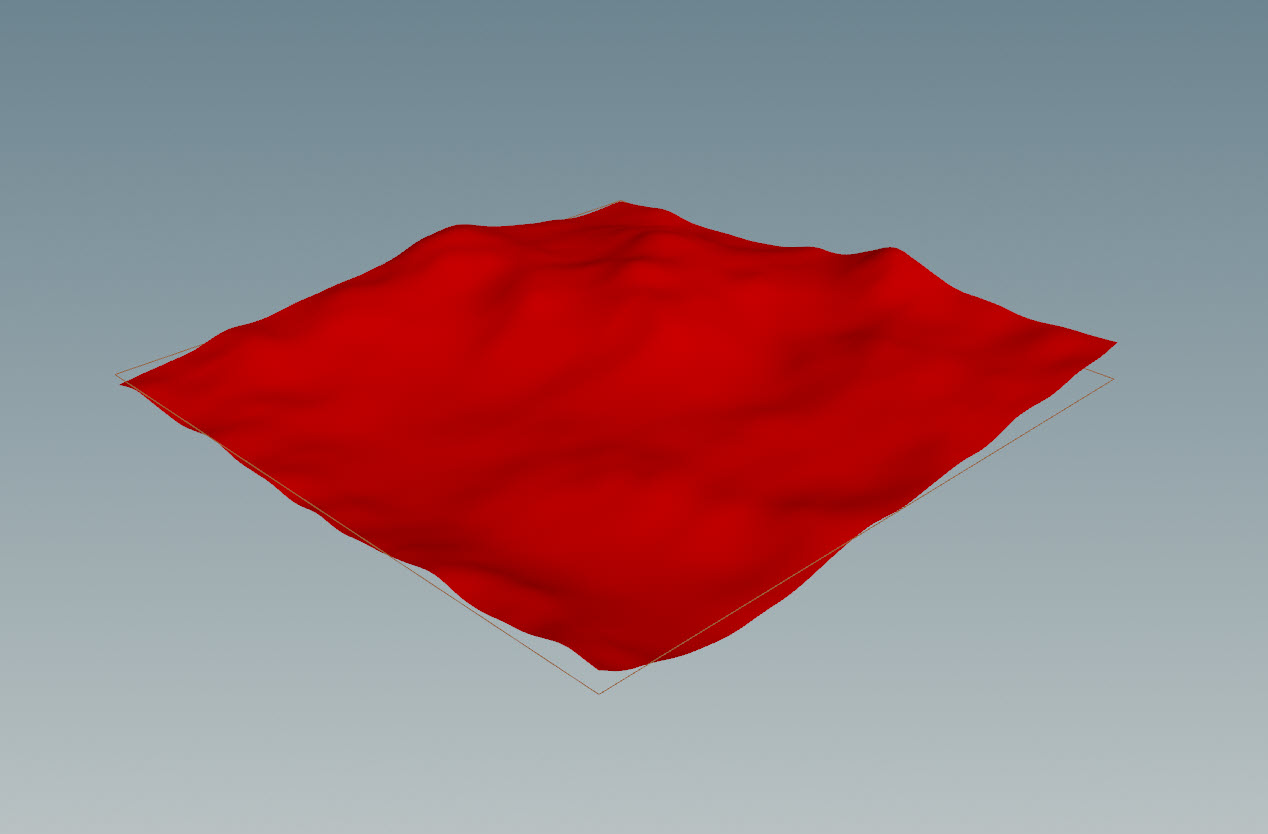
In the Heightfield Noise SOP node’s parameters, do the following:
-
In the Amplitude parameter, enter
250. -
In Element Size, enter
800. -
In Noise Type, change the dropdown menu to Perlin Flow.
-
In Max Octaves, enter
3.5. -
This creates a landscape with slight angulation and variation.
-
Use masks to create cliffs 
-
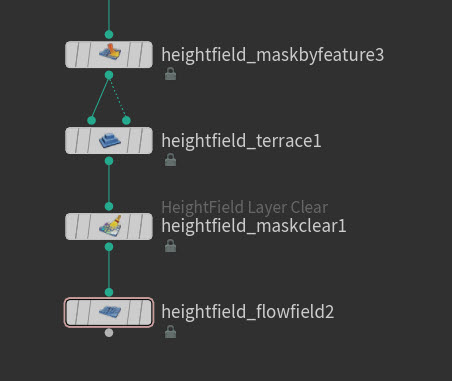
Create a
Heightfield Mask by Feature SOP and connect the input to the output of the Heightfield Noise SOP node.
-
In the Heightfield Mask by Feature SOP node’s parameters, do the following:
-
In the Min Slop Angle parameter, enter
15. -
In Max Slope Angle , enter
90. -
This mask helps to generate the cliffs and ridges for the landscape.
-
-
Create a
Heightfield Terrace SOP and connect the input1 and input2 to the output of the Heightfield Mask by Feature SOP node.
-
In the Heightfield Terrace SOP node’s parameters, do the following:
-
In Min Height , enter
-50. -
In Fade , enter
0.5. -
In Max Step Size , enter
15.
-
-
Create a
Heightfield Layer Clear SOP and connect the input to the output of the Heightfield Terrace SOP node.
-
This clears your mask selection.
-
-
Create a
Heightfield Flow Field SOP and connect the input to the output of the Heightfield Layer Clear SOP node.
-
In the Heightfield Flow Field SOP node’s parameters, do the following:
-
In Rain Amount , enter
0.5. -
In Rain Density , enter
0.25. -
In Smoothing Iterations , enter
20. -
In Adjust Height , turn on the checkbox aNd enter
0.3.
-
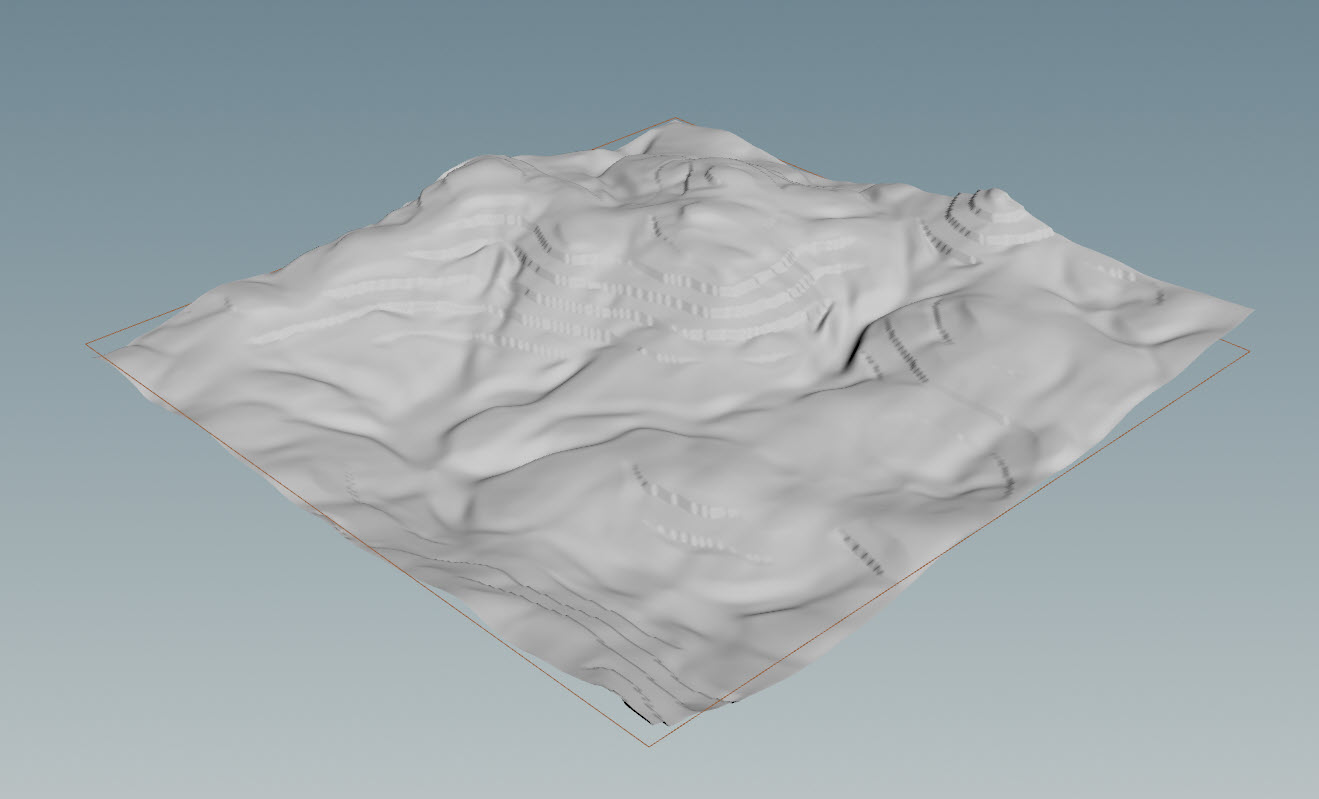
You now have a landscape with layered cliffs and erosion.
Create a mask for erosion 
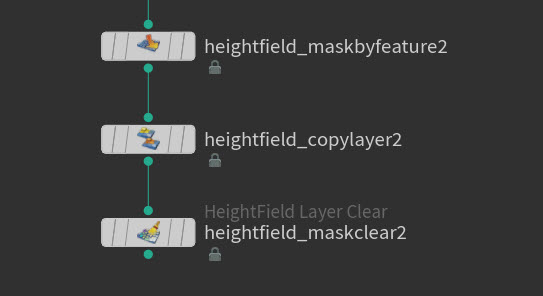
-
Create a
Mask by Feature SOP and connect the input to the output of the Heightfield Flow Field SOP node.
-
In the Heightfield Mask by Feature SOP node’s parameters, do the following:
-
Turn on Invert Mask.
-
Turn on Mask by Occlusion.
-
In Minimum Occlusion , enter
0.75. -
In Maximum Occlusion , enter
0.9.
-
-
Create a
Heightfield Copy Layer SOP and connect the input to the output of the Heightfield Mask by Feature node.
-
In the Heightfield Copy Layer SOP node’s parameters, enter erosion in the Destination parameter.
-
Create a
Heightfield Layer Clear SOP and connect the input to the output of the Heightfield Copy Layer SOP node.
-
This clears your mask selection.
-
Clean up layers (optional) 
In Houdini, heightfields on the primitive attribute called name will use the string as landscape layers in Unreal Engine. You may want to clean up these attributes to keep your HDA more organized.
-
Select the Heightfield Flow Field SOP.
-
In the Geometry Spreadsheet tab, select the primitives.
-
You can see a list of attribute names that were created during the workflow.
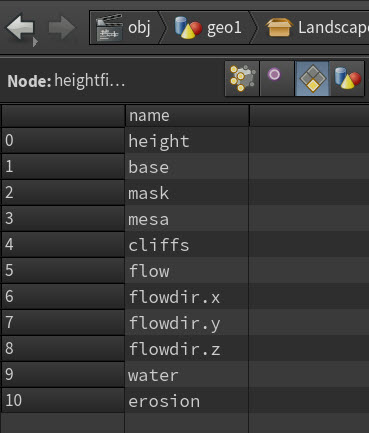
Note
You must export the
heightname attribute for Houdini Engine to properly transfer the heightfield to Unreal Engine. -
-
Create a
Blast SOP and connect the input to the output of the Heightfield Copy By Layer SOP node.
-
In the Blast SOP node’s parameters, on the Group parameter, enter
@name=cliff @name=flowdir.x @name=flowdir.y @name=flowdir.z @name=mesa @name=water @name=flow.-
This removes the unwanted attribute names and Unreal Engine won’t read those layers.
-
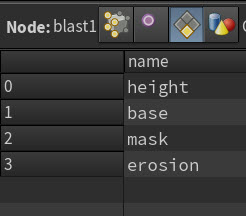
Note
Make sure you do not delete the mask name attribute. This prevents the heightfield nodes to function properly.
Visualize layers (optional) 
You may want to visualize which layers are visible using a
Heightfield Visualize SOP before exporting it to Unreal Engine.
Note
The layers and colors setup in any Heightfield SOPs do not get exported and transferred into Unreal materials. They are purely for visualization within Houdini.
-
Create a
Heightfield Visualize SOP and connect the input to the output of the Blast node.
-
In the Heightfield Visualize SOP node’s parameters, do the following:
-
In Layer 9, select
erosionfrom the dropdown menu. Change the color toorange. -
In Layer 8, select
basefrom the dropdown menu. Change the color togreen.
-
You can see the different layers and how it affects the landscape.
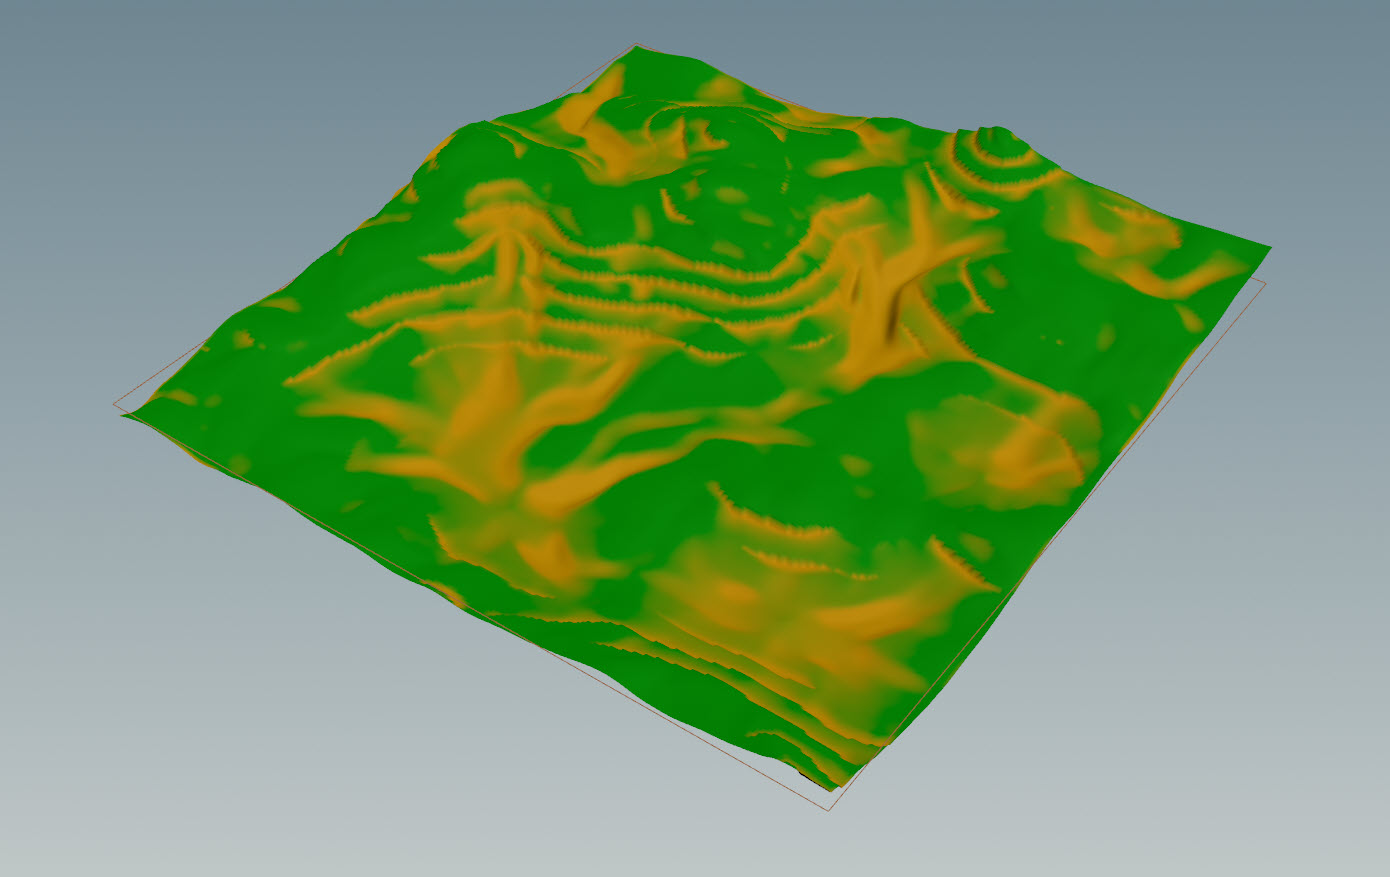
-
The
erosionlayer is set when creating the mask erosion. -
The
baselayer selects the entire landscape.
You can now delete the Heightfield Visualize SOP node.
Create the Unreal material 
You can assign existing materials from Unreal to your generated landscape by adding unreal_material onto the Prim. You can then source your Unreal material path as a string and assign it to your HDA.
See Materials for more information.
Setup material in Unreal 
-
In Unreal, create new material and name it
Landscape_Material. -
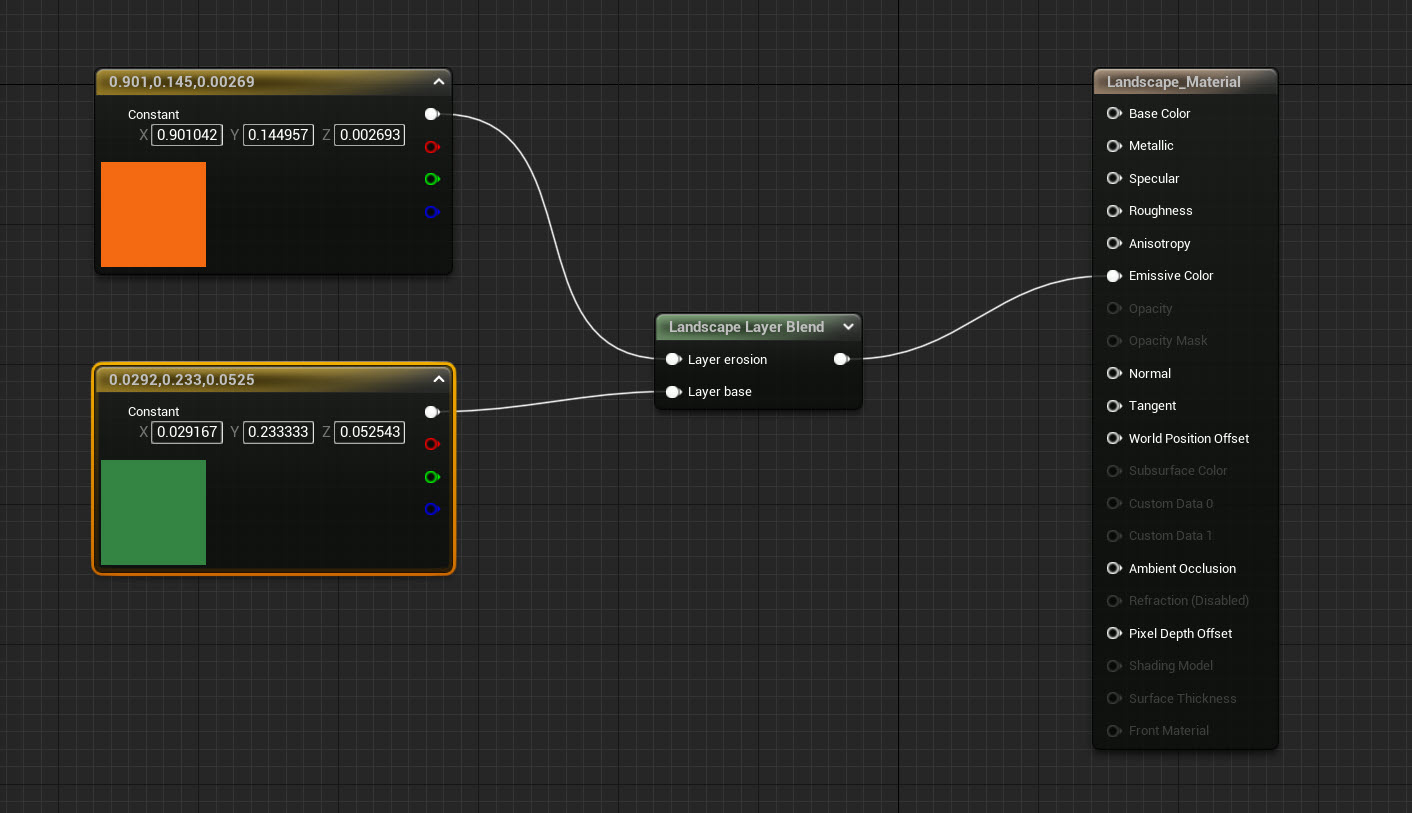
In the material graph, click ⇥ Tab and create two
Constant3Vector.-
Change the color to orange for the first constant.
-
Change the color to green for the second constant.
-
-
Click ⇥ Tab and create a
LandscapeLayerBlend.-
In the details panel, select the + symbol next to Layers to add two Array elements.
-
In Index 0, expand the dropdown tab and change the name to
erosion.-
Change the Blend Type to LB Alpha Blend.
-
-
In Index 1, change the name to
base.-
Change the Blend Type to LB Alpha Blend.
-
-
-
Connect the Orange Constant color white output to the Layer erosion input.
-
Connect the Green Constant color white output to the Layer Base input.
-
Connect the Landscape Layer Blend output to the Emissive Color input.
-
-
In the content drawer,
the
Landscape_Materialand select Copy Reference.-
You will need this later to paste into your Attribute Create SOP.
-
Setup material in Houdini 
-
In Houdini, create a
Attribute Create SOP and connect the input to the output of the Blast SOP node.
-
In the Attribute Create SOP node’s parameters, do the following:
-
In Name, enter
unreal_material. -
In Class, select Primitive.
-
In Type, select String.
-
In String, paste your Unreal material path.
-
-
In Houdini, create a
Output Geometry SOP and connect the input to the output of the Attribute Create SOP node.
You are now finished your Houdini setup and ready to export into an HDA.
Export settings for HDA 
-
Step out into Geometry view,
the
Landscape_Generationsubnetwork and select Create Digital Asset. -
In the pop-up window, change the Asset Label name to
Landscape Generation.-
You can change the other settings to your preference.
-
-
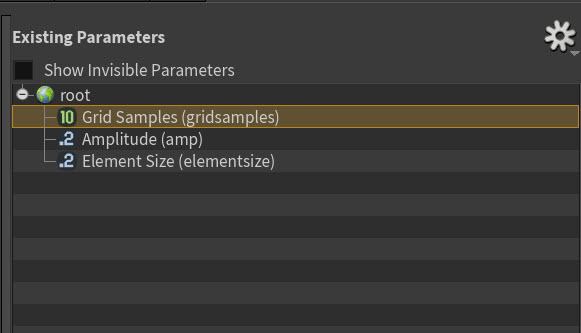
In the Edit Operator Type Properties pop-up window, locate the Existing Parameters tab.
-
You can expose parameters from your Heightfield SOP nodes to change them in Unreal Engine.
-
-
In your Heightfield SOP, drag the
Grid Samplesparameter into the Existing Parameters tab.-
Do the same for the Heightfield Noise SOP, drag the
AmplitudeandElement Sizeparameter.
-
You should now see the three parameters added.
-
-
Select Acccept.
Import into Unreal 
Make sure you have a Houdini Engine for Unreal session running. See Session for more information.
-
In Unreal, import the
Landscape_GenerationHDA. -
the HDA and select Instantiate at the origin.
Your landscape is now generated in Unreal with the proper materials assigned.
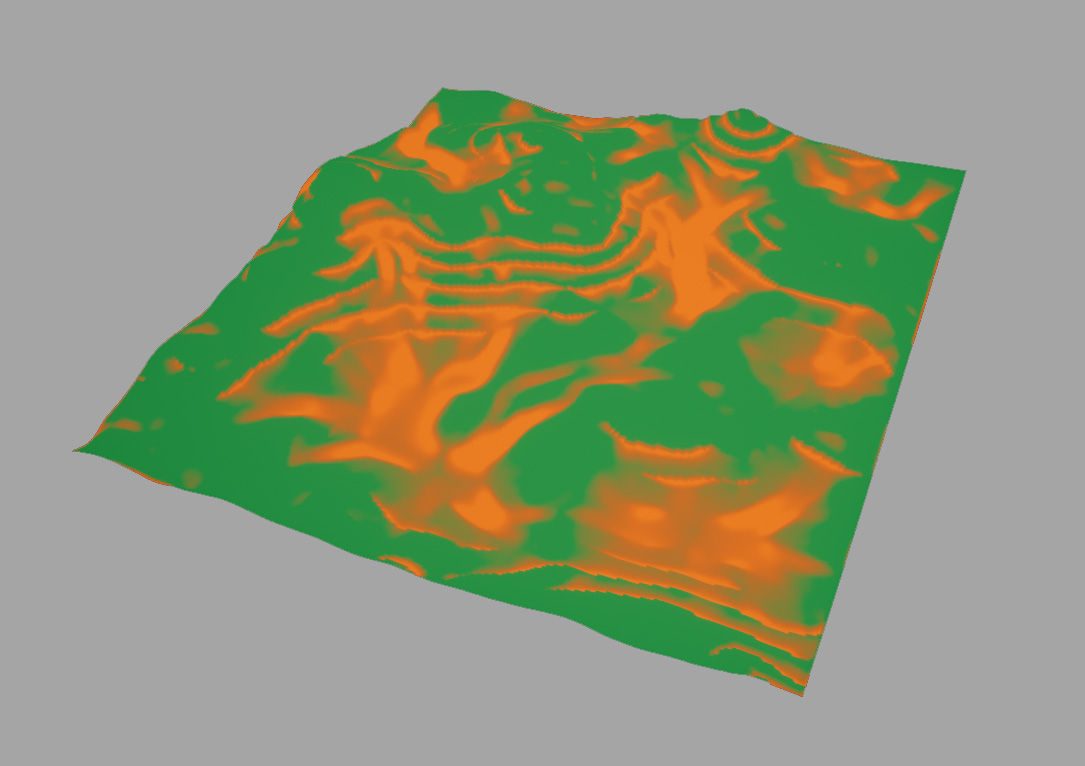
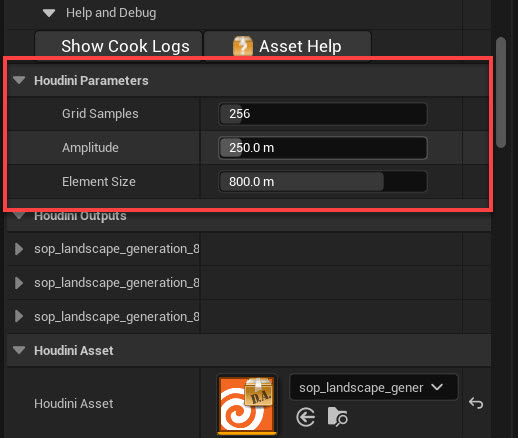
You can also see the exposed parameters in the Houdini Parameters section of the details panel to further edit your landscape within Unreal Engine.
| See also |