| On this page |
This workflow covers how to import Unreal landscape layers to spawn points using the
Heightfield Scatter SOP. There’s an advanced workflow that covers how to use the
unreal_foliage attribute to create Foliage Actors using Instances.
A few key things you will learn in this workflow:
-
using Unreal generated landscapes with Houdini
-
use landscape layers to spawn points
-
work with Instances and Foliage Actors
-
work with masks
Setup landscape in Unreal 
-
Create your landscape using Landscape mode.
-
Create new material and name it
LandscapeScatter_Material. -
In the material graph, click ⇥ Tab and create two
Constant3Vector.-
Change the color to red for the first constant.
-
Change the color to pink for the second constant.
-
-
Click ⇥ Tab and create a
LandscapeLayerBlend.-
In the details panel, select the + symbol next to Layers to add two Array elements.
-
In Index 0, expand the dropdown tab and change the name to
base. -
In Index 1, change the name to
grass.
-
-
Connect the Red Constant color white output to the Layer base input.
-
Connect the Pink Constant color white output to the Layer grass input.
-
Connect the Landscape Layer Blend output to the Base Color input.
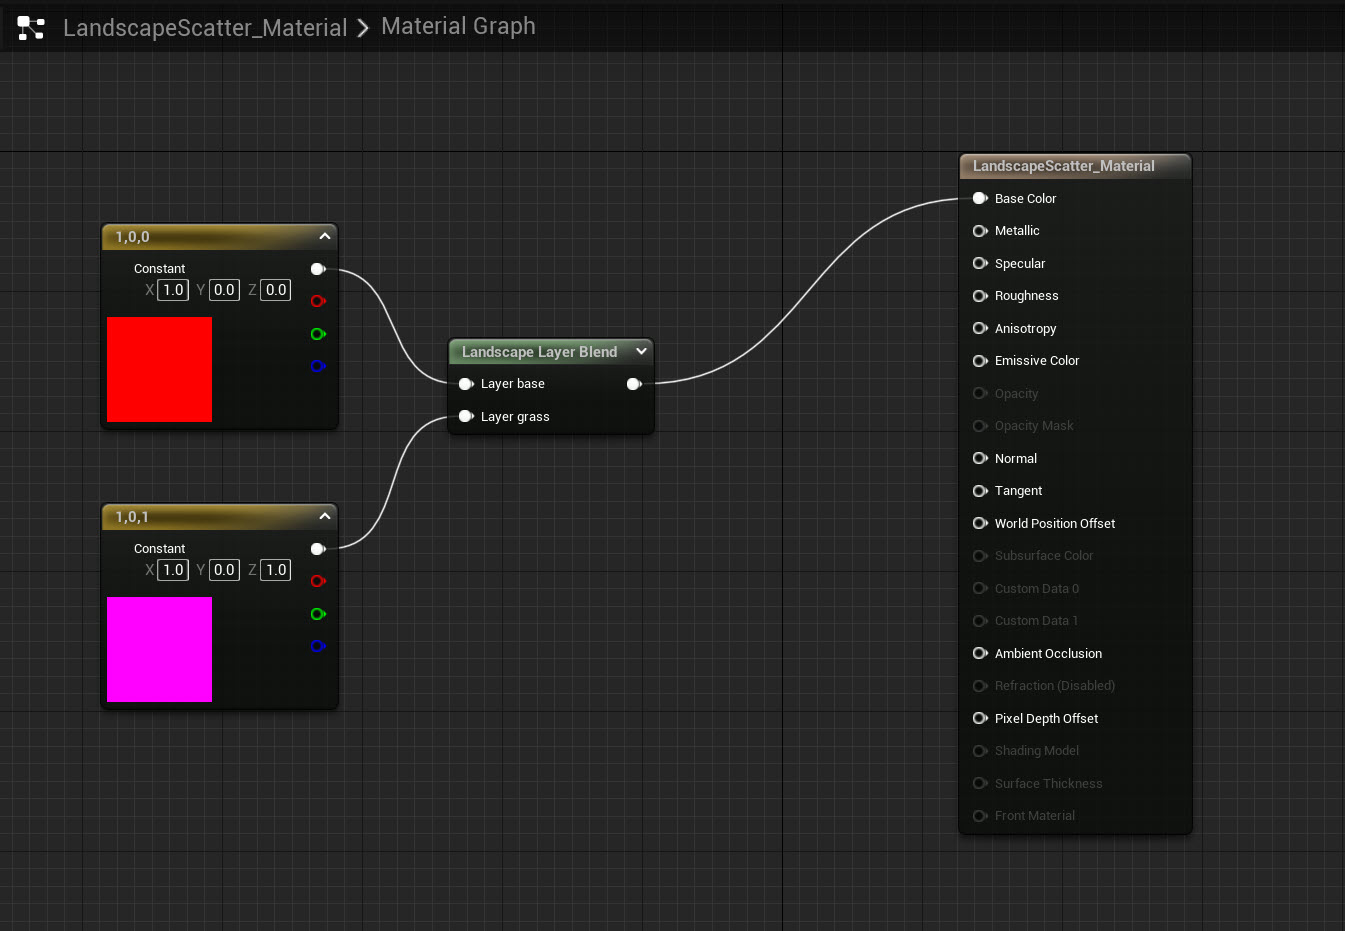
-
-
In the Outliner, select your landscape.
-
In the Details Panel, apply your material to the
Landscape Material. -
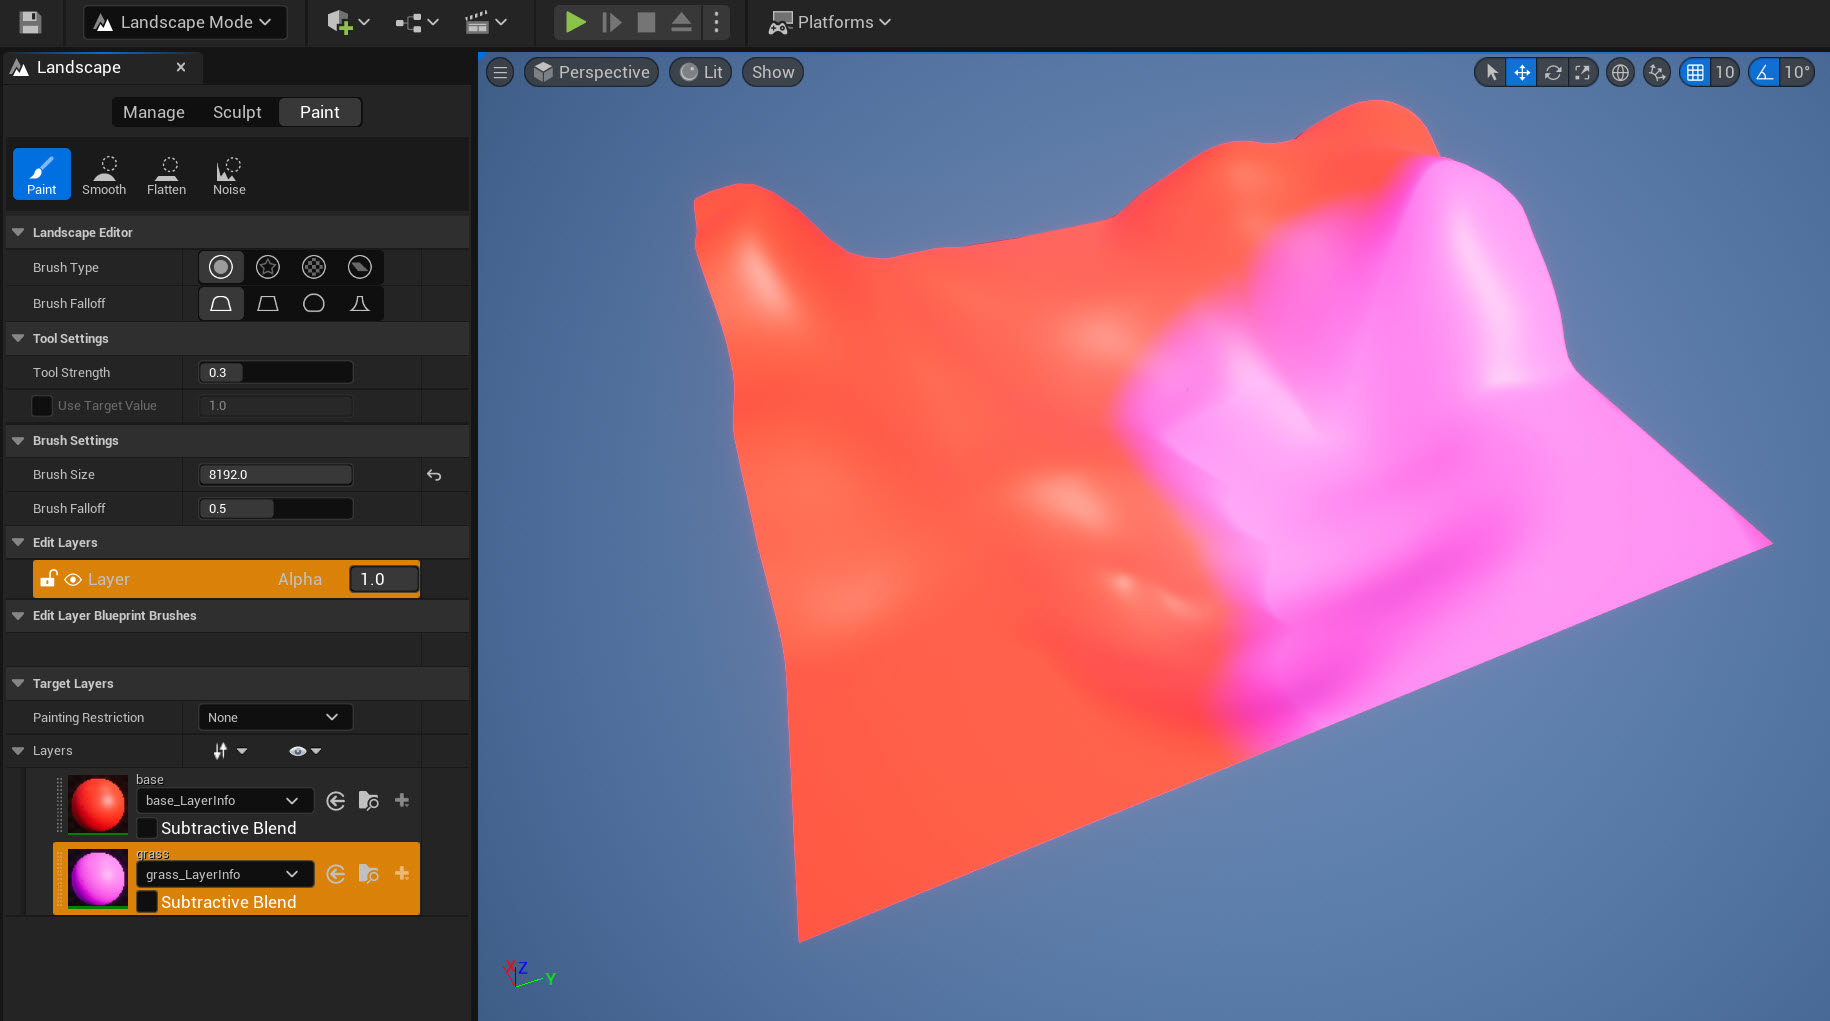
In Landscape Mode, go to Paint Tab and locate Target Layers. You should see your materials.
-
Select your weight-blended layer.
-
If you don’t have one, click the + symbol and create a Weight-Blended Layer (normal) for both materials.
-
-
Select your grass layer and paint a section of your landscape that will be scatttered.
Your landscape is now ready for Houdini.
Send Landscape to Houdini 
-
In the Houdini Engine main menu, select Open Houdini Session Sync.
-
A new Houdini application should open.
-
-
In the Outliner,
your Landscape and select Send to Houdini.
-
In Houdini, you should now see three nodes in the subnetwork.
-
If you want to work with a reference from Unreal, it’s safest to work in the UnrealContent node.
-
-
Enter the UnrealContent subnetwork, then enter the Landscape Geometry node to work in the Surface Operator network view.
You are now ready to setup Heightfield scatters on your referenced Unreal landscape.
Create scatter on Landscape 
-
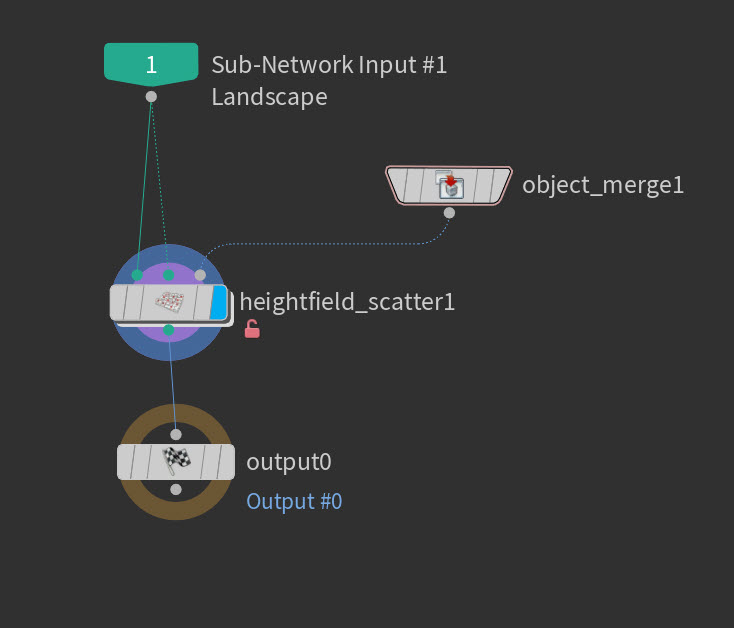
Create a
Heightfield Scatter SOP and connect the input1 and input2 to the output of the Landscape Object Merge.
-
In the Heightfield Scatter SOP node’s parameters, do the following:
-
In Mask Layer, change the name to
grass. -
Turn off the Keep Incoming Scatter Points and Keep Incoming Terrain parameters.
-
In Randomize Yaw, enter
180.
-
-
In your scene view toolbar, change the Object Visibility setting to Hide Other Objects.
-
Two references were created when you sent your landscape from Unreal.
-
-
Create an
Object Merge SOP and connect the output to input3 of the Heightfield Scatter SOP node.
-
Select the Object Merge SOP and Heightfield Scatter SOP. Then create a
Subnetwork SOP and name it
Landscape_Scatter. -
Enter into the
Landscape_Scattersubnetwork.
Export settings for HDA 
-
Select the Heightfield Scatter SOP and Object Merge SOP, then
the
Landscape_Scattersubnetwork in the View toolbar and select Create Digital Asset. -
In the pop-up window, change the Asset Label name to
Landscape Scatter.-
You can change the other settings to your preference.
-
-
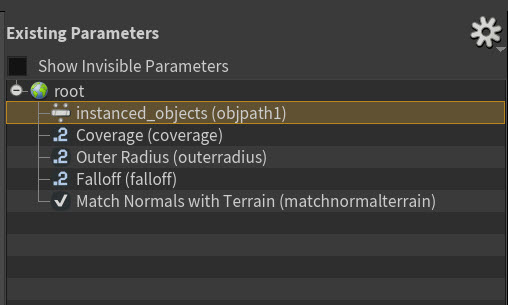
In the Edit Operator Type Properties pop-up window, locate the Existing Parameters tab.
-
You can expose parameters from your Heightfield SOP nodes to change them in Unreal Engine.
-
-
In your Object Merge SOP, drag the
Object1parameter into the Existing Parameters tab.-
In the Parameter Description pane, rename the Label parameter to
instanced_objects.
-
-
In your Heightfield Scatter SOP, drag the following parameters in to the Existing Parameters tab:
-
mask layer,Outer Radius,Falloff, andMatch Normals with Terrain
-
-
Select Acccept.
Setup scatter in Unreal 
-
In Unreal, import the Landscape_Scatter HDA.
-
the HDA and select Instantiate at the origin.
-
In the Outliner, select the Landscape_Scatter HDA. Then locate the Details Panel.
-
You can also see the exposed parameters of
Coverage,Outer Radius, etc. from Houdini as options.
-
-
In Houdini Inputs, change the dropdown from Geometry Input to World Input.
-
Select Start Selection, select your Unreal Landscape, then selecet Use Current.
-
You should now see your landscape in the Current Selected Actors window.
-
-
In Houdini Parameters, locate instanced objects and select a static mesh from the dropdown menu.
-
Select Rebuild.
-
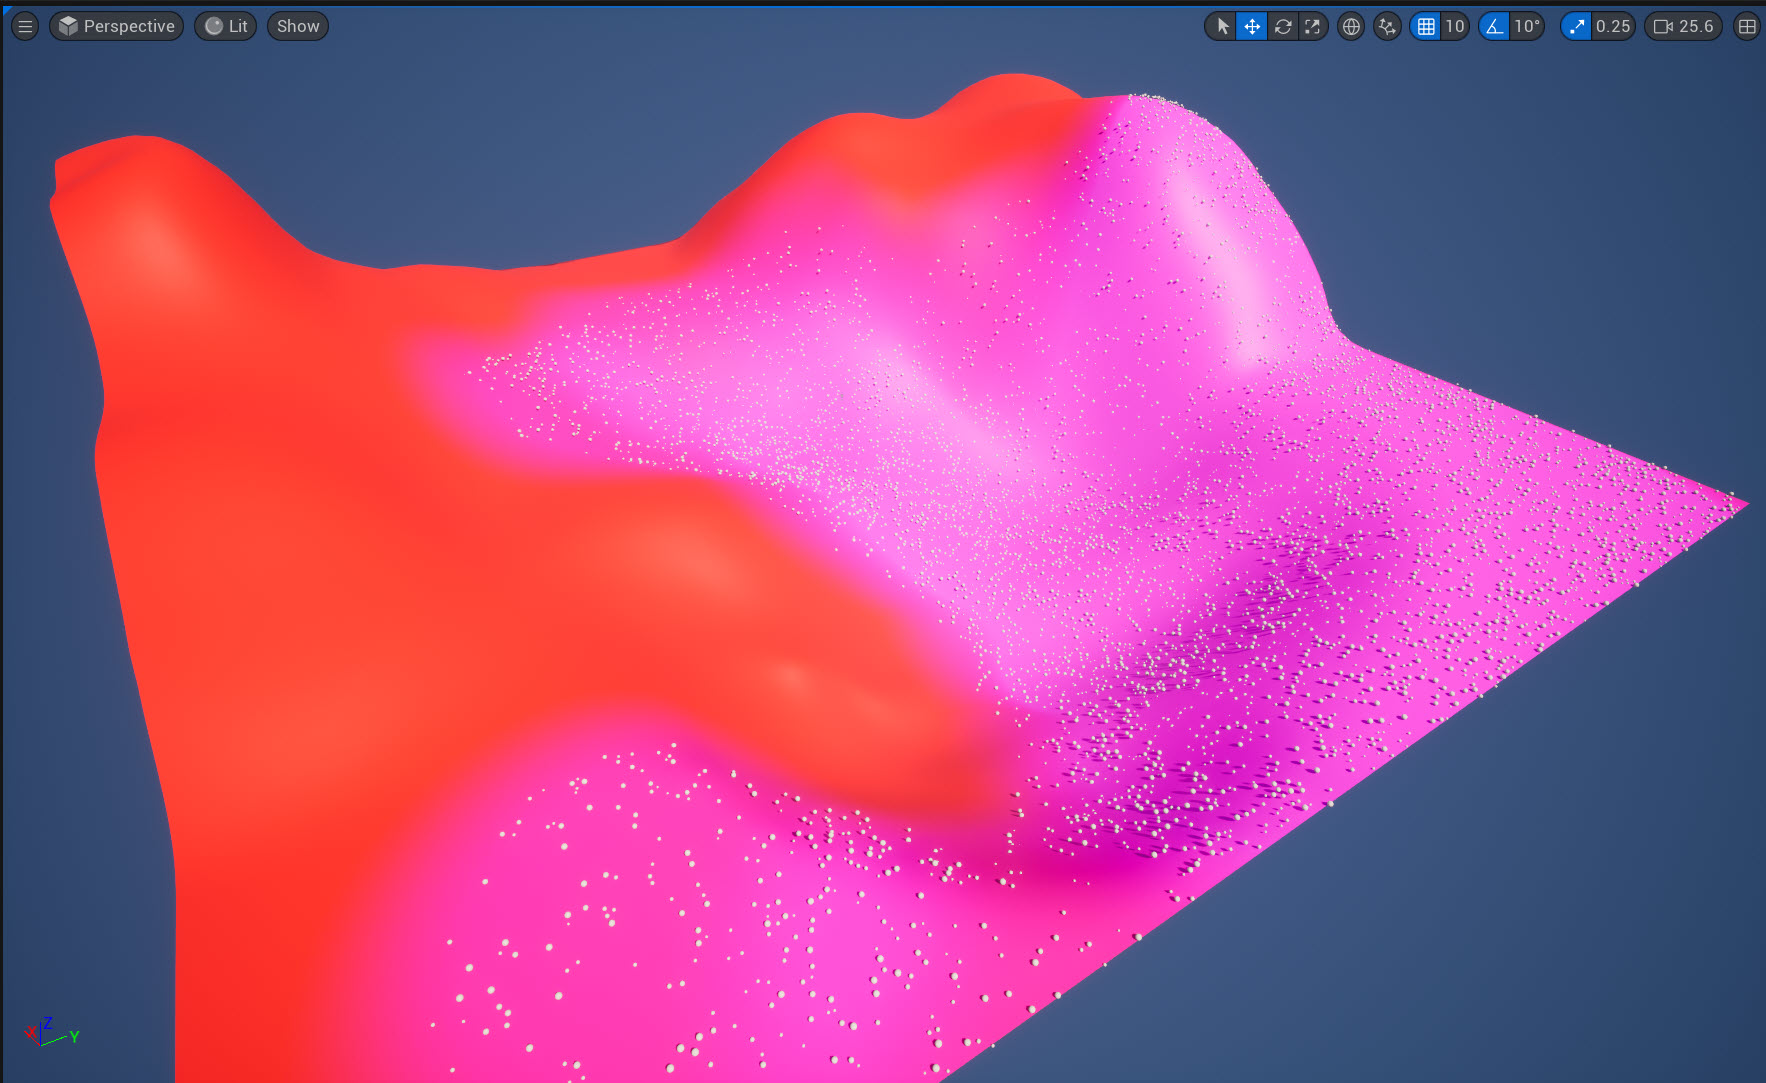
You should now see your static mesh generated on the painted
grasssection.
-
-
Select Bake.
-
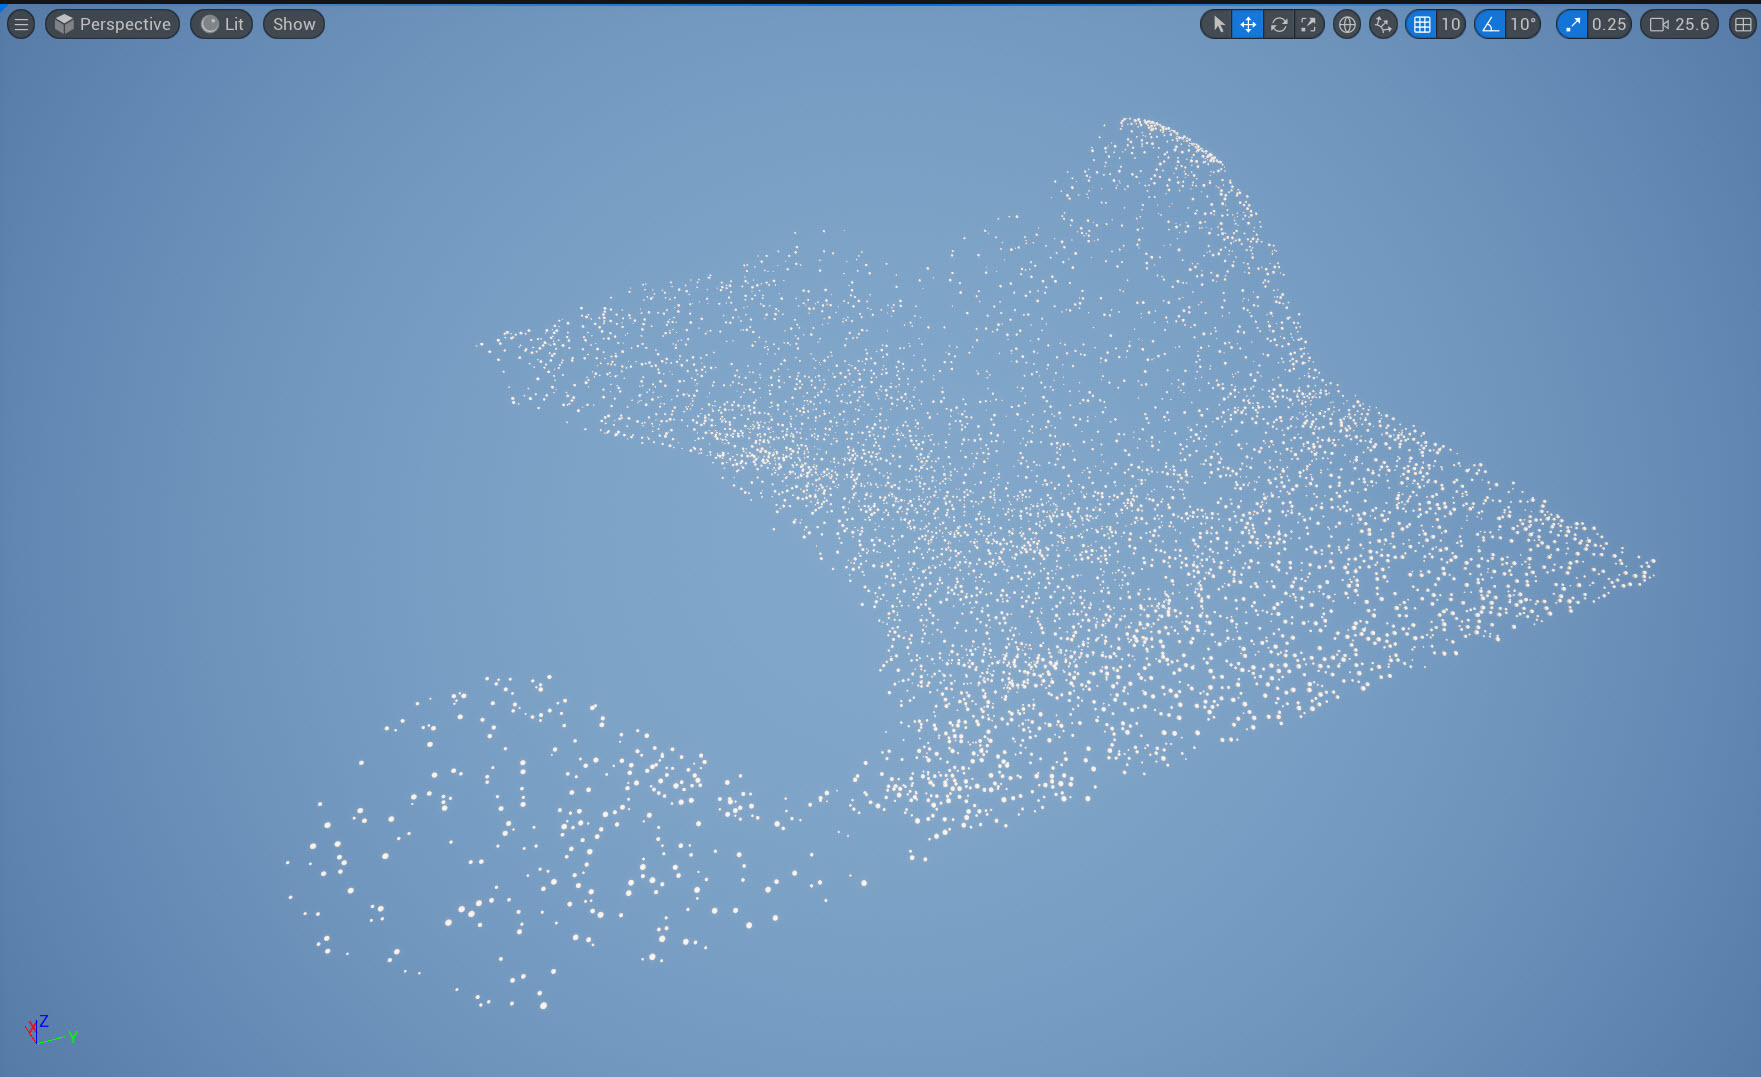
You should see a new actor created in the Outliner from the scattered static mesh.
-
You have completed the scatter layers workflow. You can continue below for an advanced method to use scatter as foliage actors.
Use scatter as foliage actor 
This workflow is a continuation of the scatter layers and allows you to use instances as foliage actors with the unreal_foliage attribute. See Attributes and Groups for more information.
-
In Houdini, create a
Attribute Create SOP and connect the input to the output of the Heightfield Scatter SOP node. Then connect the output to the Ouput SOP node.
-
In the Attribute Create SOP node’s parameters, do the following:
-
In Name, enter
unreal_foliage. -
In Type, select Integer.
-
In Default, change the first box to
1. -
In Value, change the first box to
1.
-
-
the
Landscape_Scattersubnetwork in the View toolbar and select Save Node Type.
Foliage actor setup in Unreal 
-
In Unreal, delete the old HDA and actors in the Outliner.
-
In the Content Browser, select the
Landscape_ScatterHDA and select Reimport.
-
In the Outliner, select the Landscape_Scatter HDA. Then locate the Details Panel.
-
In Houdini Inputs, change the dropdown from Geometry Input to World Input.
-
Select Start Selection, select your Unreal Landscape, then selecet Use Current.
-
You should now see your landscape in the Current Selected Actors window.
-
-
In Houdini Parameters, locate instanced objects and select a static mesh from the dropdown menu.
-
Select Rebuild.
-
You should now see an
InstancedFoliageActorin your outliner.
-
-
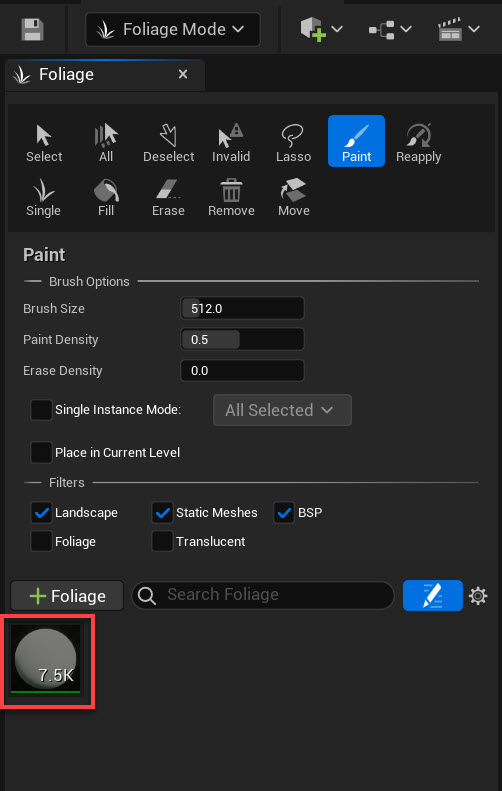
Change into Foliage Mode.
-
You should see your static mesh as one of the foliage options.
-
-
Change into Landscape Mode and paint another section using the
grasslayer. -
Change into Selection Mode, select your
Landscape_ScatterHDA from the outliner and select Recook.-
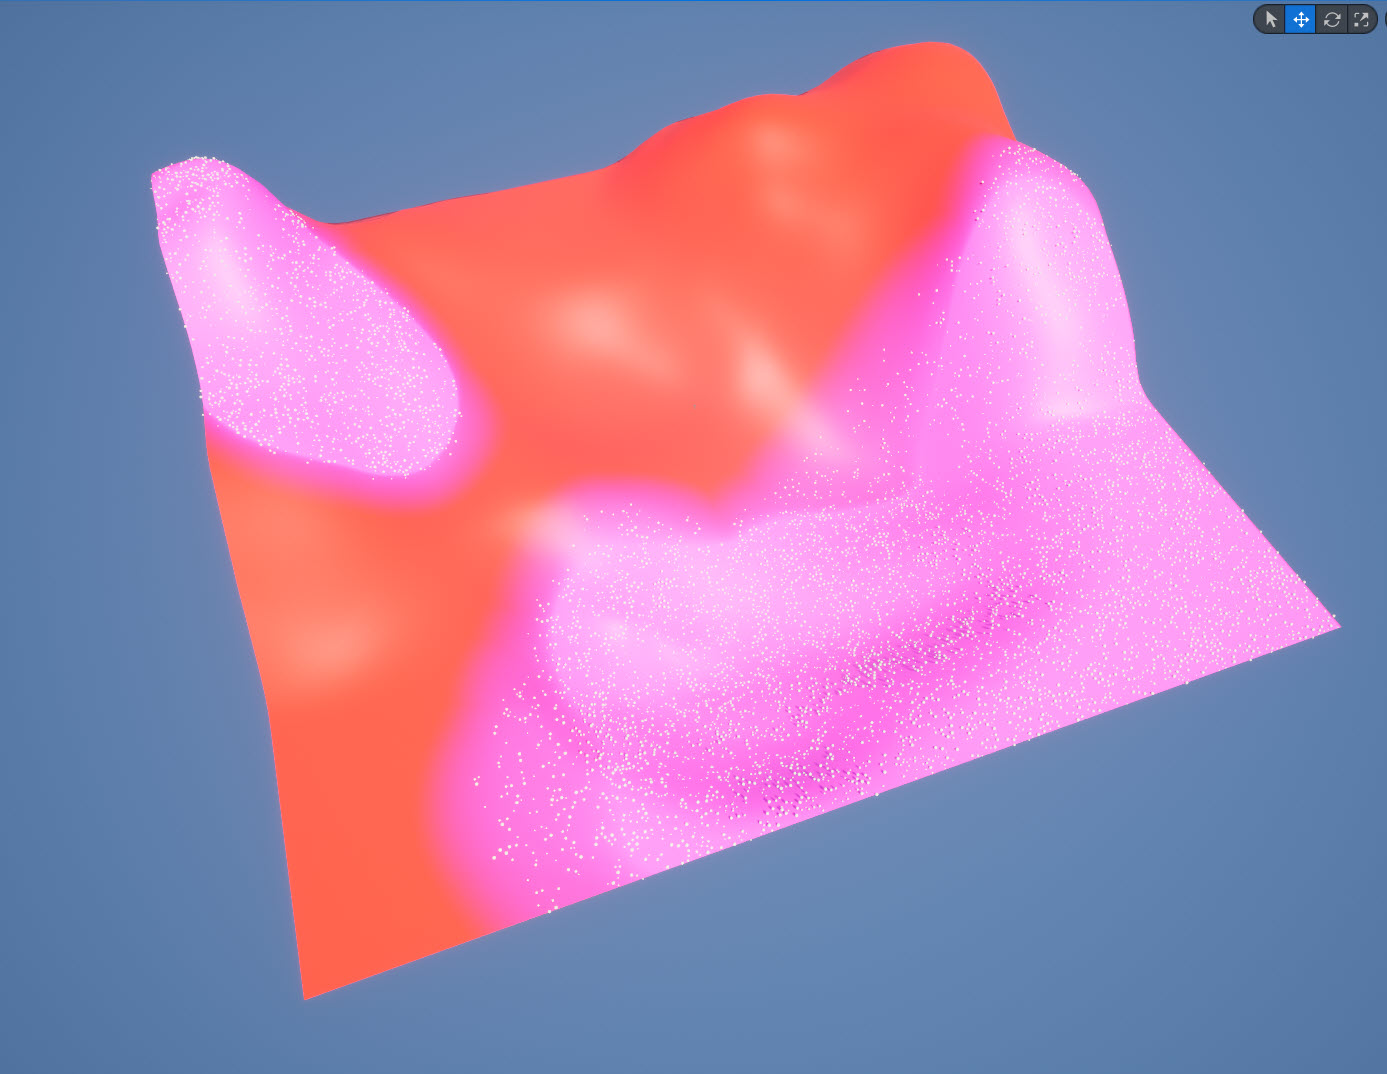
The newly painted area should now populate with the foliage actor.
-
| See also |