| On this page |
Warning
This feature is experimental and is subject to change.
The plug-in currently has experimental support for landscape spline output as polygon curves in Houdini.
Houdini Curves As Landscape Splines 
Landscape splines in Unreal consist of control points and segments. A curve primitive in Houdini can correspond to one or more segments in Unreal.
Set the unreal_landscape_spline attribute to 1 to recognize primive as landscape splines.
The unreal_landscape_spline_target_landscape primitive attribute sets the target landscape to create the landscape splines. See Output Attributes for more information.
Control Points & Segments 
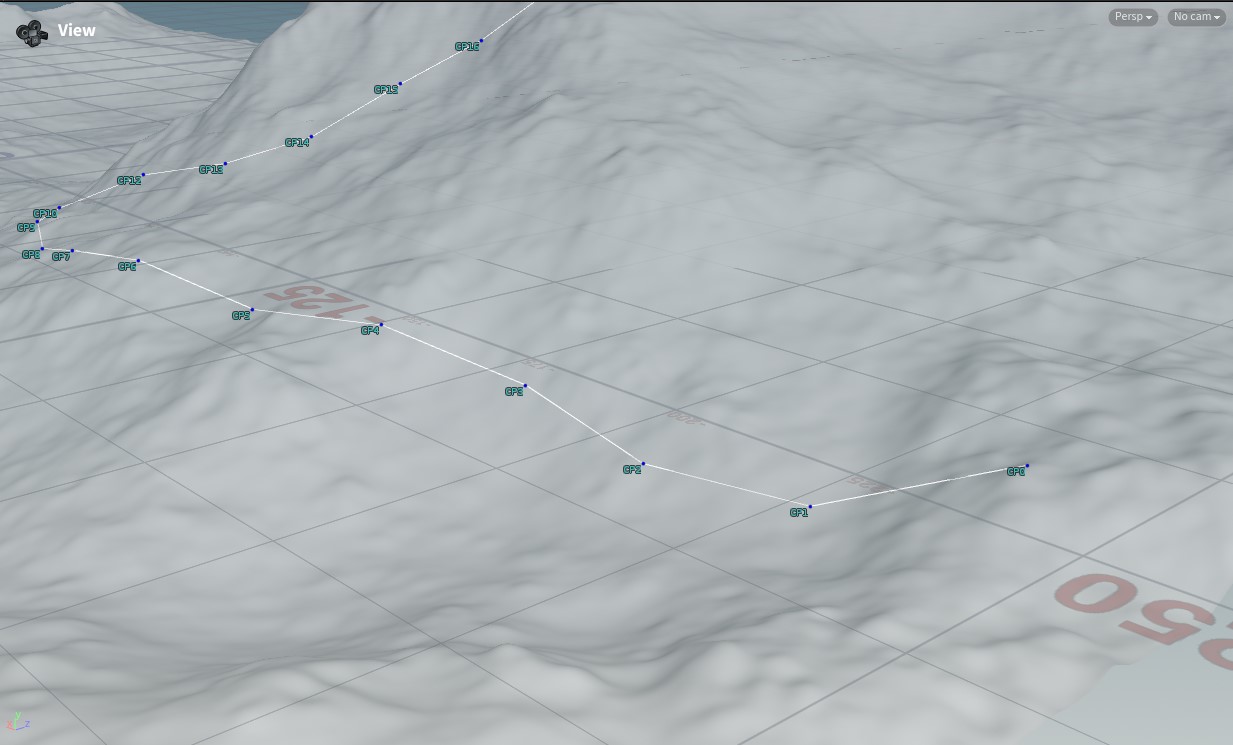
By default, all points of a curve primitive are treated as control points. Iterating over the curve points, if a point is a control point then a segment will be created between that point and the previous control point until the last point of the primitive.
You can also specify only a subset of points should be treated as control points. To do this, set the unreal_landscape_spline_control_point_id point attribute on the points you want to use as control points to a value that is greater than or equal to 0.
To omit points as control points, set the id to -1 (or a value less than 0). If two or more points have the same id they are treated as the same control point in Unreal. When the control point is created in Unreal its location, orientation, and other properties will be set from the first point that was processed with that id.
You can use separate curve primitives to represent landscape splines, where each curve primitive represents a segment in Unreal. To do this, have only two points per primitive, or set a valid id on the first and last point of the primitive only. Separate primitives can be connected as segments by a control point if they share a point with the same control point id.
The number of control points in a landscape spline is limited to 1000 due to an issue in Unreal. A large number of control points will cause Unreal to run about of memory and crash when using Open World levels.
To summarize, a point from a curve primitive in Houdini will be created as a control point in Unreal if:
-
It is the first or last point of a curve primitive.
-
The
unreal_landscape_spline_control_point_idpoint attribute does not exist on the geometry. -
The
unreal_landscape_spline_control_point_idattribute value for the point is greater than or equal to 0.
Note
While the control point location and rotation (rot) will be applied to the control points in Unreal, the segments will not match the curve primitive exactly. There are various factors that can influence how the interpolated spline points of the segments are calculated in Unreal. It is best to view the translation of Houdini curves to landscape splines as a mechanism for creating and configuring control points and segments in Unreal with the requisite properties. Not as a process to try to match the Houdini curve primitive’s geometry to the landscape splines created in Unreal.
One situation where there could be a large difference between the geometry in Houdini and the landscape spline in Unreal is using mesh sockets for the segment connections, see example.
World Partition 
Landscape spline output is supported with and without world partition. When using world partition, landscape splines are created as ALandscapeSplineActors in Unreal, attached to the target landscape. The unreal_output_name attribute can set the name of the output ALandscapeSplineActor.
If you want to create multiple actors and control which segments/splines are created on a specific actor, set the unreal_output_name primitive attribute accordingly. For example, if you have splines that represent roads and splines that represent rivers, create your roads and rivers as separate primitives and set the unreal_output_name attribute to Roads for the road primitives and to Rivers for the river primitives.
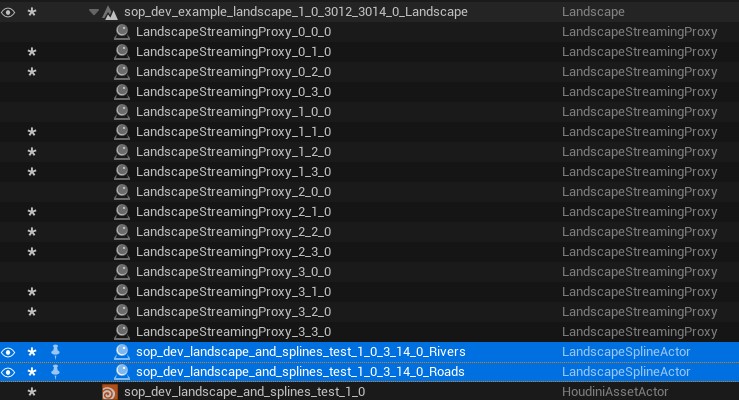
unreal_output_name attribute.If world partition is not enabled for a level, then the unreal_output_name attribute has no effect and all landscape splines are created on the ULandscapeSplinesComponent of the target landscape actor.
How-to: Creating A Pipeline 
This example uses landscape splines to create a pipeline. You can make each control point a pylon that supports the pipeline, where the segments use a tubular mesh to represent the pipeline itself.
Control Points 
This example sets the unreal_landscape_spline_control_point_mesh point attribute to StaticMesh'/Game/Meshes/Pylon.Pylon' on each control point. This Pylon represents the static mesh asset. By setting this as the control point mesh, it will be created at each control point location. You can also set the rot attribute to control the orientation of the control point, to ensure that it is orientated along the spline.

The pylon static mesh is a simple rectangular box with two sockets at the top: TopIn and TopOut. These sockets are used later to configure the segment connections (see the Segment Connections section).
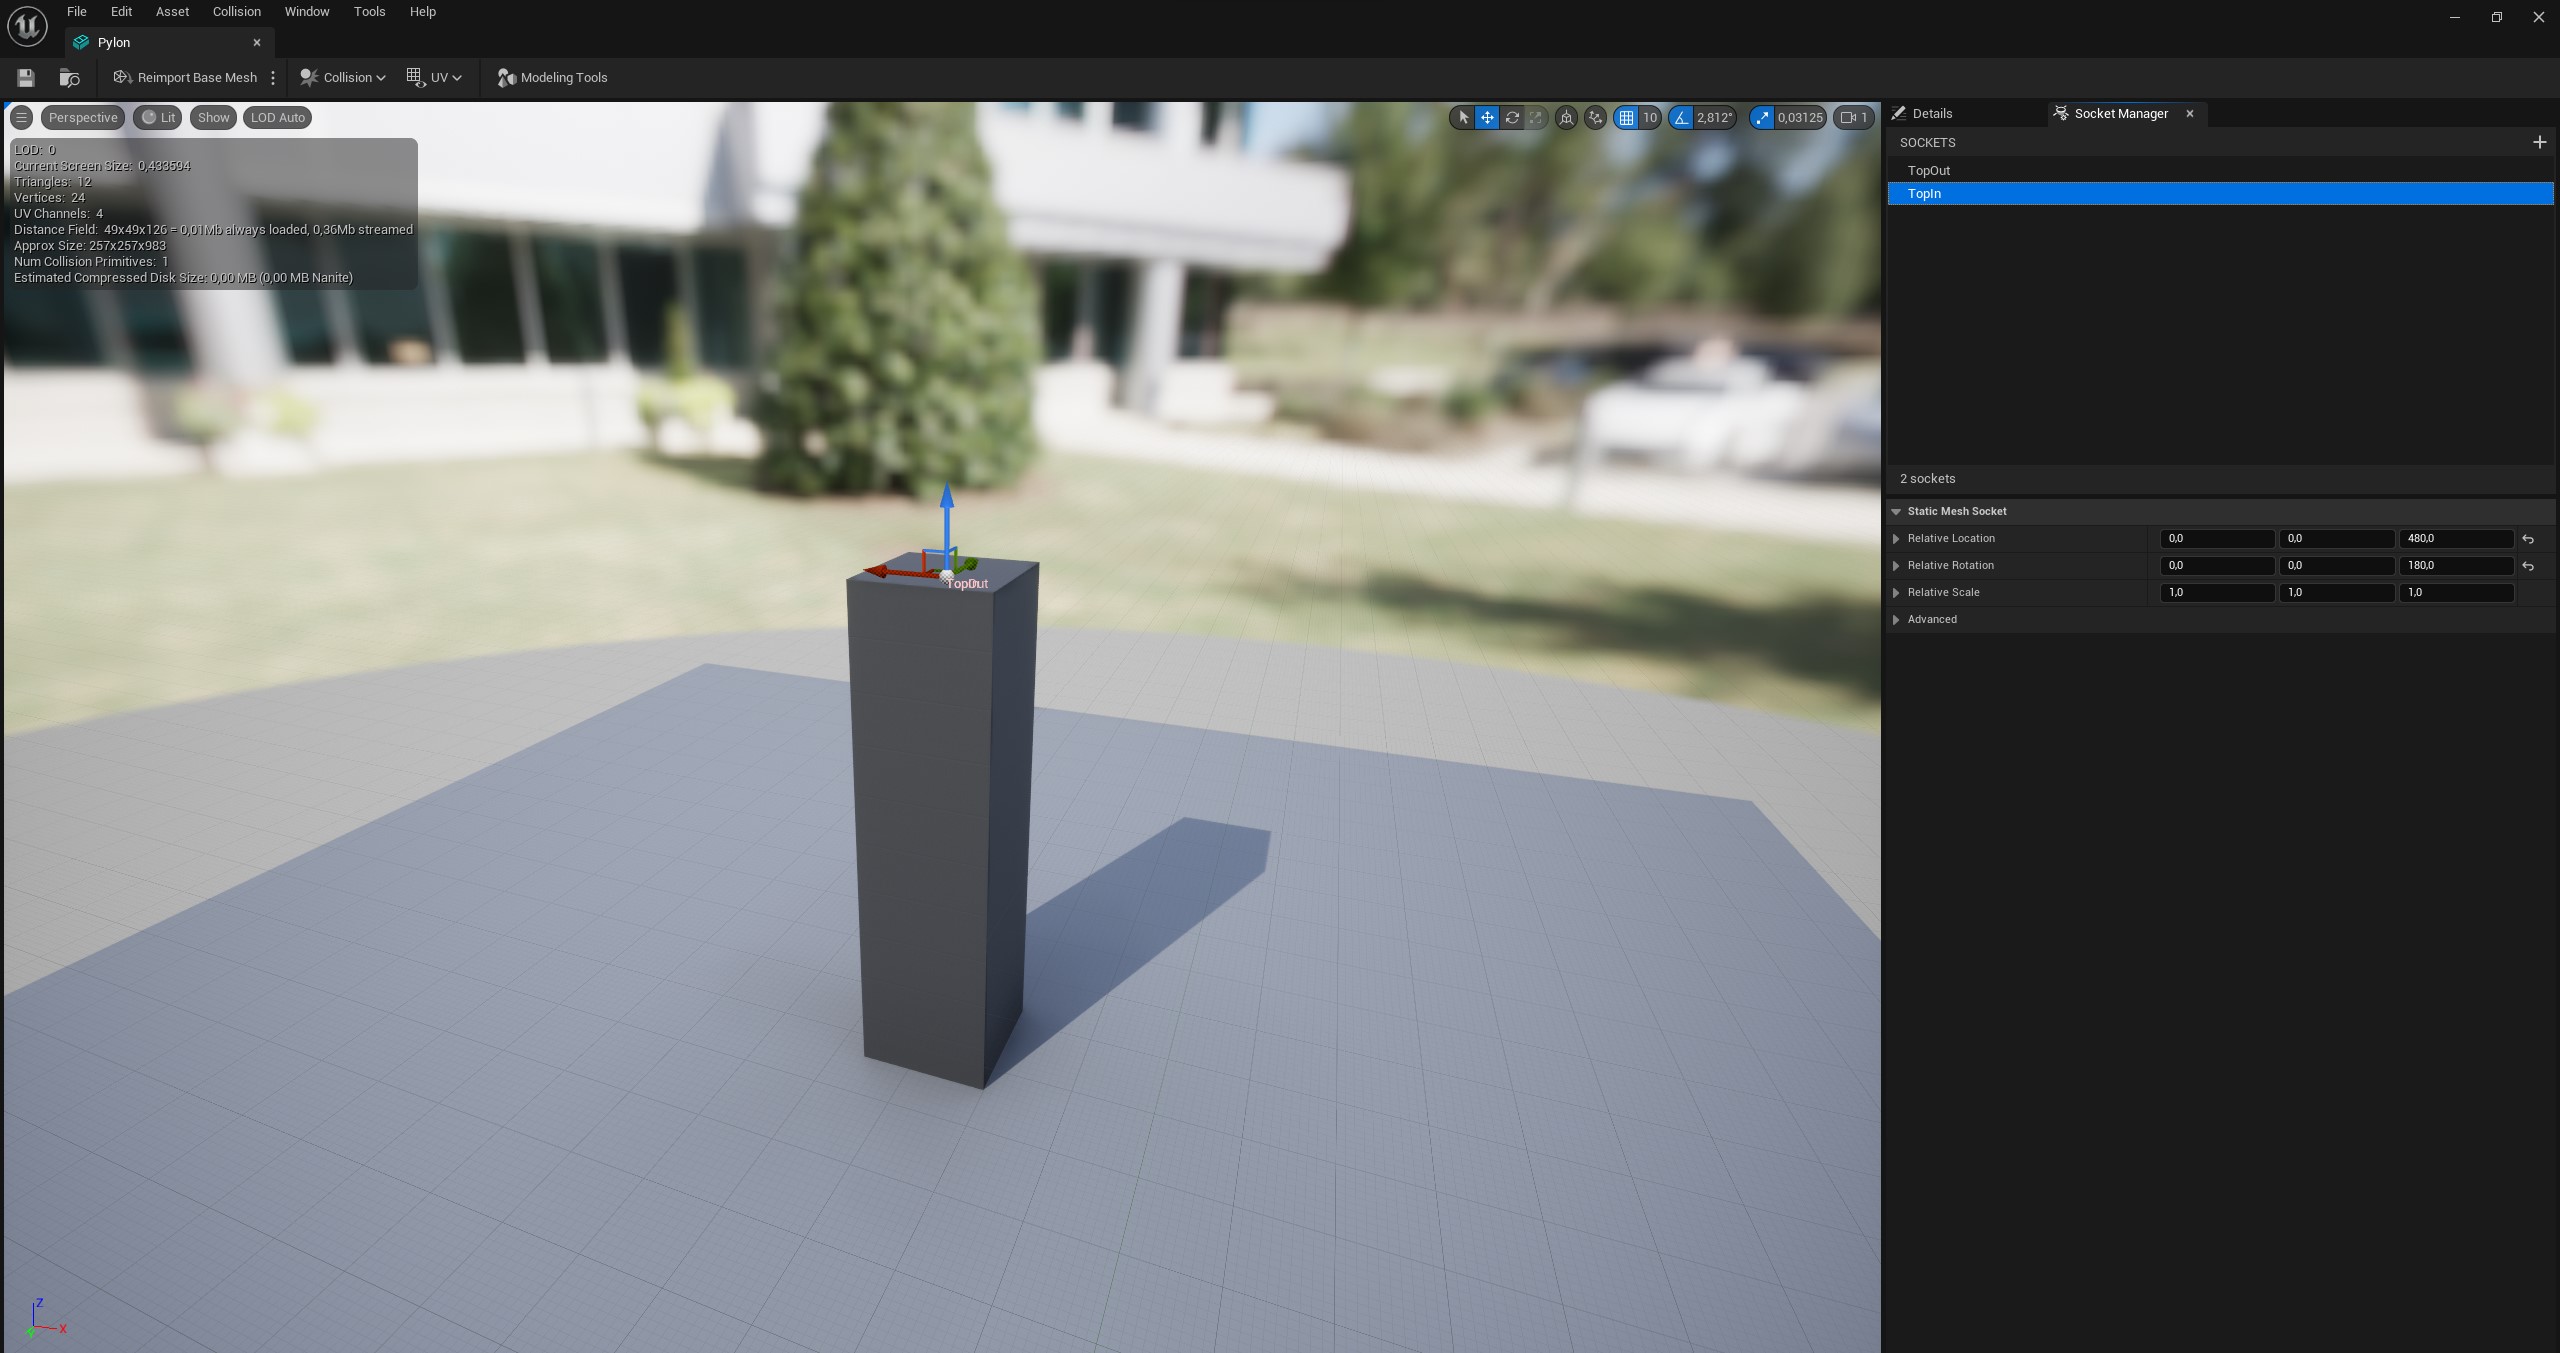
There are a number of additional point attributes for control points, such as setting the mesh scale and material overrides. See the Control Point Attributes section for more information.
The landscape splie in Unreal shows the pylon meshes on each control point with the segments in between the control points rendered as green ribbons.
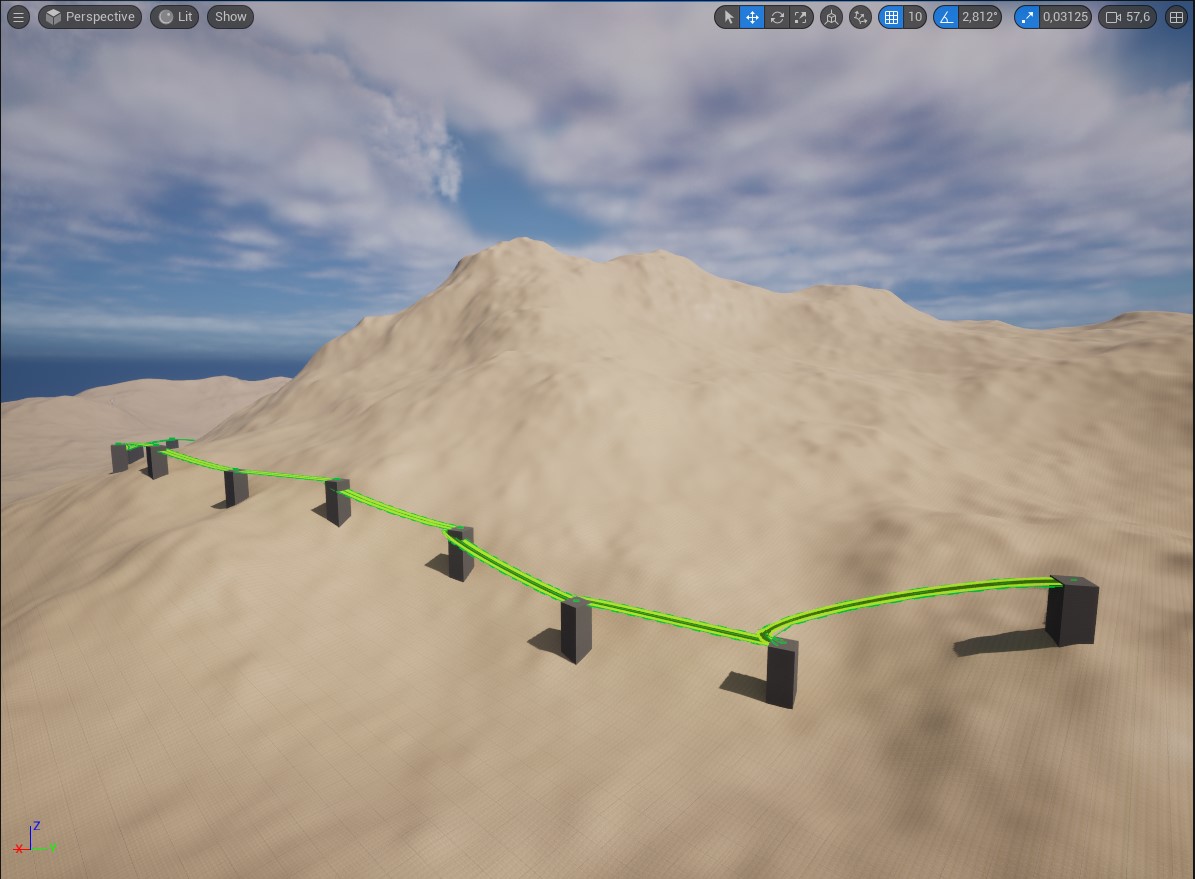
By default Unreal automatically determines a socket to use for the segment and control point mesh connections (if the control point mesh has sockets). This is corrected in the socket selection in the Segment Connections section.
Segments 
A number of attributes are supported for configuring the segments. To use more than one segment per curve primitive, set vertex attributes to configure the segment properties. When using one segment per primitive, set primitive attributes to configure the segment.
In the pipeline example, set the mesh that the segments should use. To achieve this , set the unreal_landscape_spline_segment_mesh attribute on first vertex of each segment (each vertex that corresponds with a control point) to StaticMesh'/Game/Meshes/Shape_Tube.Shape_Tube'.
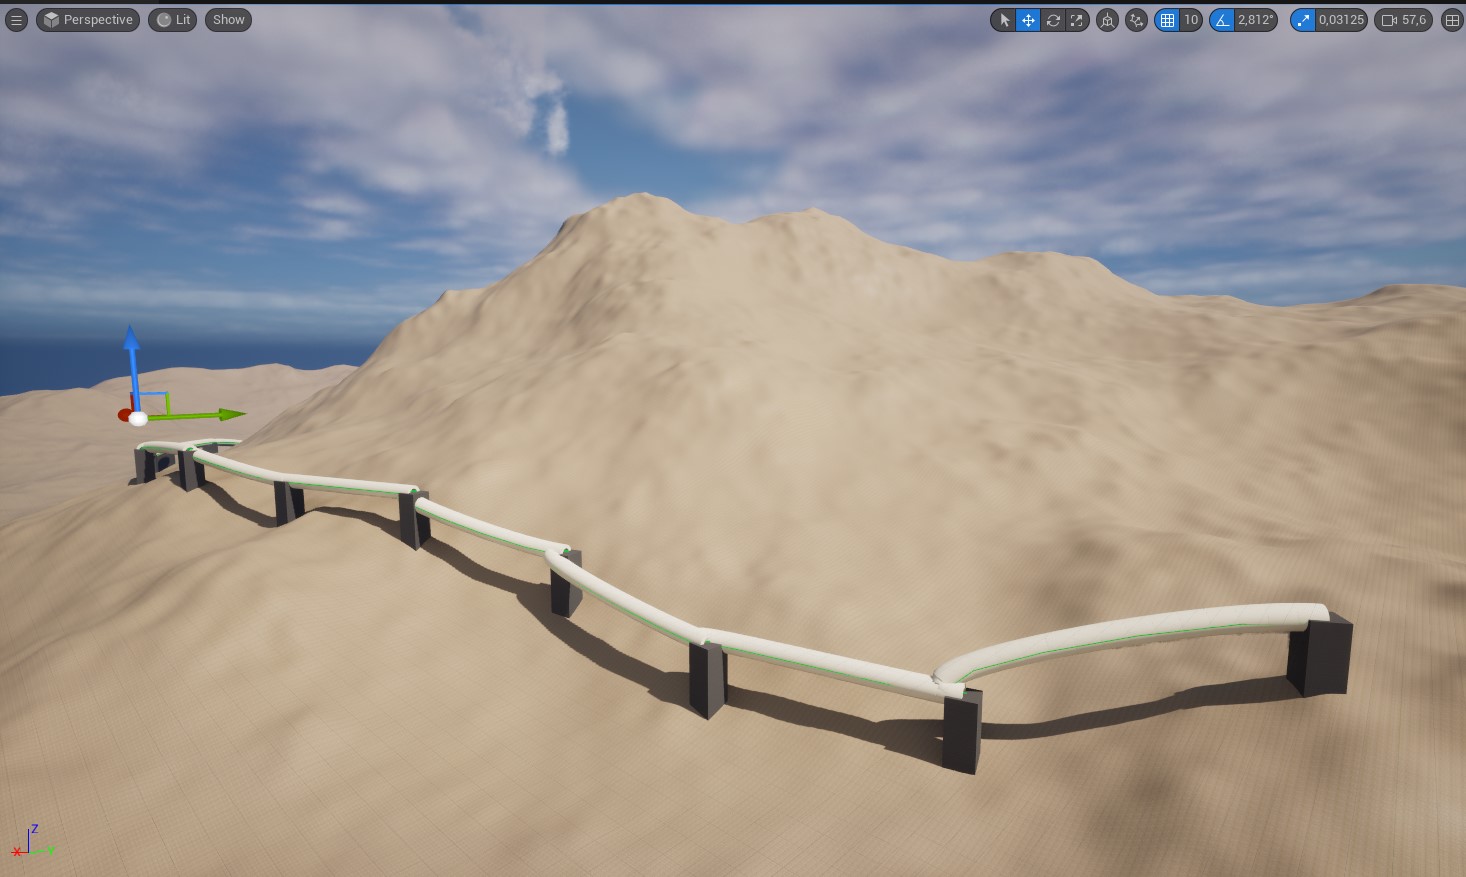
For more information on the attributes that are supported for configuring segments, such as setting additonal meshes, material overrides and whether the segment should raise/lower the terrain, see the Segment Attributes section.
At this point, the example has pylons and a tubular mesh. However the orientation of the segment and control point connections are incorrect.
Segment Connections 
For each segment connection the tangent length and control point mesh socket (for the connection location and orientation) can be configured via attributes. These attributes are set on either the first vertex of the segment or on the primitive that represents the segment.
Each segment has two segment connections: connection 0 is at the start of the segment and connection 1 is at the end of the segment. The unreal_landscape_spline_segment_connectionX_mesh_socket_name attribute sets the socket name of the control point mesh for connection X.
In the pylon example, there are two sockets at the top of the mesh: TopIn and TopOut, so set unreal_landscape_spline_segment_connection0_mesh_socket_name to TopOut and unreal_landscape_spline_segment_connection1_mesh_socket_name to TopIn:
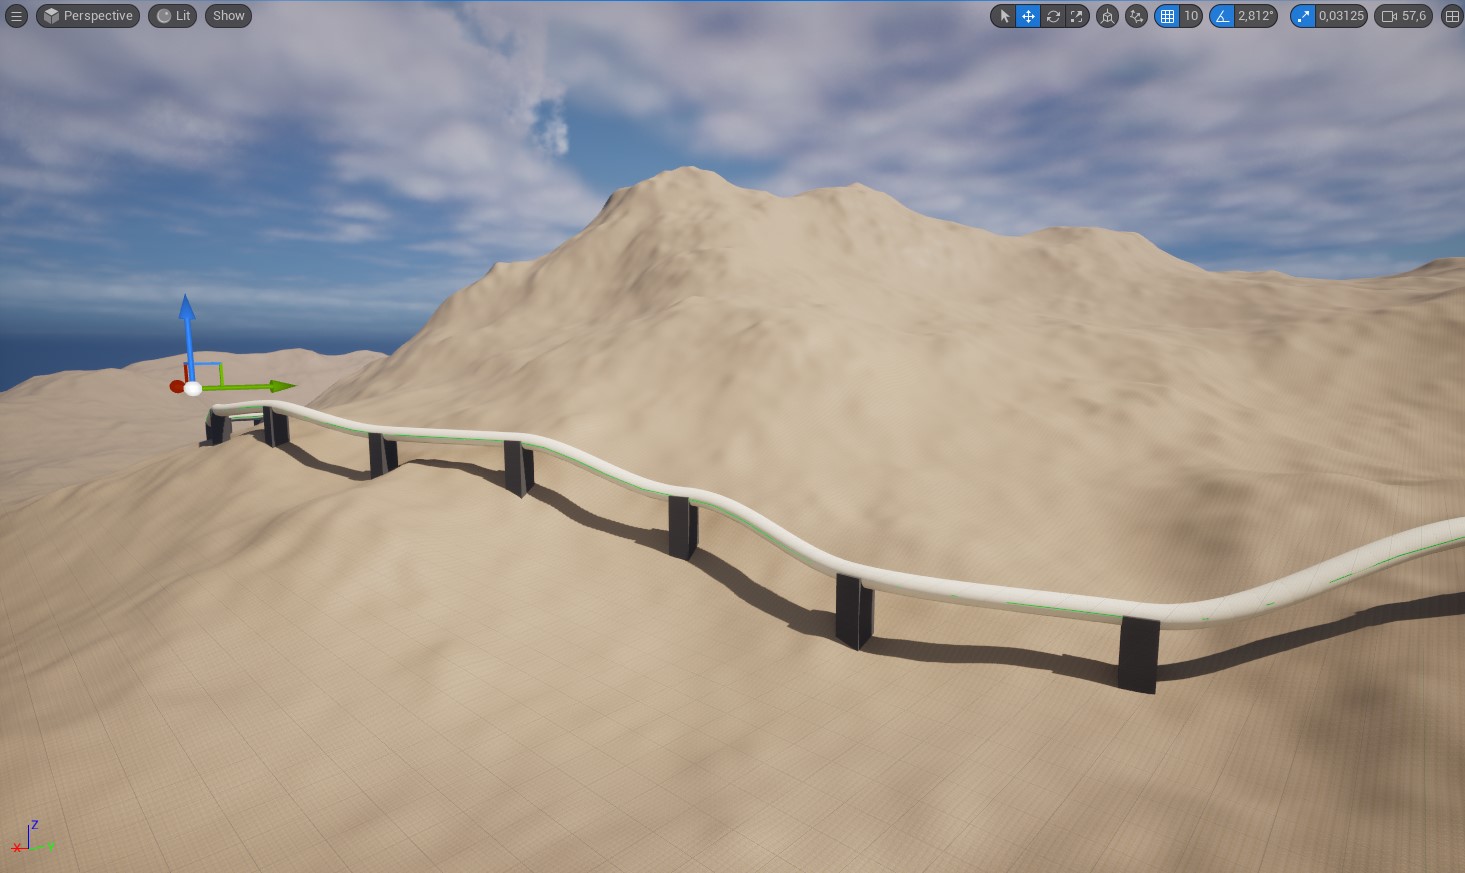
At this point, you have configured the control point locations and orientation, the mesh to use for the control point, the mesh to use for the segments, and the mesh sockets to use when connecting the segments to the control point meshes.
Edit Layers 
Landscape spline output supports using reserved spline edit layers or creating edit layers and applying the landscape splines to the specified edit layers.
Note
If the target landscape has a reserved landscape splines layer, then edit layers for landscape splines specified via attributes are ignored and the reserved layer is always used.
In our pipeline example, there are areas where segments might intersect the terrain:
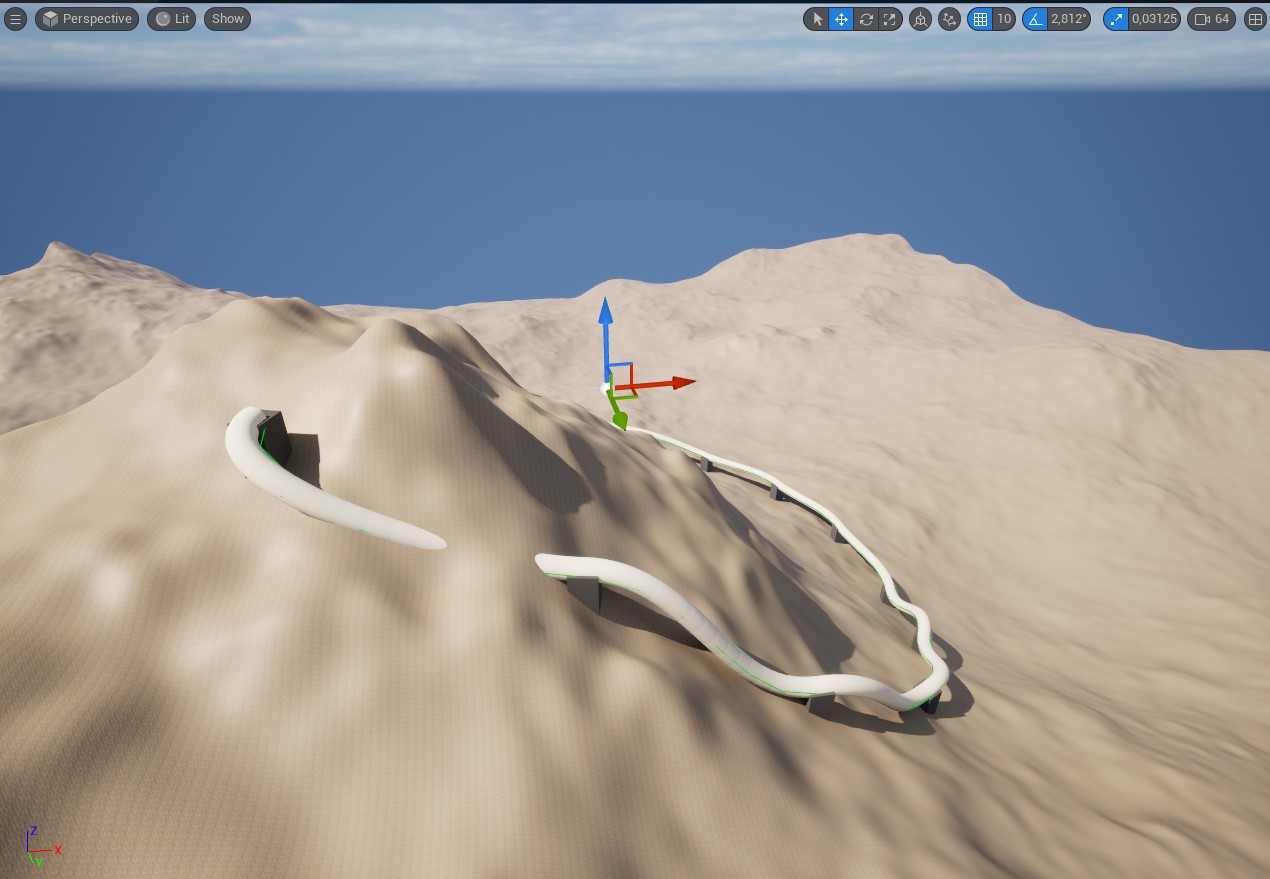
You need the landscape spline to lower the terrain in these areas. To achive that, configure a reserved splines layer on the landscape and set the vertex or primitive unreal_landscape_spline_segment_lower_terrain attribute to 1 on the segments:
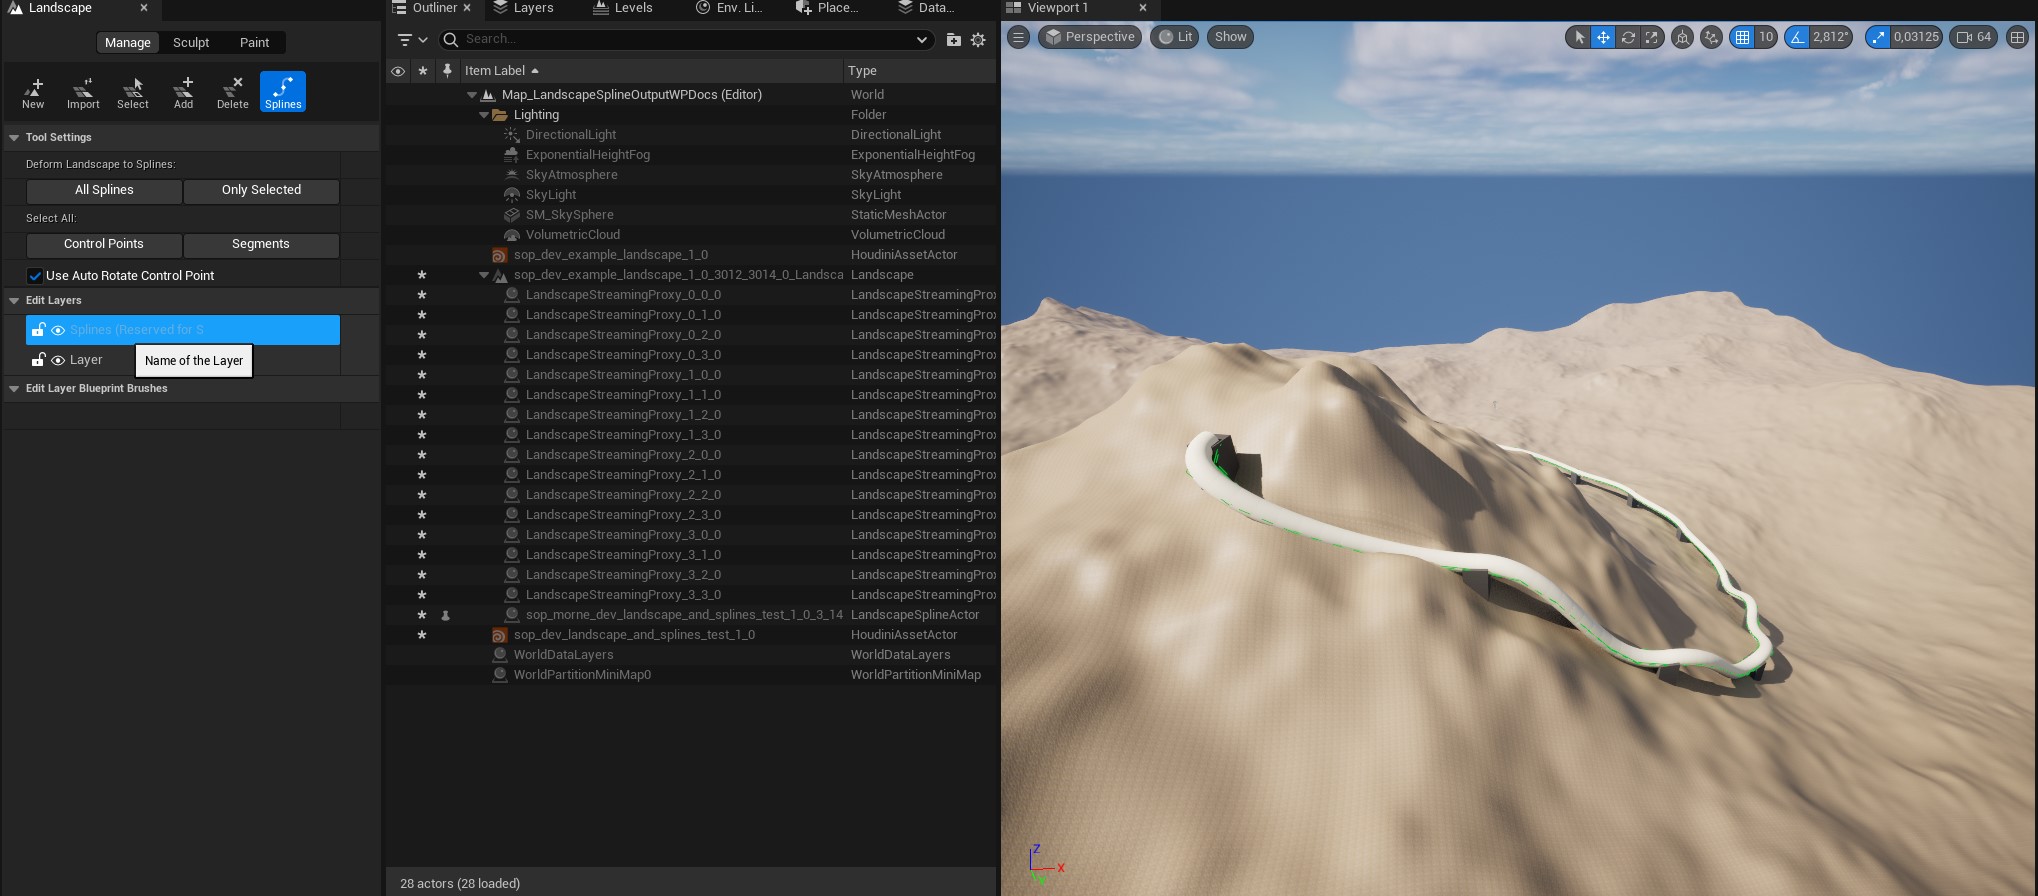
Using a reserved landscape spline layer is likely the most non-destructive workflow. However, using the following attributes it is possible to control the creation of edit layers and to apply the landscape splines to the edit layers. See Landscape Splines edit layer attributes.