| On this page |
The ![]() APEX Add Groom SOP introduces a whole new workflow to Hoduni 20.5 for more control over a character’s feathers.
APEX Add Groom SOP introduces a whole new workflow to Hoduni 20.5 for more control over a character’s feathers.
If you're an experienced user, you’ll do everything as before: you draw the feathers, scatter them over the character, do the interpolation, apply brushes and create the groom. In the Houdini 20 workflow you've sent the result directly to the ![]() Houdini Procedural: Feather LOP to render your artwork. The add groom workflow, however, requires two additional steps between grooming and rendering:
Houdini Procedural: Feather LOP to render your artwork. The add groom workflow, however, requires two additional steps between grooming and rendering:
-
Animation setup. Here you animate selected feathers through automatically generated joints for a more control over the behavior.
-
Render setup. Here you apply the animation to the groom, and create rest and animation states to feed the procedural. If you've worked with deformed feathers before, you’ll certainly recognize the necessary steps, because they're almost identical.
For the animation state, you can select master feathers through the APEX Add Groom SOP. Based on this selection, the node will automatically generate new joints to steer the feathers' animation with minimal configuration effort.
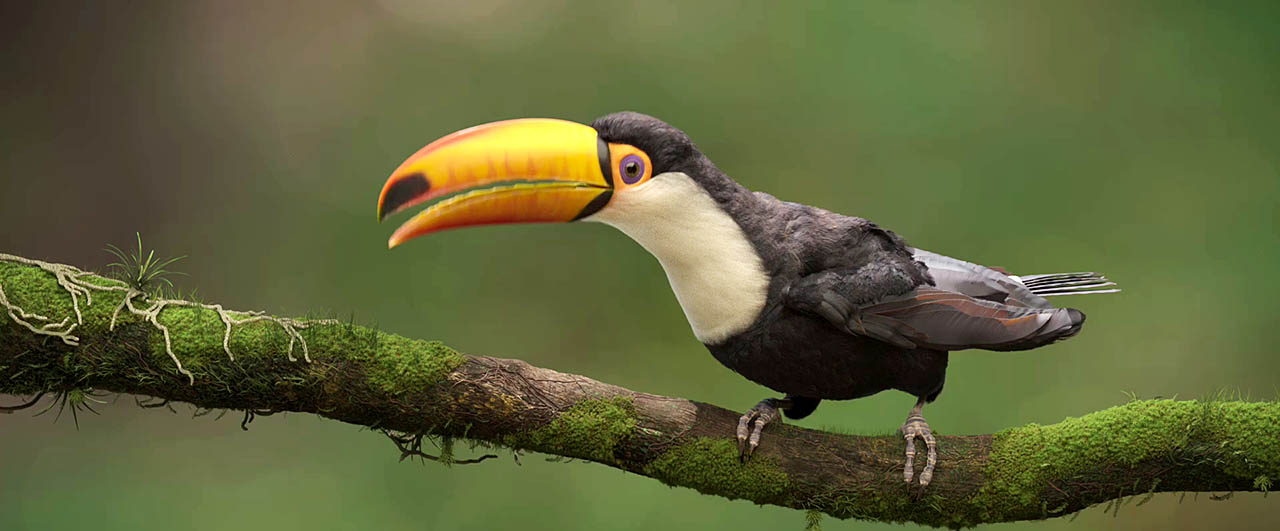
Imagine a fully rigged bird where you define different areas like neck, body, wings and tail. On the add groom node you can represent those areas as control groups and treat them individually. Near the neck, the feathers will hardly move when the bird raises its head. However, when the bird spreads its wings, there’s a lot of motion, especially at the wings' tips. There, the feathers will be splayed out.
So, what you do is to select three or four feathers on the wing. When you then animate the wing, the newly created joints will move the master feathers, and the rest of the wing’s feathers will follow them. The add groom node interpolates the motions and creates a smooth transition between the feathers. The joints give you more control to achieve exactly what you want to create.
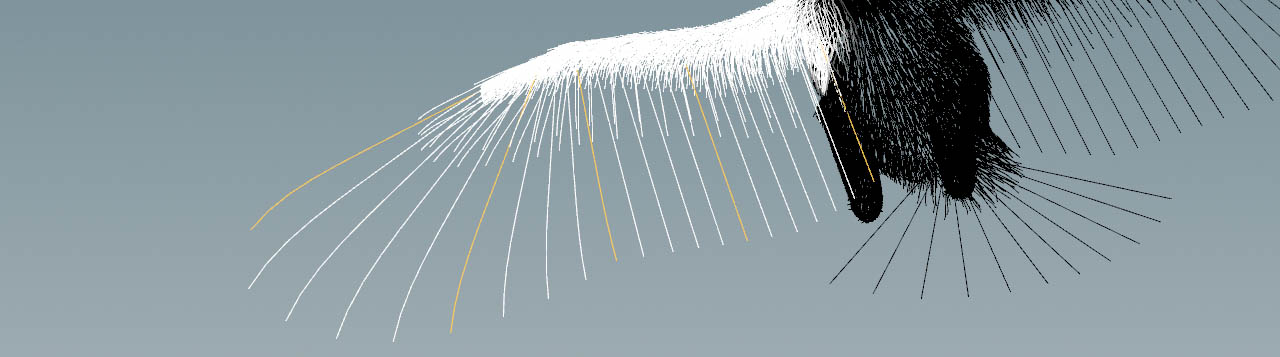
The node also provides tools that let you accelerate and fine-tune the animation process. You can, for example, exclude certain feathers that don’t contribute to the animation. This is typically the case near a bird’s beak or eyes. There you often have a high density of short and almost static feathers. You can also introduce a mask attribute to control the joints' influence on the feathers. Or you may want to use a parameter to limit the joints' influence based on distances. This will avoid that feathers are moved in areas that should remain static.
Node inputs and outputs 
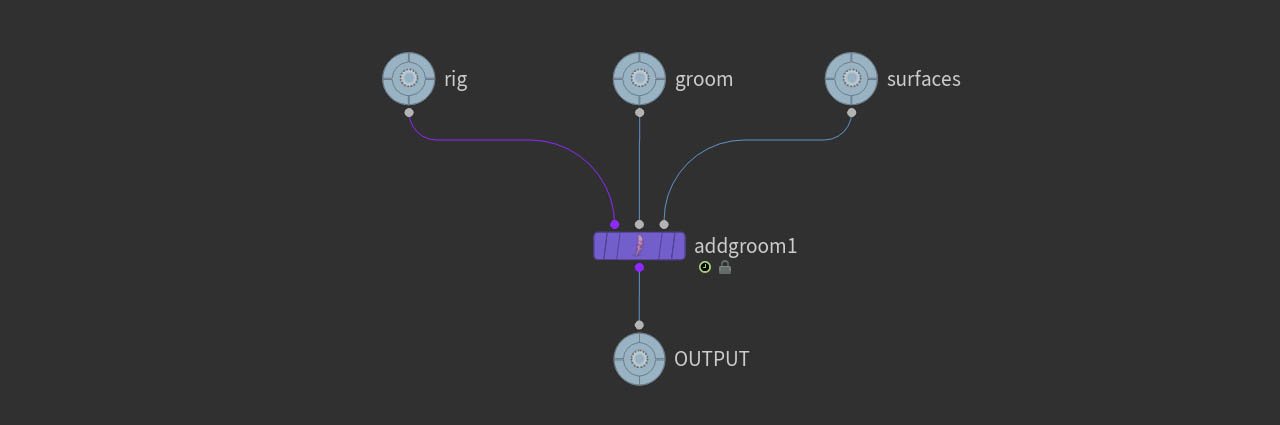
When you lay down the APEX Add Groom SOP, you’ll see three inputs. The first input expects the APEX character rig, and the second input is connected to the groom. There’s also a third input where you can connect surfaces, e.g. feathers that were converted into polygons. You can leave the third empty and in this case, the conversion will be done automatically.
Tip
You can also use the third input to extract a rest attribute from two poses, e.g. by importing the two poses through Object Merge SOPs. However, the idea behind APEX is actually to get everything from one BGEO file.
You’ll also notice that the node provides only one output. This means that all incoming data is merged into a single stream and you have to separate the streams again in an extra step. This happens in the render setup.
Scene organization 
Feather networks can become very large, because the procedure of creating and rendering complete groom involves many different steps. It’s therefore a good idea to subdivide your network into separate ![]() Geometry OBJs. Below you can see the names of the networks as used in this chapter and throughout the entire feathers documentation.
Geometry OBJs. Below you can see the names of the networks as used in this chapter and throughout the entire feathers documentation.
-
featheroratlas. This is the space where you design and create the feather(s) for your character. -
groom. Here you import thefeatheroratlasnetwork and apply the groom. -
rig. Inside this container you have the rigged character. -
animation. This is the space for the APEX Add Groom network and where you import the outputs from thegroomandrigspaces. -
render. Here you import theanimationdata to prepare the setup for rendering in Solaris.
If you prefer to work with
-
external files, you can bring in rig and groom through
 File Cache SOPs that point to appropriate BGEO files
 -
separate networks, you can use
 Object Merge SOPs to import your scene elements.
This workflow is only a recommendation and you're free to put everything into one network, but a separation keeps the scene clearly organized and manageable.
Note
In this workflow guide we assume that you have already populated the feathers, groom and rig networks and now you're ready to animate the feathers.
Animation setup 
The screenshot below shows the animation network’s starting point.

The rig network contains a fully rigged toucan that was used to create the example setup. The example contains an Object Merge SOP to load the character. The feathers in this example were resampled with a ![]() Feather Resample SOP to decrease the number of polygons and accelerate the work on the APEX Add Groom in the viewport. You can use masks and groups to define certain areas of the bird like wing and neck to treat them separately.
Feather Resample SOP to decrease the number of polygons and accelerate the work on the APEX Add Groom in the viewport. You can use masks and groups to define certain areas of the bird like wing and neck to treat them separately.
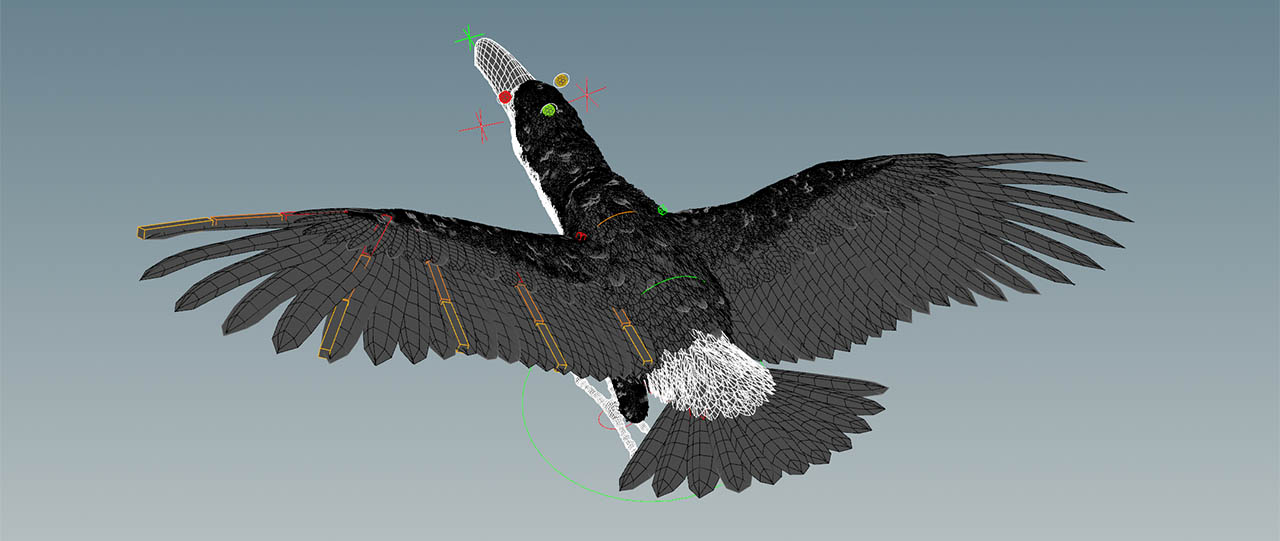
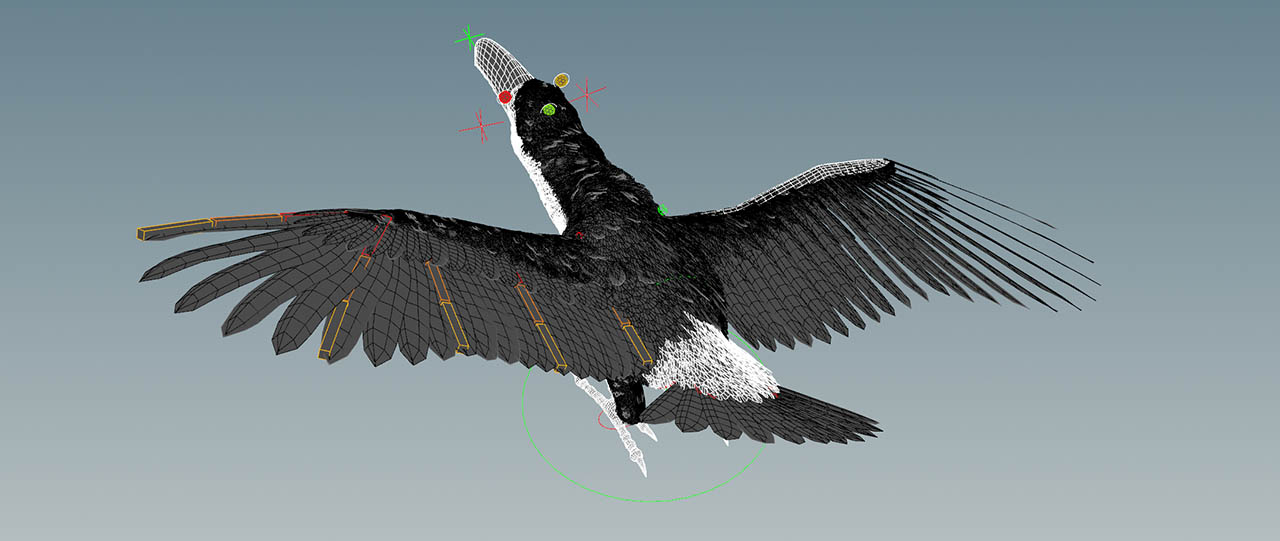
Below you can see the rig. For better visibility of the joints, the shading mode is Hidden Line Invisible. You might also notice that the bird doesn’t have the typical T-pose you normally use for characters and grooming. The rig pose in the image is better suited in conjunction with the APEX Add Groom SOP.
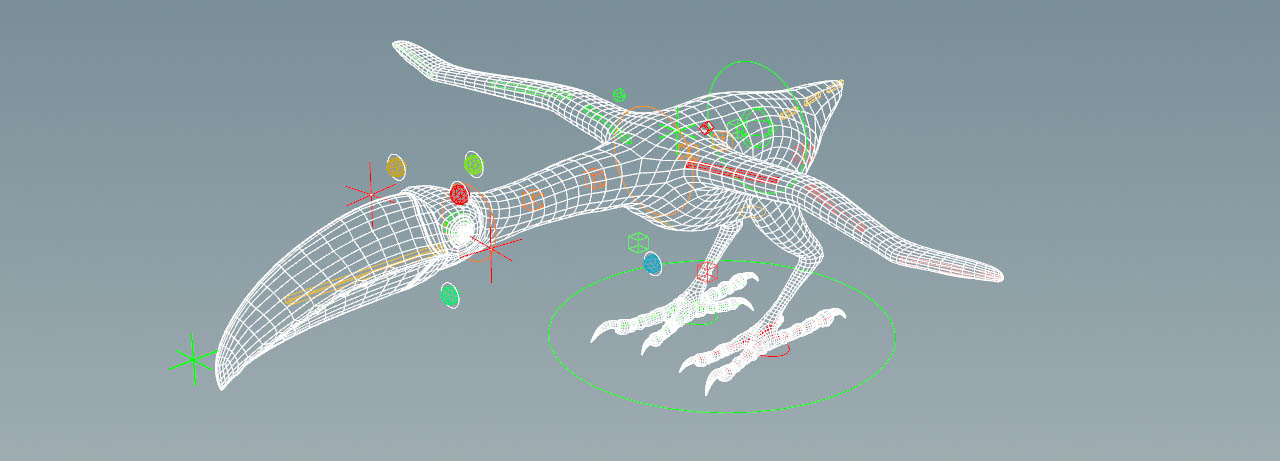
The bird also wears a quite elaborated feathering that was made separately in the groom network and re-imported as curves to the example scene. The APEX Add Groom SOP was designed to create a plausible and believable motion through the creation of so-called control groups. Here, we’ll be focusing on the bird’s left wing (wing_selection node in the network screenshot above). The workflow is the same for any other control group.
-
Inside the
animationspace, add the APEX Add Groom SOP. -
Connect the node’s first input with the output of the
RIGimport. Then link the second input to the resample node’s output. In this example, theGROOMcomes from a BGEO file. -
Turn on the add groom’s blue Display/Render flag to actually see the feathers. The node has converted them into polygon surfaces.
Rig Tree pane 
The rig tree pane provides a hierarchical view of character components. You will need it in the second step of the APEX Add Groom workflow, when you create the render setup. You can also use the tree to monitor how new nodes affect a rig.
-
Select a node, e.g. the APEX Add Groom SOP.
-
On top of the viewport (and many other panes) you can see several tabs and a
 New Tab button. Click the button. From the dropdown menus choose New Pane Tab Type ▸ Animation ▸ Rig Tree.
Here’s the rig tree for the scene’s example.
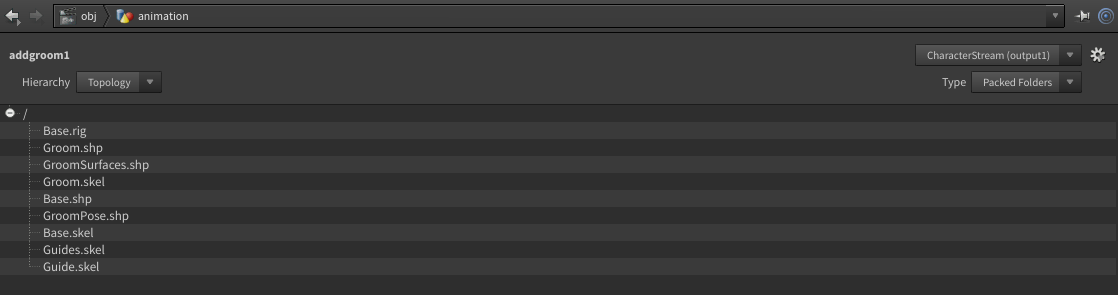
On the right side of the pane you can see a Type menu with a default Packed Folders entry. The entry indicates that you're dealing with packed primitives.
Creating control groups 
Control groups are the basis of your work with the APEX Add Groom SOP. You've already defined certain groups of the bird like wings, body, tail, etc. What you do now is to select master feathers within such a group. The add groom node will then create joints from your selection and integrates them into the existing rig.
You can find all relevant parameters for the creation of control groups in the Joints section of the add groom node. The only parameter from the other sections you might want to change is Groom ▸ Output Curves. With feathers you can turn it off to show only the polygon feathers and improve performance.
The Joints parameters create and manage the new joints you’ll be using to animate the feathers based on your feather selection.
-
The Name Prefix will be added to the joints to make them distinguishable from the rig’s already existing joints. You can also add a Suffix, for example
_lor_rto separate left and right joints. -
By default, Skin Vector Attribute takes the normals
Nfrom the bird’s skin to orient the joints. -
The Control Groups lets you specify multiple groups and treat them individually. Enter the number of groups directly, or press the + button to add new groups. When you create a new group, a Joint Properties parameter set appears.
Joint Properties 
The first step is to select the feathers you want to use for the animation. If you have already defined a group, e.g. through an ![]() Attribute Wrangle SOP or by manual selection in a different part of the groom network, you can enter the name to the Joints ▸ Group parameter’s input field. Alternatively, you can select feathers directly from the viewport, as explained below.
Attribute Wrangle SOP or by manual selection in a different part of the groom network, you can enter the name to the Joints ▸ Group parameter’s input field. Alternatively, you can select feathers directly from the viewport, as explained below.
-
Click the
Select geometry… button. The viewport will now only show the feathers' curves. -
On the viewport,
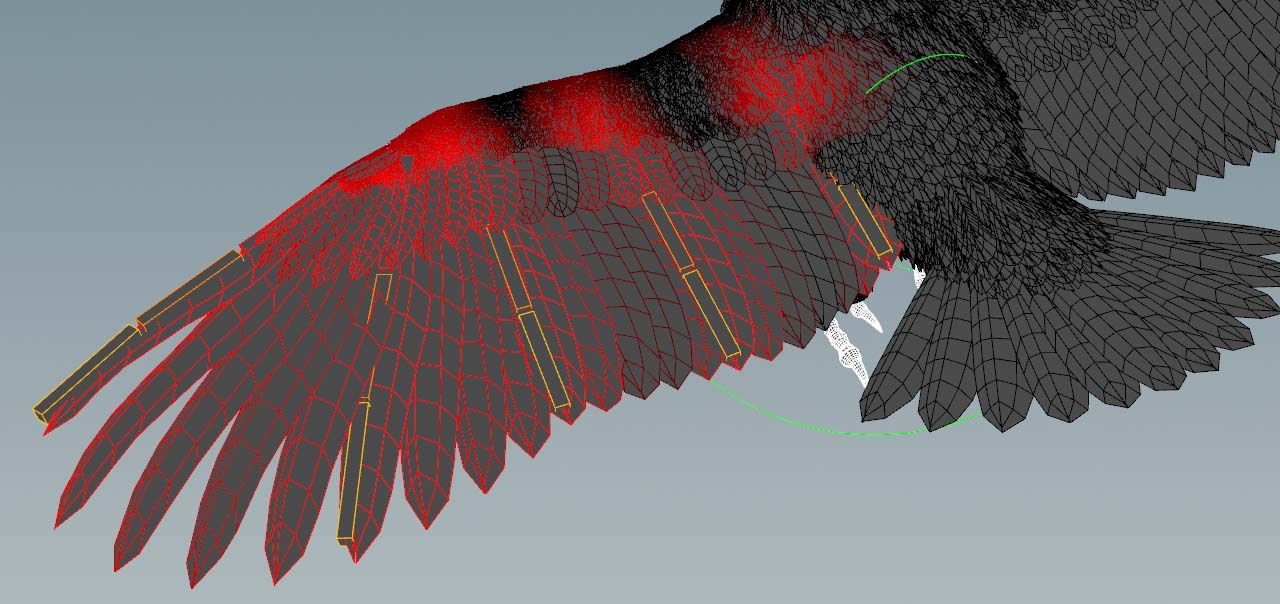
 -⇧ Shift-click the feathers you want to use to create the joints. Selected feathers have a brownish-yellowish color (see image below).
 -
When you're ready, hit Enter to confirm your selection. To abort the process, press ⎋ Esc. In both cases, the feather surfaces will appear again.
The numbers of the selected feathers appear in the Group parameter’s input field and you can edit them manually. You will also see the newly created joints, wearing the colors from Root Color and Tip Color. Another convenient parameter is Width to determine the size of the joints' viewport representation.
If you want to change the number of joints, increase or decrease Joint Count. For long feathers like primaries or tail feathers, you can use higher values, especially for hero shots. Short feathers such as contour feathers won’t profit from high joint counts.
Moving joints 
Now you can start to move the joints. To do that, select the add groom node.
-
Hover the mouse over the viewport.
-
Press Enter to see the rig. You’ll also notice a HUD in the viewport’s upper left corner.
-
Select a joint and rotate it. To leave the animation mode, press ⎋ Esc.
The node calculates weights to define how strongly a feather will follow a joint. There aren’t any gaps or far-away feathers that move while they shouldn’t. What you get instead is a smooth transition between the feathers that fades out slowly. The clip below shows the motion of the feather near the left wing’s tip. The newly created joints are enlarged for better visibility.
Orientation 
The add groom’s Control Group section contains an Orient to Skin Vector Attribute toggle. When you turn on the toggle, the node will exclusively use the attribute you've specified on the Skin Vector Attribute. By default that’s the skin’s normal N.
When the toggle is turned off, barborient is being used or - if this attribute doesn’t exist either - just orient. In cases without any orientation attributes, the node will create a skin vector attribute.
Joint Influence 
If you still think that the influence of the joints is too strong, you might consider limiting their scope.
The Mask Attribute controls, on which feathers the joints will have influence on. The mask attribute has to exist before and normally it’s already on the groom when it comes into APEX Add Groom SOP.
Instead of an attribute, you can also use Limit Influence Distance to avoid that feathers are moved in areas that should remain static. Core Distance and Maximum Distance create a falloff. Below you can see a comparison. Without the limiting effect, the entire bird is affected by the wing’s motion. With Limit Influence Distance, only the associated feathers move.
Mask Attribute and Limit Influence Distance can coexist and the values are multiplied: feathers will only be moved in those area where both properties apply.
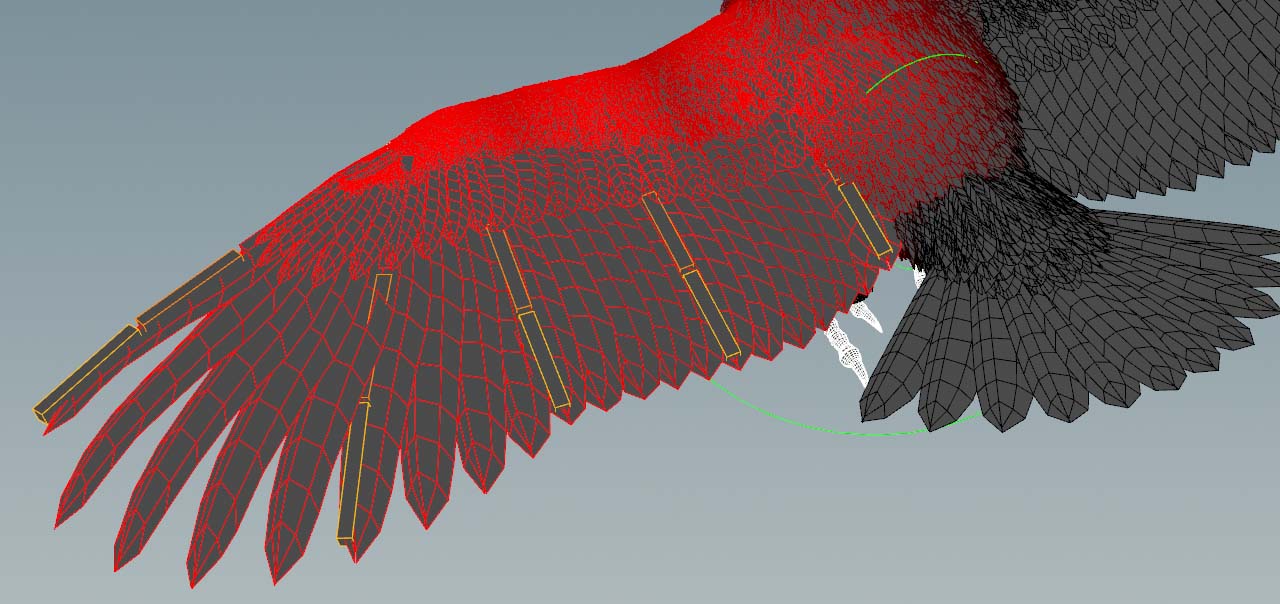
Influence colors 
Just from adjusting distance parameters it’s hard to estimate the influence of the newly created joints. To get a visual representation of Core Distance and Maximum Distance, you can go to the add groom node’s Joints section and turn on Output Influence Regions as Color. Note that this feature requires at least one control group.
When you now change the distance values and/or define a Mask Attribute, you’ll see that feathers within in the given range or mask become colored. You can control the color in the Joint Properties section of a control group by changing Root Color.
APEX setup 
Since you're already working with an APEX node, it’s necessary to proceed with this technology and prepare the setup accordingly.
Note
The entire APEX technology in Houdini is still under development. Functionality and features are subject to change.
-
Optional: lay down an
 APEX Scene Add Character SOP and connect its second input with the output of the APEX Add Groom SOP. This node isn’t mandatory, but creates a clearly arranged rig tree.
 -
Rename the node, e.g. to
bird. This name will be added to the node’s Character Name parameter and packs the scene into abird.char/rig tree (see image below). -
Add an
 APEX Scene Animate SOP and connect its input with the output of the add character node. The scene animate node is essential, because it’s where you interact with the animation setup you've created so far.
 -
Terminate the network with a
 Null SOP. Rename it, for example to
 ANIMand turn on its blue Display/Render flag. This Null SOP is the bridge to the next network where you prepare your scene for the render process.