| On this page |
Curves are useful to control how your asset behaves in Houdini since you can display and manipulate them in the Unreal Engine viewport.
Houdini Engine for Unreal allows you to use either Houdini Curves or Unreal Spline Components to control a Curve SOP in your Houdini Asset. You can create a Houdini Curves using a Curve Inputs or Editable Curve Nodes. You can use Unreal Spline Components in World Outliner Inputs.
You can also output curves as Unreal Spline Components when using the unreal_output_curve attribute.
Houdini Curves 
Input Curves 
Houdini Curves controls your asset is by using Curve Inputs. This can be done either by creating a Node Input or an Object Path Input and changing its type to Curve.
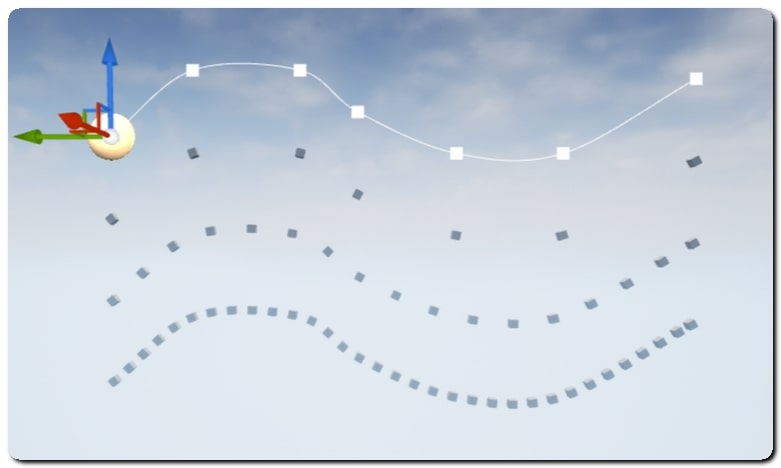
The curve will then be displayed in the editor viewport, and can be edited directly there. You can change curve parameters like its type or method in the details panel.

For more information, see Curve Inputs
Editable Curve Nodes 
You can also make Curve SOPs editable to create editable Houdini curves in Unreal.
To create an editable curve node:
-
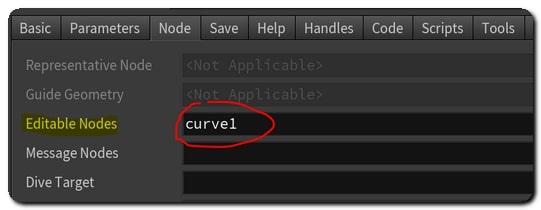
In the Type Properties dialog in Houdini, locate the Node tab.
-
Add your Curve SOP to the Editable Nodes list of your asset.
You can make multiple curve nodes editable.

In Unreal, you can edit the edited direclty in the editor viewport.
Note
This workflow is now deprecated and isn’t compatible with the new Curve SOP introduced in Houdini 19.0. To use Editable curves with Houdini 19.0, make sure to use curve1.0 SOPs.
There are two methods to achieve this:
-
Right click on the Curve SOP in the Network Editor and use Actions ▸ Change Type, then change the Node Type to curve, instead of curve::2.0.
-
Enable the asset definition toolbar in the Assets Menu, then Asset Definition Toolbar ▸ Show Always and select curve instead of curve::2.0 in the dropdown that appears above the curve SOP’s parameters.
Note
Curves will become editable if the HDA is unlocked, which may not be desirable. To disable curve editing uncheck “Enable Curve Editing” in the Houdini Asset Component.
Editing Houdini Curves 
When you select a Houdini asset with an exposed curve, its curve and control pilts are displayed in the editor viewport. If you select the whole asset, the points are grayed out.

Click on the curve points to edit the curve. You can use the Transform Gizmos to scale, rotate, or move them.
To create a new point after the current selection, click ALT when translating a control point. You can also ALT)on the curve to automatically insert a new control points.
To remove the currently selected point from the curve, press DEL. You can also use the context menu when you right click on a curve point.
The first two points of the curves are colored in green and orange to show the direction of the curve. This is useful when you use a closed curve.

Rotation and scale of each control point of the curve can be modified in Unreal using the scale and rotation gizmos.
The rotation and scale values appear as the standard rot and scale points attributes in Houdini.
Unreal Spline Components 
You can also use Unreal Spline Components to control a Curve SOP in Houdini.
select an Actor with a Spline Component attached to it with a World Inliner Input.
Using Unreal Spline Components is a great way to reuse your existing splines directly with Houdini Assets, and can also be used to share curves between multiple assets.
As Unreal’s spline interpolation cannot be reproduced perfectly in Houdini, the Spline is resampled to its refined position when marshalled to Houdini and converted to a linear Curve SOP. The Unreal Spline Resolution parameter on the World Outliner Input allows you to choose the sample length used to resample and send the refined positions to Houdini.
The default value of 50 will extract a spline point every 50cm in Unreal and marshall it to Houdini. If the spline resolution is set to 0, only the spline’s control points will be marshalled. The first and last point of the spline are always marshalled to Houdini.

Rotation and scale of each spline points will be available in Houdini as the standard rot and scale point attributes.
Note
Unlike Houdini curves, closed Unreal splines aren’t created as a closed curve but as an open curve with the same beginning and end points. If your HDA normally expects a closed curve (which defines a polygon), you can use the ends node with close straight for the Close U parameter to ensure your curve input is closed.
Rotation and Scale Attributes 
With Houdini Engine for Unreal, both Houdini curves and Unreal splines generate curve SOPs, whose points will contain additional rot and scale point attributes.
These attributes give you additionnal control over your assets by allowing you to manipulate them with the standard gizmos in Unreal.
However, as Curve SOPs traditionnaly do not have these attributes, their presence may sometimes cause side effects if your curve nodes are processed by nodes that will use them.
An example is a Sweep node that uses a curve as its backbone. Even without modifying the curve’s point rotation in Unreal, the added rot attribute might change the orientation of the geometry being swept on the curve.
To solve this, you might need to rotate the input geometry to account for the added rot parameter, or you can remove it from the curve with an Attribute Delete node.
(in the case of the Sweep node example, using the Transform using attributes parameter will also fix the issue.)
Curve Output 
You can output a curve from your HDA as an Unreal Spline Component. You need to add the unreal_output_curve int attribute to the curve, with its value set to 1.
You can control if the output spline component will be linear, or closed by respectively using the unreal_output_curve_linear and unreal_output_curve_closed int attributes, with their values set to either 1 or 0.
Note
Output curves are only output objects and recreated upon a recook of the main asset. Their corresponding Houdini curve will not be updated if you modify the Spline Component in Unreal.