The Houdini Unreal Engine plugin allows Skeletal Meshes and Skeletal Mesh components to work with HDAs and NodeSync.
You can learn more about KineFX Skeletons on its documentation.
Install Houdini HDAs for Skeletal Mesh 
Import and exporting Skeletal Meshes requires two HDAs loaded into Houdini to work properly.
To install these HDAs:
-
Locate your Houdini Engine plugins folder.
-
Go to the HoudiniEngine\Content\NodeSync folder.
-
Copy KineFXToUnreal and UnrealToKineFX HDA files.
-
Paste these two files into your otls folder. In this example the location is C:\Users\PC\Documents\houdini20.5\otls.
After you install the Houdini plugins, you can follow the instructions on the NodeSync documentation to send Skeletal meshes from Unreal to Houdini and vice versa. Skeletal mesh can also be used in Inputs or created as HDA outputs.
KineFX to Unreal (output) 
When working in Houdini, Skeletal meshes use a Rest Geometry and Capture Pose to make changes.
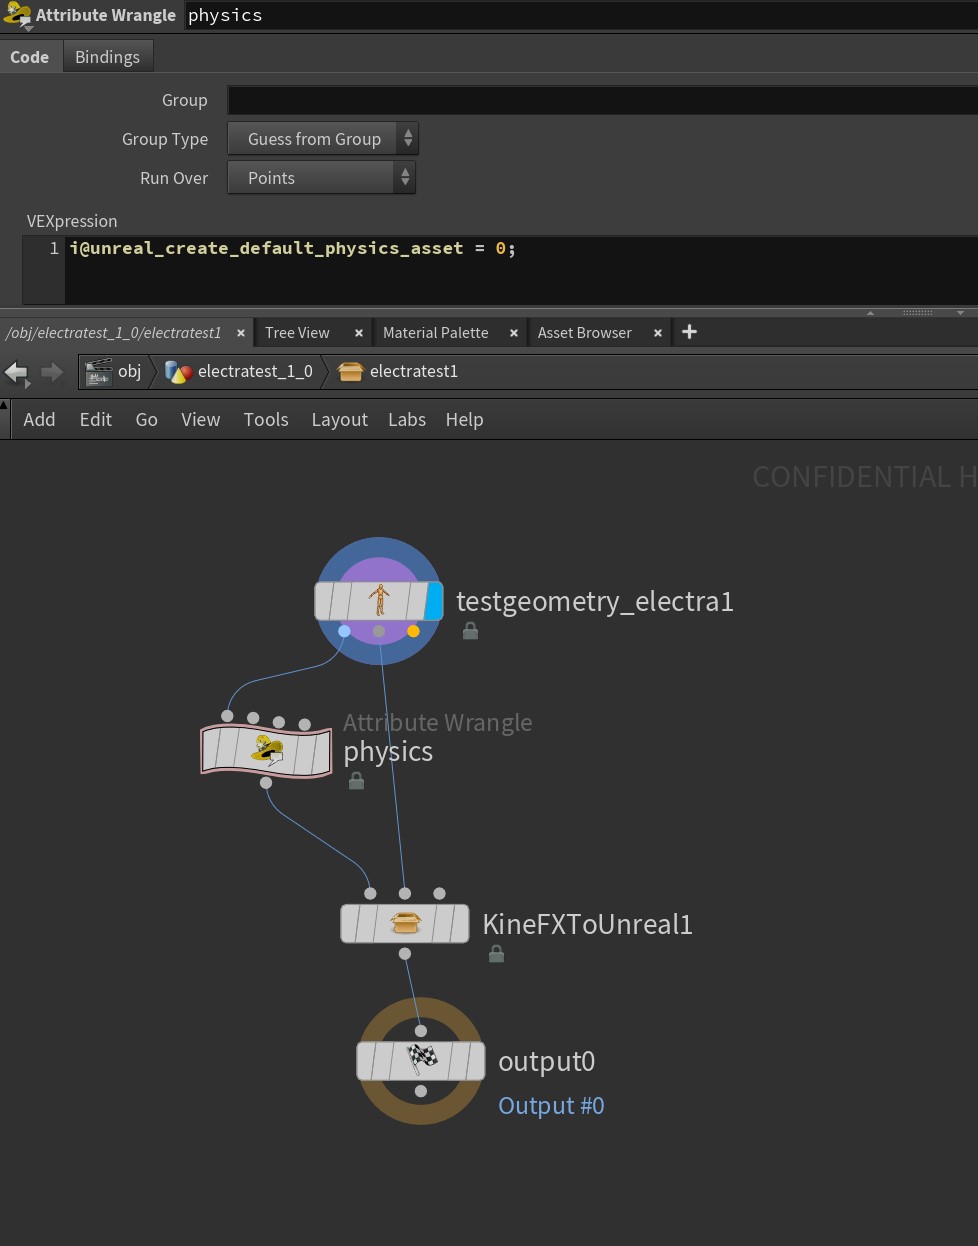
To export the Skeletal mesh back into Unreal properly, you need to use the KineFXtoUnreal node as the final output.
-
Create a KineFXtoUnreal node.
-
Connect your Rest Geometry output into Input1 and the Capture Pose output into Input2.

-
Click CTRL+C to copy the KineFXtoUnreal node.
-
Use the Fetch from Houdini procedures above to import into Unreal Engine.
Using Existing Unreal Skeletons 
Skeletal Meshes exported from Houdini to Unreal can use an existing Unreal Skeleton Asset rather than creating a new Skeleton Asset. The unreal_skeleton attribute defines the existing skeleton. When using an existing Unreal Skeleton, a Catpure Pose must still be specified.
Physics Assets 
The Unreal plugin will create a default Physics Asset for a Skeleton Mesh exported from Houdini to Unreal.
In addition the plugin can use an existing Physics Asset already defined in Unreal or create a Physics Asset that uses custom collision shapes and materials specified in the HDA.
Disabling the Default Physics Asset 
By default the plugin will create a Physics Asset with collision shapes generated from the shape of the mesh and the bones of the skeleton.
If this is not desired set the point attribute unreal_create_default_physics_asset to 0 on the skeletal mesh before the KineFXToUnreal HDA.

Using An Existing Physics Asset 
Specify the path of an existing Unreal Physics Asset using the string attribute unreal_physics_asset.
Creating A Custom Physics Asset 
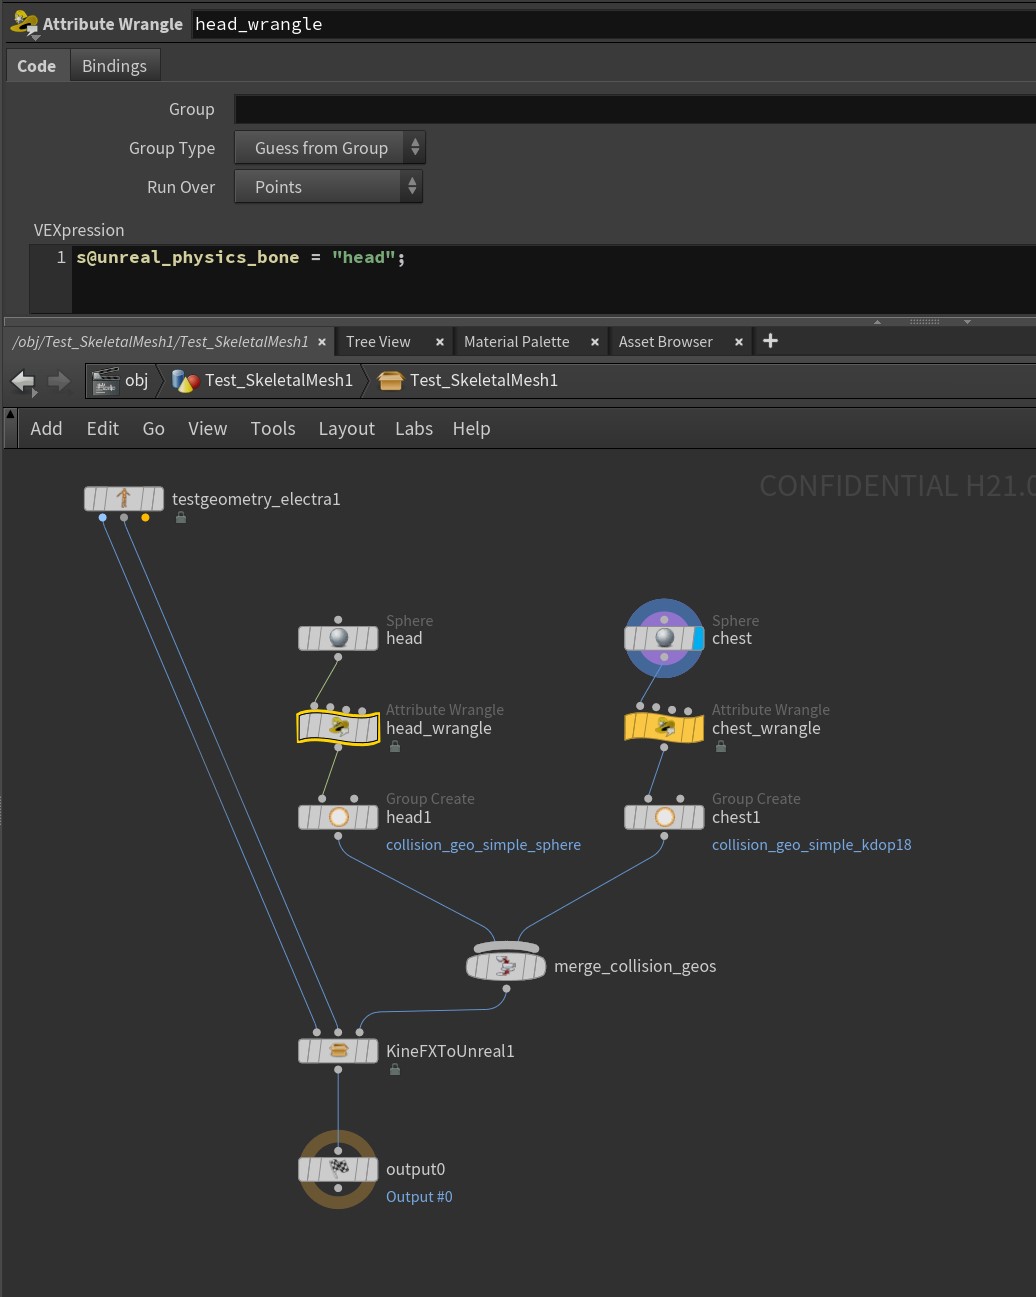
Creating a custom Physics Asset for Skeletal Mesh is similar to creating a custom collisions for a regular Unreal mesh. Groups such as collision_geo_simple_box”
are used to indicate the type of collision and the string attribute unreal_physics_bone is used to indicate which bone a shape is applied to. All attributes should be specified on points.
In addition, unreal_physical_material can be used to specify an existing Physical Material to assign to each collision.
To create a custom Physics Asset on the Skeletal Mesh, supply the collision mesh to the third input of KineFXToUnreal HDA.

Collison Groups 
To create Physics Assets collisions use groups with the following prefixes.
Group Name Prefix |
Collision type |
|---|---|
collision_geo_simple_box |
Creates a simple box collision |
collision_geo_simple_sphere |
Creates a simple sphere collision |
collision_geo_simple_capsule |
Creates a simple capsule collision |
collision_geo_simple_kdop10× |
Creates a simple 10DOP-X collision |
collision_geo_simple_kdop10y |
Creates a simple 10DOP-Y collision |
collision_geo_simple_kdop10z |
Creates a simple 10DOP-Z collision |
collision_geo_simple_kdop18 |
Creates a simple 18DOP collision |
collision_geo_simple_kdop26 |
Creates a simple 26DOP collision |
Assigning two points to the same collision group, but with different target bones, will create two collision shapes, one for each bone. Multiple shapes of the same type can be creating by creating groups with the same prefix, eg. collision_geo_simple_box_1 and collision_geo_simple_box_2.
Unreal to KineFX (input) 
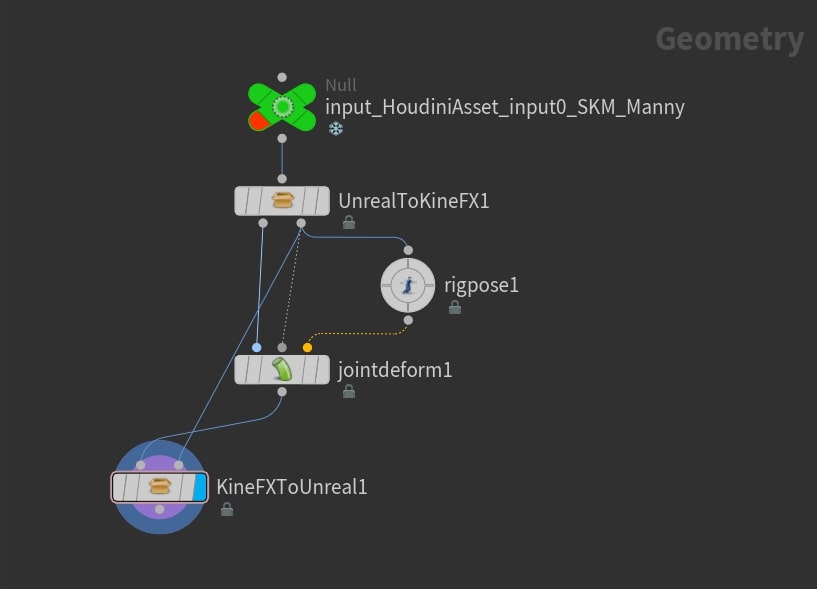
When sending an Unreal Skeletal Mesh to Houdini use the UnrealtoKineFX HDA to unpack the input data to a Rest Geometry and Capture Pose for use with KineFX.
The first output connects to the Rest Geometry and the second output connects to the Capture Pose.
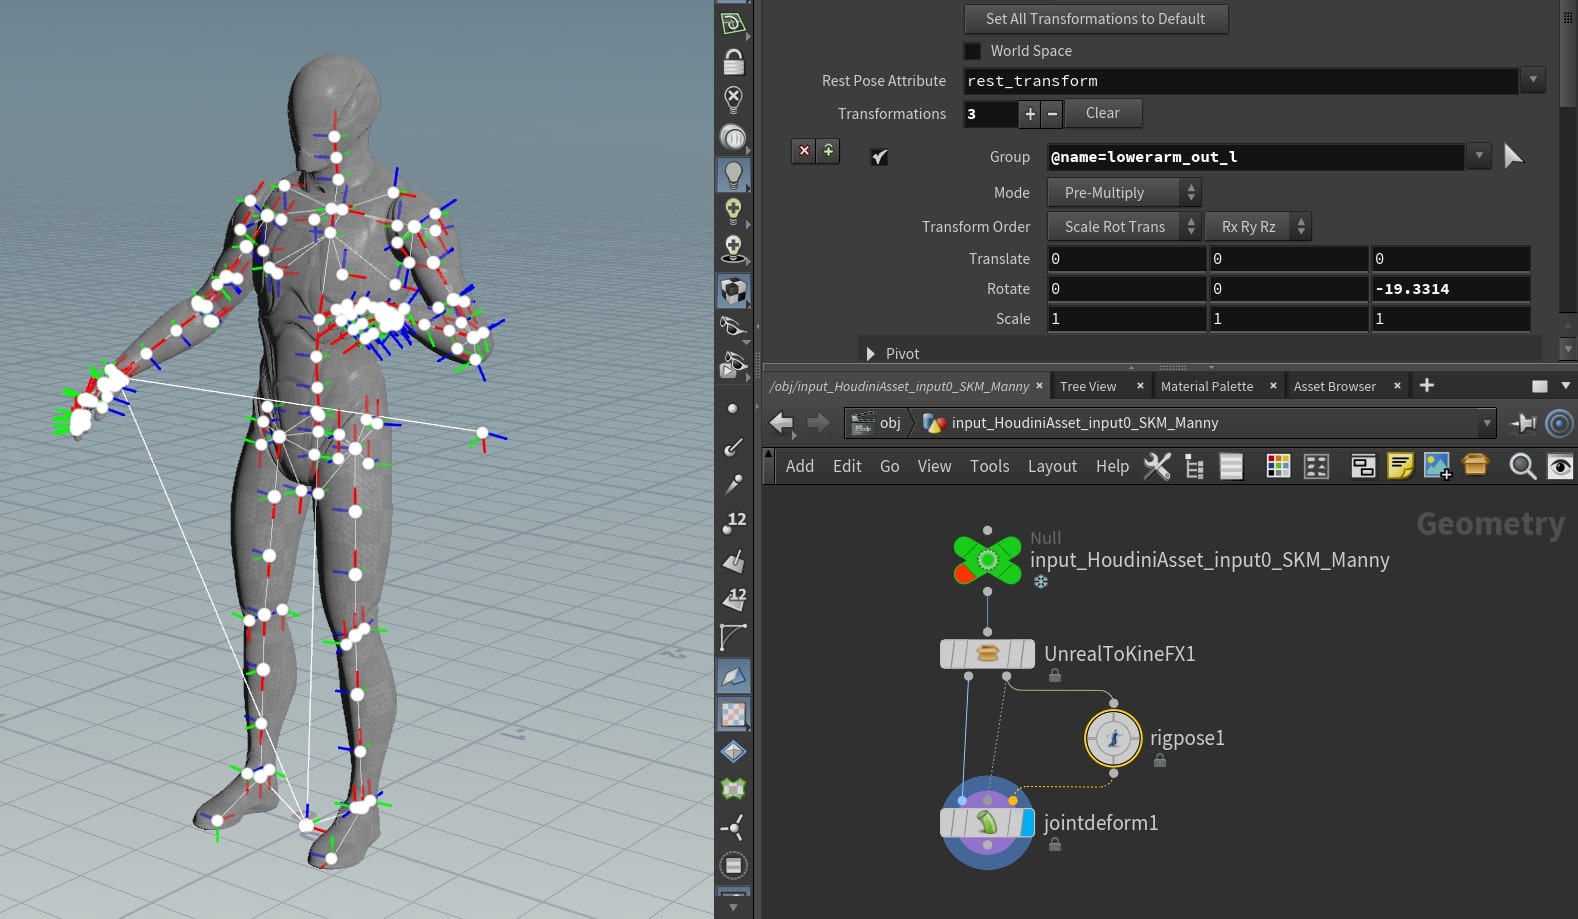
In this example, the Skeletal mesh is now able to be edited using the Joint Deform SOP node.
