Houdini 20.5

Copernicus

Houdini’s 2D and 3D GPU image processing framework.

On this page
This feature is still under development. The current functionality is unfinished and subject to change, and may have thin or no documentation. Please bear this in mind when using it.
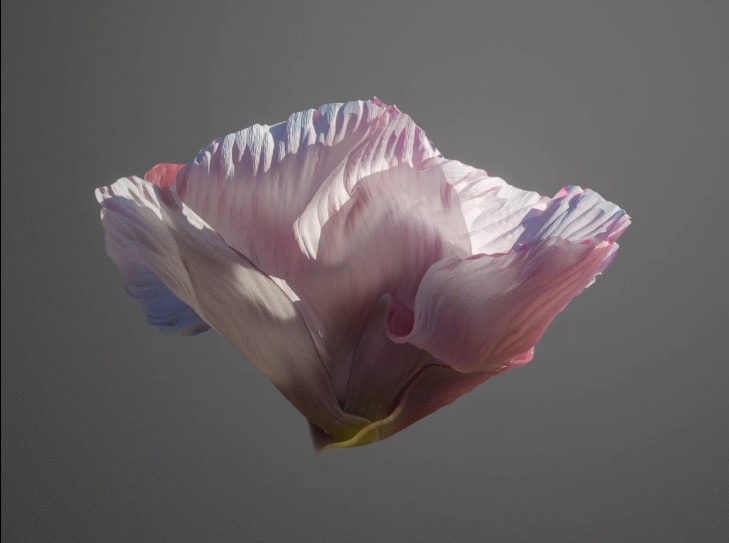
Image courtesy of Nikola Damjanov.

Overview

Copernicus (COP) is a 2D and 3D GPU image processing framework. COP nodes provide real-time image manipulation within a 3D space. Each wire consists of either a layer (which is a single image) or geometry (which is any Houdini geometry). The nodes can export as images or volumes. COP nodes also fully interoperate with SOPs, which lets you solve problems using the suitable network type.

Use Copernicus nodes instead of Compositing nodes. Though both networks still exist, the Compositing network is now designated as COP Network - Old. The new COP Network node sets the default resolution, pixel scale, border, and precision for COP nodes in the network that don’t have their own input or set values for these parameters. For more information about changing from Compositing to Copernicus, see Copernicus for Houdini users.

Note

Use the Vulkan viewport instead of OpenGL, which doesn’t support visualizations. See Limitations for more information.

For definitions of Copernicus terminology, see Copernicus glossary.

How to access Copernicus

To access the COPs network, you can either manually add a COP network, add a COP network SOP, or use the default COP network. You can view the COP network in the Scene (3D) and Composite (2D) Views.

After you add a COP network, see Working with Copernicus nodes for next steps. To use slap comp in your network, see Slap comp.
Adding a COP network

  1. Go to the Object (/obj) or Solaris (/stage) network.

  2. Create a COP Network node.

  3. Dive into the COP Network node to add Copernicus nodes.

Adding a COP network SOP

  1. Create a Geometry node in the Object (/obj) network.

  2. Dive into the Geometry node.

  3. Add a COP Network SOP.

  4. Dive into the COP Network node to add Copernicus nodes.

Note

This COP network is treated as geometry, so you can wire it into other geometry nodes. For example, you can wire the COP Network node into a Transform node.

Using the default COP network

  1. Go to the Compositing (/img) network.

  2. Dive into the existing COP Network node to add Copernicus nodes.

Input and output

COPs have a similar shape and network orientation as VOP networks. They have the following inputs and outputs, which are differentiated by color:

  • Metadata: This determines the output’s resolution and position rather than its type. You can wire any output type into this port.

  • Geometry: This can contain 2D volumes similar to layers and its output is geometry.

  • Layer: This includes the ID, Mono, UV, RGB, and RGBA types.

    An RGB layer has three values per pixel. These values are usually red, green, and blue, but you can store whatever you want in these pixels.

    Note

    The input and output names on the node can be different than the names listed above, but they're still color-coded based on their type.

When an input with an associated parameter is wired in, the associated parameter usually scales that input. For example, when you wire a bright input into the Bright node, the associated Brightness parameter multiplies with that input.

Limitations

The following are Copernicus' limitations:

  • Handles and states

  • Multilayer workflow

  • Roto/paint

  • Time shift and manipulation

  • Materials driven by COP textures may not update properly in the OpenGL viewport

  • Type info driven visualization doesn’t work in the OpenGL viewport (SDFs, tiling, and such)

Mac

The Vulkan viewport isn’t supported on macOS. MacOS uses the OpenGL viewport renderer.

Subtopics

Basics

Next steps

  • Working with Copernicus nodes

    Provides next steps and workflows for how to use Copernicus nodes.

  • Slap comp

    Slap composite (slap comp) is a fast image manipulation you can use to view approximate and live results of a final composite.

  • OpenFX

    Describes what OpenFX is and how to use it in your network.

  • Hatching

    Describes how to use hatching in your Copernicus network.

  • How to use ONNX Inference

    Describes how to apply inference using a model in the ONNX Inference node.

  • Copernicus tips

    Useful tips and information while using COPs.

Advanced concepts

  • Normals

    Defines the normals that the Copernicus network uses.

  • Spaces

    Defines the spaces that the Copernicus network uses.

Houdini 20.5

Getting started

Using Houdini

  • Geometry

    How Houdini represents geometry and how to create and edit it.

  • Copying and instancing

    How to use copies (real geometry) and instances (loaded or created at render time).

  • Animation

    How to create and keyframe animation in Houdini.

  • Digital assets

    Digital assets let you create reusable nodes and tools from existing networks.

  • Import and export

    How to get scene, object, and other data in and out of Houdini.

  • MPlay viewer

    Using Houdini’s stand-alone image viewer.

Character FX

  • Character

    How to rig and animate characters in Houdini.

  • Crowd simulations

    How to create and simulate crowds of characters in Houdini.

  • Muscles and tissue

    How to create and simulate muscles, tissue, and skin in Houdini.

  • Hair and fur

    How to create, style, and add dynamics to hair and fur.

  • Feathers

    How to create highly realistic and detailed feathers for your characters.

Dynamics

  • Dynamics

    How to use Houdini’s dynamics networks to create simulations.

  • Vellum

    Vellum uses a Position Based Dynamics approach to cloth, hair, grains, fluids, and softbody objects.

  • Pyro

    How to simulate smoke, fire, and explosions.

  • Fluids

    How to set up fluid and ocean simulations.

  • Oceans and water surfaces

    How to set up ocean and water surface simulations.

  • MPM

    How to simulate different types of solid materials (such as snow, soil, mud, concrete, metal, jello, rubber, water, honey, and sand).

  • Destruction

    How to break different types of materials.

  • Grains

    How to simulate grainy materials (such as sand).

  • Particles

    How to create particle simulations.

  • Finite elements

    How to create and simulate deformable objects

Pipeline

  • Executing tasks with PDG/TOPs

    How to define dependencies and schedule tasks using TOP networks.

  • HQueue

    HQueue is Houdini’s free distributed job scheduling system.

  • Houdini Engine

    Documents the Houdini Engine C, Python APIs, and Houdini Engine plugins

  • Machine Learning

    Houdini provides a platform for machine learning which supports synthetic data generation, preprocessing, training models, exporting trained models, and deploying trained models

Nodes

  • OBJ - Object nodes

    Object nodes represent objects in the scene, such as character parts, geometry objects, lights, cameras, and so on.

  • SOP - Geometry nodes

    Geometry nodes live inside Geo objects and generate geometry.

  • DOP - Dynamics nodes

    Dynamics nodes set up the conditions and rules for dynamics simulations.

  • VOP - Shader nodes

    VOP nodes let you define a program (such as a shader) by connecting nodes together. Houdini then compiles the node network into executable VEX code.

  • LOP - USD nodes

    LOP nodes generate USD describing characters, props, lighting, and rendering.

  • ROP - Render nodes

    Render nodes either render the scene or set up render dependency networks.

  • CHOP - Channel nodes

    Channel nodes create, filter, and manipulate channel data.

  • COP - Copernicus nodes

    COP nodes provide real-time image manipulation within a 3D space.

  • TOP - Task nodes

    TOP nodes define a workflow where data is fed into the network, turned into work items and manipulated by different nodes. Many nodes represent external processes that can be run on the local machine or a server farm.

  • APEX - APEX nodes

    APEX nodes provide operations for building up the functionality of APEX graphs, which are used in KineFX to create character rigs and perform other geometry manipulation.

Scene building, Karma rendering, Image processing

  • Solaris and Karma

    Solaris is the umbrella name for Houdini’s scene building, look development, and Karma rendering tools based on the Universal Scene Description (USD) framework.

  • Copernicus

    Houdini’s 2D and 3D GPU image processing framework.

  • Compositing

    Houdini’s compositing networks let you create and manipulate images such as renders.

Mantra rendering and shading

Reference

  • Menus

    Explains each of the items in the main menus.

  • Viewers

    Viewer pane types.

  • Panes

    Documents the options in various panes.

  • Windows

    Documents the options in various user interface windows.

  • Stand-alone utilities

    Houdini includes a large number of useful command-line utility programs.

  • APIs

    Lists all the reference documentation for the ways you can program Houdini.

  • Python scripting

    How to script Houdini using Python and the Houdini Object Model.

  • Expression functions

    Expression functions let you compute the value of parameters.

  • HScript commands

    HScript is Houdini’s legacy scripting language.

  • VEX

    VEX is a high-performance expression language used in many places in Houdini, such as writing shaders.

  • Properties

    Properties let you set up flexible and powerful hierarchies of rendering, shading, lighting, and camera parameters.

  • Galleries

    Pre-made materials included with Houdini.

  • Houdini packages

    How to write and combine multiple environment variable definition files for different plug-ins, tools, and add-ons.

  • hwebserver

    Functions and classes for running a web server inside a graphical or non-graphical Houdini session.