| On this page |
概要 
このシェーダを使用することで、煙、炎、爆発のシミュレーションまたはMaterialXに基づいてプロシージャルに生成されたボリュームのリアルなレンダリング結果を生成することができます。
Smoke(煙)とEmission(発光) 
これら2つのコンポーネントを組み合わせて、最終的なボリュームレンダリングを構成します。 煙突の煙、塵雲、その他の全般的な煙要素といった一部のレンダリングでは、煙をシェーディングするだけで済みます。 Smoke(煙)は、主に密度とカラーで制御します。 その一方でEmission(発光)は、炎から放出される光の全体的な強度とカラーを制御します。
これらの各コンポーネントは、作業内容によってボリュームが異なります。
通常ではdensityボリュームは煙コンポーネントにバインドし、 Smoke タブのパラメータでその結果のルックを制御します。
このシェーダでは最大2個の発光要素を使用することができます: Scatter , Fire 。
Scatter はPyro Bake Volume SOPで生成された
scatterボリュームを使用します。このscatterボリュームでは内部散乱の効果を事前にベイクしておくことができます。
この散乱は本当の挙動を近似処理したものですが、この手法の方がボリュームライトと多数のボリュームバウンスを使用するよりもレンダリング負荷がはるかに軽いです。
さらに、ルックをもっとアート志向で制御しやすくなります。
Fire には、Pyro Shader - Classicの頃のような従来のコントロールセットが用意されています。
特に、これらの発光要素には Intensity フィールドと Color フィールドが必要で、それぞれのフィールドは放出される光の量とカラーを制御します。
Scatter と同様で、 Fire でも他のボリュームでマスクすることができます。
Tip
どの範囲設定でも、それぞれのバインドされたボリュームの値の範囲を考慮してください。
Export タブの Compute Min/Max Values が有効になっている場合、Pyro Solverは、それぞれエクスポートされるボリュームの最小値と最大値をPrimitiveアトリビュートに書き込みます。
Emissionマスク 
Pyro Shaderには、 Scatter と Fire を他のフィールドでマスクする機能があります。
デフォルトでは、
maskフィールドにdensityが設定されていて、densityが高い領域内の発光を減らす効果があります。
マスクは、煤煙に焦げ焦げなディテールを取り入れることができるので、特に爆発のレンダリングで役立ちます。
正しく使用すると、ボリュームの内部が白熱して、煙の隙間から白熱が垣間見えるようになります。
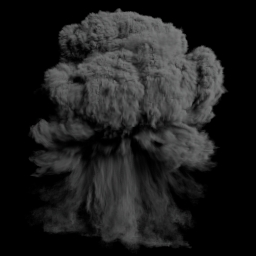
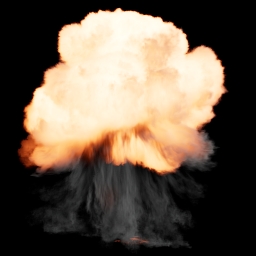
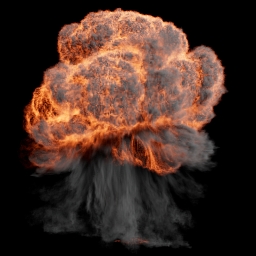
以下の画像は、Smoke、Scatter、Scatter Mask、それらを最終的に合成した画像を示しています。

Scatter, Fire 
使用可能なこれら2個の発光コンポーネントは最終レンダリングで一緒に合成されますが、これらはどれも用途が異なります。
-
Scatter は主に爆発内部での光の散乱を模倣するために使用し、
Pyro Bake Volumeで生成可能な特別な
scatterボリュームに依存します。SmokeとScatter(左) 対 Smokeのみ(右):


-
Fire は炎や火炎のシェーディングに使用することができます。デフォルトでは、発光の強度とカラーのどちらにも
temperatureボリュームを使用します。このコンポーネントにマスクを適用することも可能です。SmokeとFire(左) 対 Smokeのみ(右):


Clouds 
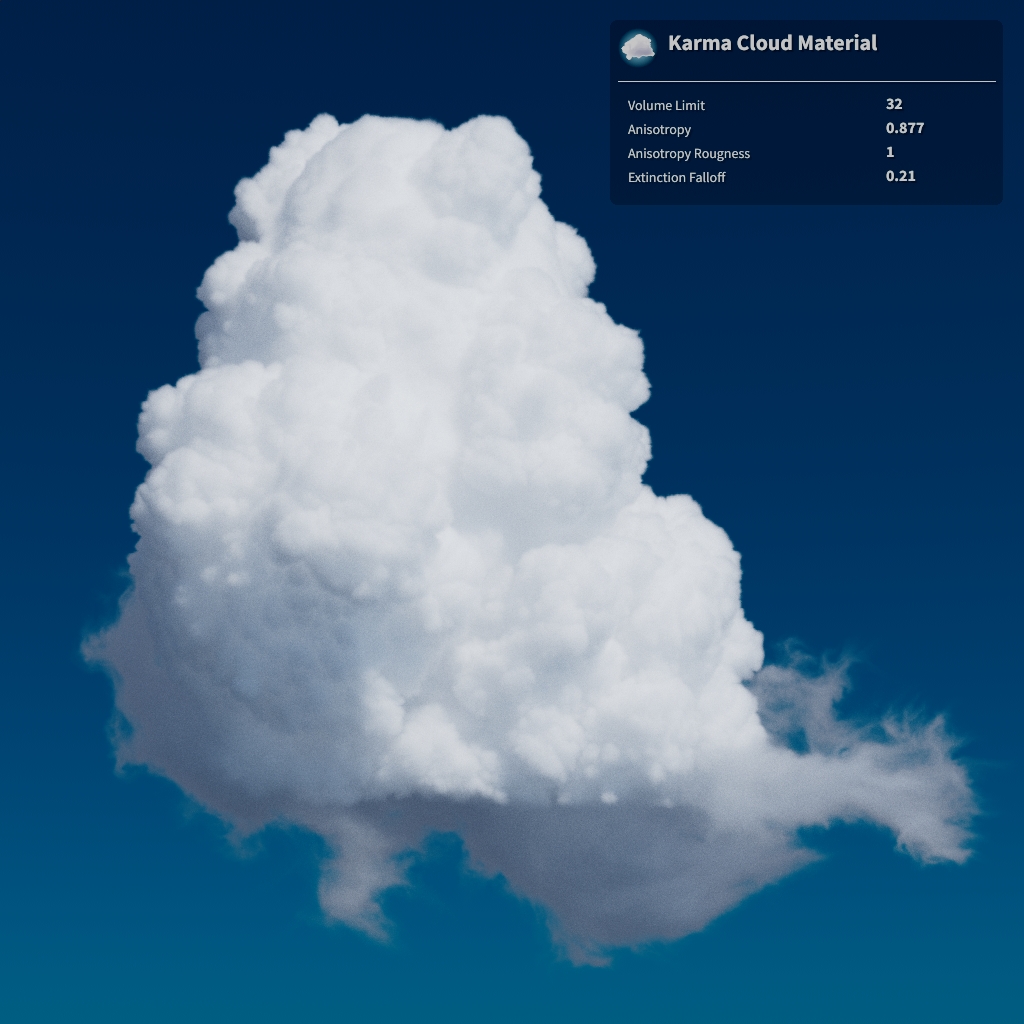
雲は、ライト方向へ散乱させることで偏った強い多重光散乱を露出します。
つまり、リアルな雲をレンダリングするには、高い異方性値( Anisotropy が約0.877)と複数のボリューム光線のバウンスが必要になるので、評価が非常に複雑で負荷が重くなります。
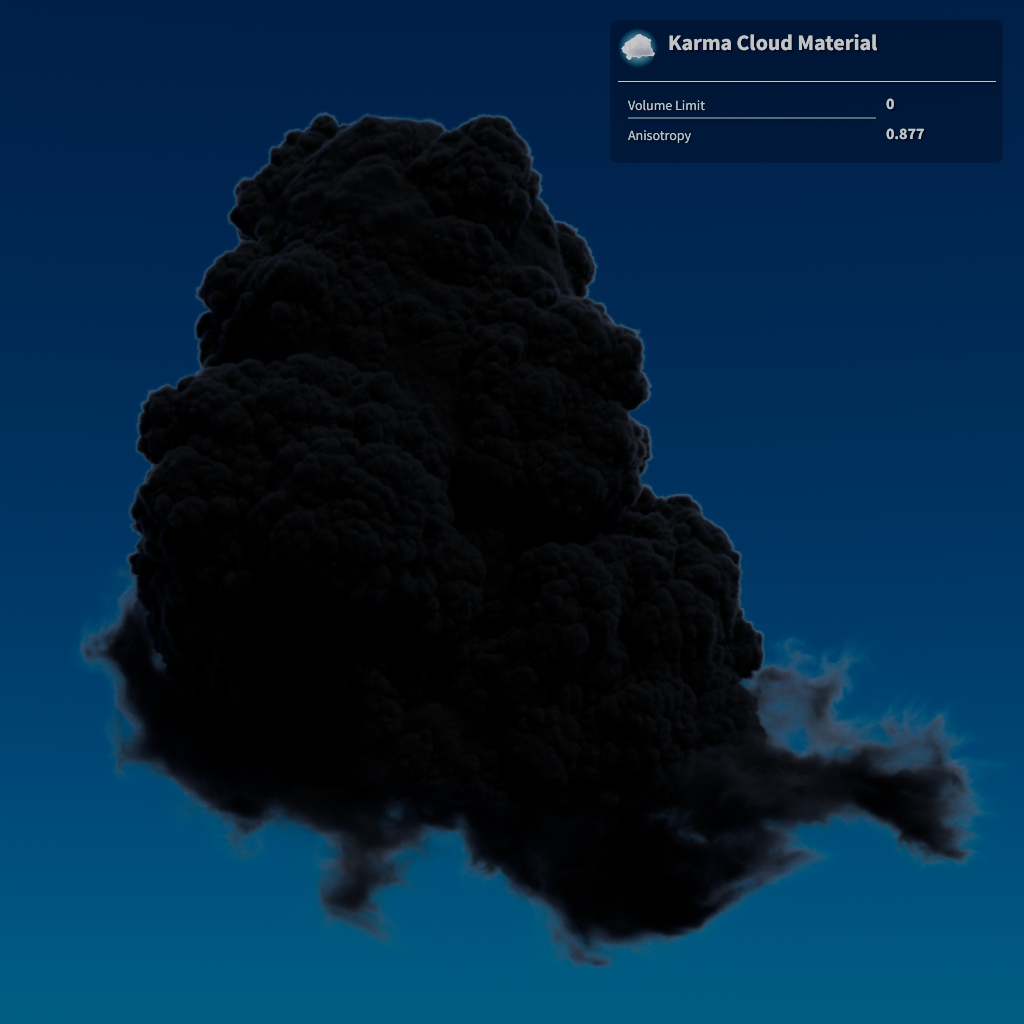
Multiple Volumetric Ray Bouncesを使った雲のレンダリング 
左側の画像は、 Anisotropy を0.877に設定し、Karma Render Settingsの Volume Limit を
0に設定したもくもく雲ですが、その結果では雲が黒くレンダリングされています。
もっと光が雲を通過できるようにするために、右側の画像では、 Volume Limit を32に設定しています。
これで一歩前進しましたが、レンダリング時間が既にかなり長くなってしまっています。
Volume Limit を100または200以上に設定すると、雲のルックはさらに良くなりますが、レンダリング時間が劇的に長くなってしまいます。
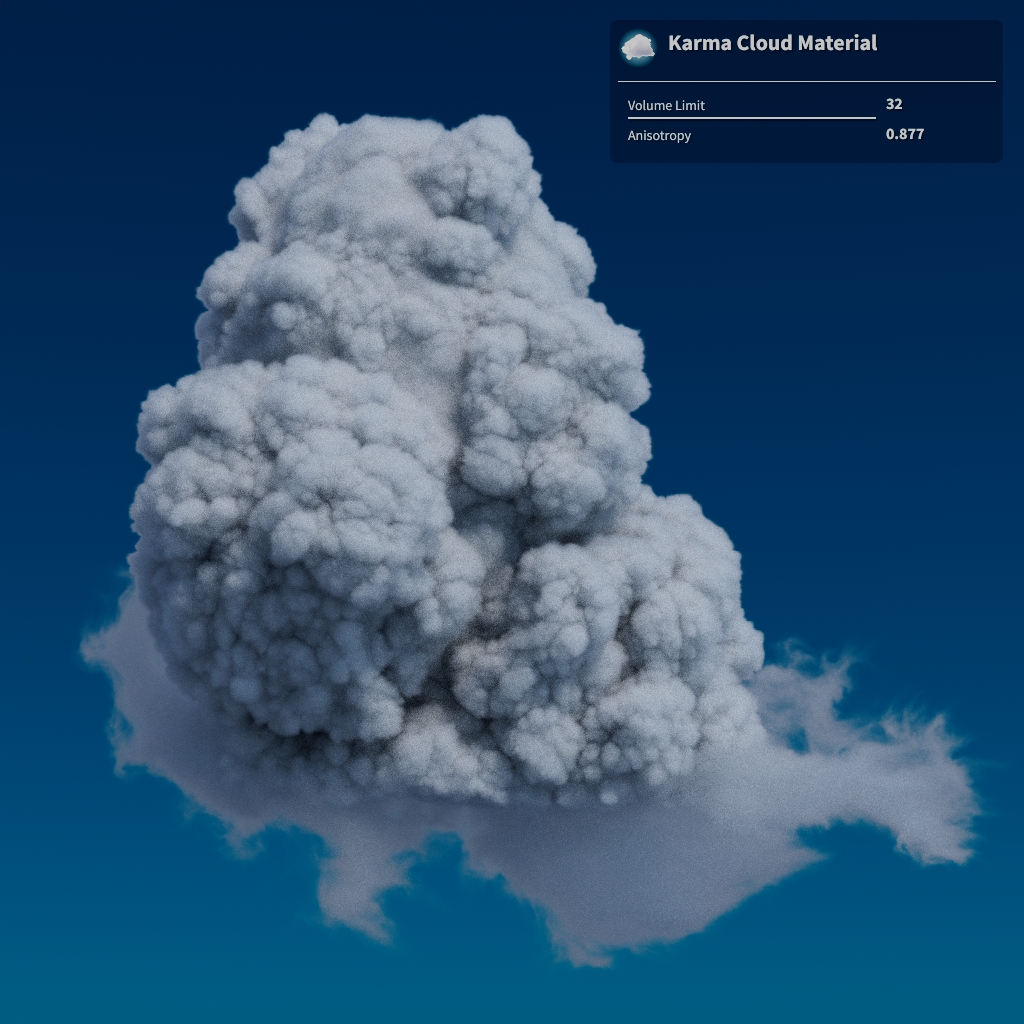
幸いなことに、雲のルックの品質を良くするのに役立ついくつかのテクニックがあり、 Volume Limit を32に維持しつつレンダリング時間を下げることができます。
-
密度の調整
シェーダの Extinction Falloff パラメータを上げることで、ボリューム光線バウンス毎に雲の密度を指数関数的に減らすことができます。 これによって、光線があまり減衰しなくなり、少ない光線バウンスですぐに媒体から抜けるようになるので、影領域が明るくなります。 この効果によって、本来は光線バウンスがもっと必要になるはずの雲のレンダリング時間が短くなります。
レンダリング時間を短くするために Extinction Falloff を大幅に上げたいところではありますが、雲のルックを考慮しなければなりません。
以下の動画では、 Extinction Falloff を
0から1にアニメーションさせています。 まず最初に、雲が明るくなっていて、特に影の領域が明るくなっていることに注目してください。 この例では、雲はおよそ0.127-0.21の値で明るさがピークに達しています。 この範囲内の値を使用するのが理想ですが、さらに値を上げると雲の明るさが下がり、コントラストがほとんどなくなるだけです。 -
異方性の調整(Roughness)
密度調整と同様に、ボリューム光線バウンスの数に基づいて、異方性を制御することもできます。 これを行なう1つの方法は、 Anisotropy セクションにある Roughness を有効にすることです。 これは、ボリューム光線バウンス毎に異方性を指数関数的に0の方へ下げていきます。
この動画では、 Extinction Falloff が
0.21に設定されている時に Roughness を上げた場合の効果を示しています。 Roughness 値を上げると、雲は明るくなり、典型的な白い粉のようなもくもく雲のルックが得られます。 Roughness 値が大きいほど、雲の密度が濃くなり、ディテールが鮮明になります。以下の2枚の画像は、同じ Roughness 値での Extinction Falloff 値の比較です。 右側の画像は、 Extinction Falloff 値が非常に高い値(
0.75)で、雲が色褪せてコントラストが弱いです。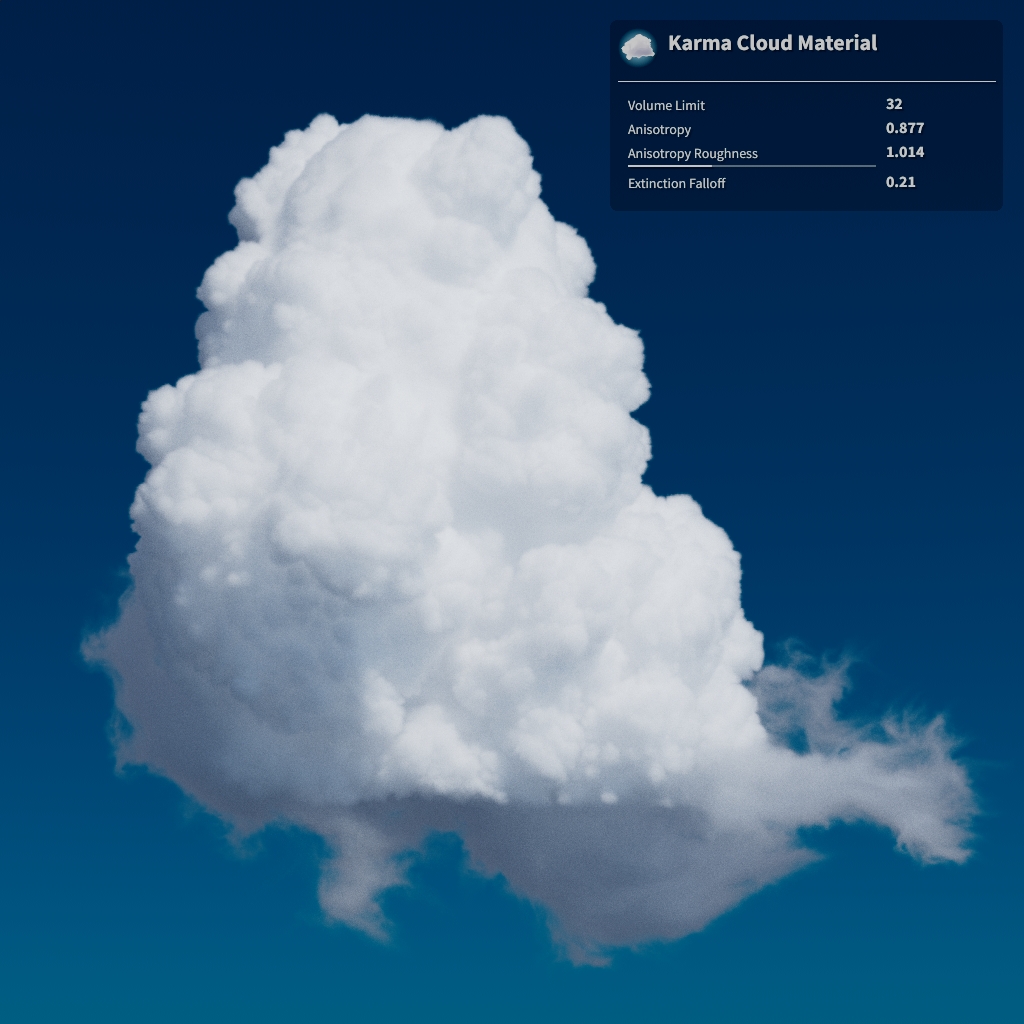
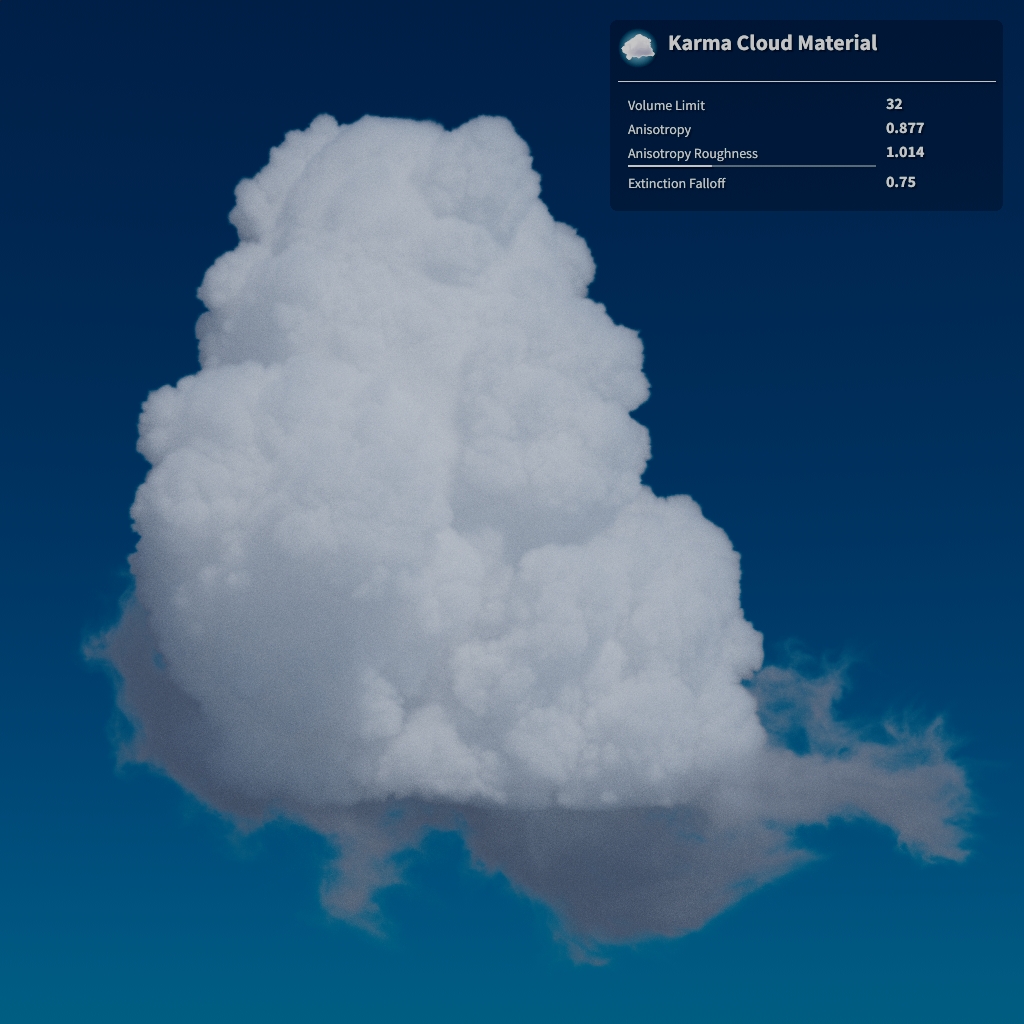
-
異方性の調整(Secondary Anisotropy)
別の方法として、 Roughness の代わりに、 Use Secondary Anisotropy を有効にすることで、2つの異方性値をブレンドすることができます。
左側の画像は、 Roughness を
1に設定したレンダリング結果で、右側の画像は、 Use Secondary Anisotropy を有効にして、 Secondary Mix を0.5、 Secondary Anisotropy を0に設定したレンダリング結果です。 左側の画像の方がかなり滑らかで、ディテールはあまり鮮明ではないです。 これは、 Roughness を上げることで、ある程度改善することができます。 一方、右側の画像は、密度の低い領域の明るさが劇的に強くなっているように見えます。

この動画では、 Secondary Mix を変更した効果を示しています。 様々なMix値によってレンダリングでノイズが多くなるのに注目してください。 Roughness を使用して異方性を変更する場合には、これは問題になりません。
パラメータ 
Smoke 
Enable Smoke
ボリュームの煙の部分を有効にします。 煙は、その中を通過する光を吸収して減衰させます。 Smoke Volume を使用して、煙の密度を記録したボリュームを指定します。
Density Scale
煙の全体的な密度を制御します。 この値を上げると、煙の見た目がもっと濃くなります。 この値を下げると、煙の不透明度が下がります。 煙の濃さをリマップするには、このパラメータの右側にあるメニューを Constant から Use Ramp に変更します。
Density Range
煙の密度をスケールする際に評価される Density Ramp の横軸範囲を指定します。
このパラメータは、 Density Scale の隣にあるメニューが Use Ramp に設定されている時に利用可能です。
Density Ramp
煙の密度をどのようにリマップするか制御します。 このランプの横軸が Density Range になっています。
このパラメータは、 Density Scale の隣にあるメニューが Use Ramp に設定されている時に利用可能です。
Control Range
Density Control Volume 値がこの範囲から Scale Range にリマップされてから、その結果が煙の密度と乗算されます。
Scale Range
Density Control Volume によって密度に適用可能な乗数の範囲を制御します。 マッピングを制御したいのであれば、この右側にあるメニューを Use Ramp に設定します。 このメニューを Constant に設定すると、マッピングはリニアになります。
Control Ramp
Density Control Volume 値をどのように Density Scale にマッピングするか制御します。 このランプの横軸と縦軸は、それぞれ Control Range と Scale Range になっています。
このパラメータは、 Scale Range の隣にあるメニューが Use Ramp に設定されている時に利用可能です。
Smoke Brightness
煙の全体的な明るさを制御します。 この値は、煙のカラーに対する乗数として作用します。 この値を上げると、煙がもっと明るくなります。
Smoke Color
煙の全体的なカラーを制御します。 より自然に見える煙を得るには、このパラメータの右側にあるメニューで Constant から Use Ramp に変更します。 これによって、煙のカラーを密度で可変させることができます。
Source Range
Density Color Ramp の左端と右端にマッピングする( Smoke Color Source Volume の)最小値と最大値。
Shadow Color Ramp
( Smoke Color Source Volume の)値をどのように煙カラーにマッピングするか制御します。 このランプの横軸は Source Range になっています。
Absorption Color
光がボリュームを通過する時に吸収されるカラー。
Source Range
Absorption Color Ramp の左端と右端にマッピングする( Absorption Color Source Volume の)最小値と最大値。
Absorption Color Ramp
( Absorption Color Source Volume の)値をどのように吸収カラーにマッピングするか制御します。 このランプの横軸は Source Range になっています。
Shadow Color
ボリュームから落とされるシャドウのカラー。 このパラメータの右側にあるメニューを Constant から Use Ramp に変更することで、煙の密度に基づいてシャドウのカラーを変更することができます。
Source Range
Shadow Color Ramp の左端と右端にマッピングする( Shadow Color Source Volume の)最小値と最大値。
Shadow Color Ramp
( Shadow Color Source Volume の)値をどのようにシャドウカラーにマッピングするか制御します。 このランプの横軸は Source Range になっています。
Shadow Density
この乗数は、ボリュームをライティングした時に Density Scale に適用されます。 この値を上げると、ビューアに煙の不透明度の影響を与えることなく、ボリュームを貫通する光を減らします。 この値を下げると、煙の不透明度の見え方を変えることなく光の吸収を減らします。
Tint Smoke Color with Cd
有効にすると、 Smoke Color パラメータで設定された煙カラーは、( Cd Volume で指定された)Cdカラーボリュームが存在すれば、そのボリュームで乗算されて最終の煙カラーが取得されます。
Mix Smoke Color with Cd using Alpha
有効にすると、Alphaボリュームを使用して、 Smoke Color と( Cd Volume で指定された)Cdボリュームがブレンドされます。
アルファ値が1の箇所では、Cdボリュームのカラーが使用され、0の箇所では、 Smoke Color で設定されたカラーが使用されます。
これを無効にすると、煙カラーは、これら2つの値の積になります。
Anisotropy
ボリュームに入射した光が散乱する方向を制御します。
デフォルトの0では、光は全方向に均一に散乱します(等方性散乱)。
最大1までのプラスの値は、入射光と同じ方向により多く散乱します。
-1までのマイナスの値は、後方に散乱します。
雲の場合は、0.877あたりの値を使用します。
Roughness
これを使用することで、ボリューム光線バウンスの数に基づいて、( Anisotropy で指定された)0でない異方性値が0に変わる速さを制御することができます。
これは、 Anisotropy が大きな前方散乱値(0.877あたりの値)に設定されている時に雲のレンダリングで使用されます。
この値が大きいほど、雲はより明るく、より鮮明に、よりノイズの少ないレンダリング結果になります。
密度の高い雲ほど、より大きな値が必要になります。
複数のボリューム光線バウンスでボリュームをレンダリングするには、Karma Render Settings LOPの Volume Limit を上げてください。
以下の動画は、雲ボリュームの Roughness を上げた効果を示しています:
Use Secondary Anisotropy
プライマリ異方性と線形ブレンドされるセカンダリ位相関数を有効にします。 これによって、その位相関数に前方散乱(プラスの値)と後方散乱(マイナスの値)の両方を含めることができます。 これは、雲を後方散乱で満たしつつ、前方散乱でエッジの銀色の輪郭を維持できるように雲のレンダリングを改善することができます。
Secondary Mix
( Anisotropy で指定された)プライマリ異方性と( Secondary Anisotropy で指定された)セカンダリ異方性のブレンドを制御します。
以下の動画は、Secondary Mixを変更させた効果を示しています:
Secondary Anisotropy
雲のレンダリングを改善できるセカンダリ散乱を制御します。
雲のエッジの銀色の輪郭を維持するためには、( Anisotropy で指定された)プライマリ散乱を大きなプラスの値にし、このパラメータには0またはそれ以下の値を使用して、雲の中心をもっと'暗く'します。
Extinction Falloff
ボリューム光線バウンスの数が Start Level に達すると、Extinction Coefficient(吸光係数)がこの値の累乗でスケールされます。
0の値は何の効果もなく、1.0未満の値は、指数関数的にその吸光係数を下げるので、光線があまり減衰しなくなり、少ない光線バウンスですぐに媒体から抜けるようになるので、影領域を明るくするのに役立ちます。
この効果によって、本来は光線バウンスがもっと必要になるはずの雲のレンダリング時間が短くなります。
複数のボリューム光線バウンスを使ってボリュームをレンダリングするには、Karma Render Settingsの Volume Limit を上げてください。
以下の動画は、雲ボリュームに対してExtinction Falloffを上げた効果を示しています:
Albedo Contribution
位相関数に使用されるアルベドの定数乗数。
これは、直接照明の寄与を上げるのに役立ちます。
1.0より大きい値は、より柔らかくてより透過したルックになります。
複数のボリューム光線バウンスを使ってボリュームをレンダリングするには、Karma Render Settingsの Volume Limit を上げてください。
Start Level
ボリューム光線バウンスの数がこの数に到達しないと、 Extinction Falloff と Albedo Contribution の乗数は効果を出しません。
複数のボリューム光線バウンスを使ってボリュームをレンダリングするには、Karma Render Settingsの Volume Limit を上げてください。
Scatter 
Enable Scatter
ボリュームの発光部分の散乱を有効にします。 これは爆発のシェーディングに使用します。 これは、レンダリングでも使用される Scatter Volume を生成します。 Source Volume を使用して、この発光を制御するボリュームを指定します。
Enable Scatterを無効(右)または有効(左)にした場合のビューポートの爆発( Enable Mask を無効にしています)。

Intensity Scale
散乱の発光強度を設定します。 この値を上げると散乱が明るくなります。
Hot Core Scale
散乱の輝度が明るい箇所における散乱の発光強度をスケールします。 爆発が時間の経過とともにフェードアウトしていくにつれて、散乱値の輝度も時間の経過とともに減少するので、このパラメータが非常に大きな値でも、このパラメータの効果が弱くなっていくのが確認できます。 爆発の開始時に爆発の明るさを上げるのは良い考えです。 Hot Core Scale の値を上げると、爆発の割れ目が明るくなります。
Color Correct
散乱カラーのカラー補正コントロールを有効にします。
Hue
値が0-1範囲で循環する色相を回転させます。

Saturation
彩度を調整します。

Enable Mask
閾値範囲を使って Mask Volume に基づいて発光をマスクします。
Mask Center と Mask Width がそのマスク範囲を制御します。
デフォルトでは、maskボリュームがこの範囲の最小値と最大値の箇所において、それぞれ追加発光乗数が1と0になります。
mask値が大きい領域の発光が弱くなります。
マスクは、爆発の焦げ目の付いたディテールを引き出すのに役立ちます。
マスクなし(右)とマスクあり(左)の散乱。

Mask Center
Mask Width と併用して、このパラメータは、発光のマスクに使用される値の範囲を制御します。
mask値の有効範囲は、Mask Center - Mask Width * 0.5からMask Center + Mask Width * 0.5までです。
このパラメータに低い値を設定すると、より多くの発光がマスクされ、爆発があまり明るく白熱しなくなります。
このパラメータに高い値を設定すると、ボリュームが内部で白熱するようになり、この白熱が煙の隙間から垣間見えるようになります。
以下の動画では、 Mask Width を固定にしたまま、このパラメータを上げた効果を示しています。
Mask Width
Mask Center と併用して、発光のマスクに使用される値の範囲を制御します。
mask値の有効範囲は、Mask Center - Mask Width * 0.5からMask Center + Mask Width * 0.5までです。
Use Mask Ramp
ランプを使用して、( Mask Center と Mask Width で設定された)最小マスク閾値と最大マスク閾値の間での発光の変化の挙動を設定することができます。
Mask Ramp
( Mask Center と Mask Width で設定された)最小マスク閾値と最大マスク閾値の間での発光の変化の挙動を設定します。 白が完全発光で、黒が発光なしを意味します。
Note
デフォルトの白から黒のランプは、 Use Mask Ramp が無効な時とまったく同じ結果を生成します。
ランプが左から右に向かって白から黒に設定した場合:

ランプが左から右に向かって黒から白に設定した場合:

Fire 
Enable Fire
2次発光コンポーネントを有効にします。 Fire は主に炎や火炎のタイプのシミュレーションで使用します。
このコンポーネントは Scatter と非常に似ています。 唯一の違いは、 Scatter は発光の強度とカラーに同じフィールドを使用する必要があることと、 Scatter には発光を広げるためのブラー機能が用意されていることです。
Enable Fire を無効(右)または有効(左)にした場合のビューポートの炎シミュレーション( Enable Mask を無効にしています)。
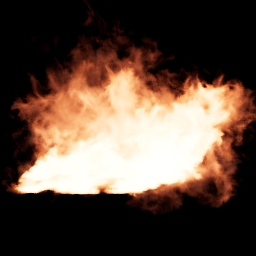
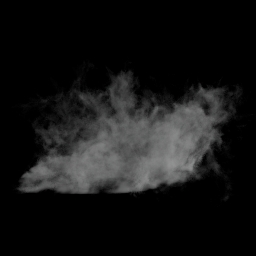
Enable Scatter を無効(右)または有効(左)にした場合のビューポートの炎シミュレーション( Enable Fire を有効にしています)。


Intensity Scale
炎の発光強度を設定します。 この値を上げると炎が明るくなります。 このパラメータの右側にあるメニューを Use Ramp に設定することで、この強度をリマップすることができます。
Source Range
Fire Intensity Ramp の左端と右端にマッピングする最小ソース値と最大ソース値。 ボリュームの発光部分を減らすには最小ソース値を上げます。
最小ソース値をゼロから上げることで、炎の領域が収縮します( Enable Mask を無効にしています)。
Fire Intensity Ramp
そのままの Intensity Volume 値を有効な強度にマッピングする方法を制御します。 このランプの横軸が Source Range になっています。
Color Mode
炎のカラーの計算方法を設定します。 Color Ramp は、 Fire Color Ramp を使用して、指定された Source Range からカラーをマッピングします。 白熱ブラックボディの温度に基づいてカラーを計算したいのであれば、 Physical Blackbody または Planck Backbody を選択します。
Note
Planck Blackbody は、計算されたカラーに発光パワーを組み込みます。
このパワーは、高温で急激にスケールするので、それを補正するために発光強度を下げる必要性が出てくる場合があります。
純粋に物理的なブラックボディを使用したいのであれば、発光強度を1に設定し、そのIntensity Rampを一定の1に設定します。
Source Range
Fire Color Ramp の左端と右端にマッピングする最小ソース値と最大ソース値。
Fire Color Ramp
Color Volume 値を発光カラーにマッピングする方法を制御します。 このランプの横軸が Source Range になっています。
Temperature Scale
Color Volume 値にスケールを適用した後の値がブラックボディカラーにマッピングされます。
Enable Mask
閾値範囲を使って Mask Volume に基づいて発光をマスクします。
Mask Center と Mask Width がそのマスク範囲を制御します。
デフォルトでは、maskボリュームがこの範囲の最小値と最大値の箇所において、それぞれ追加発光乗数が1と0になります。
mask値が大きい領域の発光が弱くなります。
マスクは、爆発の焦げ目の付いたディテールを引き出すのに役立ちます。
マスクなし(右)とマスクあり(左)の散乱。


Mask Center
Mask Width と併用して、このパラメータは、発光のマスクに使用される値の範囲を制御します。
mask値の有効範囲は、Mask Center - Mask Width * 0.5からMask Center + Mask Width * 0.5までです。
このパラメータに低い値を設定すると、より多くの発光がマスクされ、爆発があまり明るく白熱しなくなります。
このパラメータに高い値を設定すると、ボリュームが内部で白熱するようになり、この白熱が煙の隙間から垣間見えるようになります。
以下の動画では、 Mask Width を固定にしたまま、このパラメータを上げた効果を示しています。
Mask Width
Mask Center と併用して、発光のマスクに使用される値の範囲を制御します。
mask値の有効範囲は、Mask Center - Mask Width * 0.5からMask Center + Mask Width * 0.5までです。
Use Mask Ramp
ランプを使用して、( Mask Center と Mask Width で設定された)最小マスク閾値と最大マスク閾値の間での発光の変化の挙動を設定することができます。
Mask Ramp
( Mask Center と Mask Width で設定された)最小マスク閾値と最大マスク閾値の間での発光の変化の挙動を設定します。 白が完全発光で、黒が発光なしを意味します。
Note
デフォルトの白から黒のランプは、 Use Mask Ramp が無効な時とまったく同じ結果を生成します。
ランプが左から右に向かって白から黒に設定した場合:

ランプが左から右に向かって黒から白に設定した場合:

Bindings 
Density Volume
煙として使用されるボリュームの名前。
通常では、この名前をdensityのままにしてください。
Density Control Volume
煙のdensity値の変更に使用するコントロールボリューム。
このボリュームは、 Scale by Control Volume が有効な場合に使用されます。
発光ボリュームに応じて密度をスケールさせたい炎の効果には、tempeartureまたはflameを使用します。
Smoke Color Source Volume
煙カラーのマッピングに使用されるボリュームを選択します。 これを Smoke Density に設定した場合、シェーダで修正された煙密度が使用されます。 これを Geometry Volume に設定した場合、ジオメトリから指定された入力ボリュームが使用されます。
Custom Volume
煙のカラーのマッピングに使用されるボリューム。
Absorption Color Source Volume
吸収カラーのマッピングに使用されるボリュームを選択します。 これを Smoke Density に設定した場合、シェーダで修正された煙密度が使用されます。 これを Geometry Volume に設定した場合、ジオメトリから指定された入力ボリュームが使用されます。
Custom Volume
吸収カラーのマッピングに使用されるボリューム。
Shadow Color Source Volume
シャドウカラーのマッピングに使用されるボリュームを選択します。 これを Smoke Density に設定した場合、シェーダで修正された煙密度が使用されます。 これを Geometry Volume に設定した場合、ジオメトリから指定された入力ボリュームが使用されます。
Custom Volume
シャドウカラーのマッピングに使用されるボリューム。
Cd Volume
カラーボリュームとして使用されるボリュームの名前。
通常では、この名前をCdのままにしてください。
Alpha Volume
アルファボリュームとして使用されるボリュームの名前。
通常では、この名前をAlphaのままにしてください。
Anisotropy Control Volume
Scatter Volume
散乱カラーに使用されるボリュームの名前。
通常では、このボリュームはPyro Bake Volumeノードで作成します。
Mask Volume
Enable Masking が有効な時に、散乱の発光のマスクに使用されるボリュームを選択します。 これを Smoke Density に設定した場合、シェーダで修正された煙密度が使用されます。 これを Geometry Volume に設定した場合、ジオメトリから指定された入力ボリュームが使用されます。
Custom Volume
散乱の発光のマスクに使用されるボリューム。
Alpha Volume
Enable Masking が有効な時に、散乱の発光の乗算に使用されるボリュームを選択します。 これを Smoke Density に設定した場合、シェーダで修正された煙密度が使用されます。 これを Geometry Volume に設定した場合、ジオメトリから指定された入力ボリュームが使用されます。
Alpha Volume
Enable Mask が有効な時、散乱の発光はこのボリュームで乗算されます。
Intensity Volume
炎の強度に使用されるボリュームの名前。
Color Volume
炎のカラーに使用されるボリュームの名前。
Mask Volume
Enable Masking が有効な時に、炎の発光のマスクに使用されるボリュームを選択します。 これを Smoke Density に設定した場合、シェーダで修正された煙密度が使用されます。 これを Geometry Volume に設定した場合、ジオメトリから指定された入力ボリュームが使用されます。
Custom Volume
炎の発光のマスクに使用されるボリューム。
Alpha Volume
Enable Mask が有効な時、炎の発光の乗算に使用されるボリュームを選択します。 これを Smoke Density に設定した場合、シェーダで修正された煙密度が使用されます。 これを Geometry Volume に設定した場合、ジオメトリから指定された入力ボリュームが使用されます。
Custom Volume
Enable Mask が有効な時、炎の発光はこのボリュームで乗算されます。
| See also |